Quantcast
Channel: Chitra's Food Book
Viewing all 968 articles
Browse latest View live

Eggless Snowball Cookies Recipe – Easy Christmas Recipes

$
0
0
Easy Snowball cookies recipe with step by step photos and  a video !
Christmas is the perfect time for me to attempt some interesting cakes and cookies recipes. Last year during this time, I posted few Christmas special recipes like Gingerbread man cookies, Tutti frutti cookies, eggless tutti frutti cake, shortbread cookies, Kulkul and some more. This year, I wanted to start my Christmas recipes with this easy, melt in mouth, most special snowball cookies recipe.Its a very simple cookie that can be made with easily available ingredients. Snowball cookies is also called as Mexican wedding cakes/cookies, Russian tea cakes. With lots of butter and nuts ( Pecan or walnuts)these cookies comes out with a melt in mouth texture and crunchy taste. Pecan nuts is widely used for the recipe. But I had used a combination of nuts which you can find in the ingredients list.These snowball cookies can be made without nuts as well. I followed the recipe from Classy cakes and watched You tube video by Jenny can cook. Even though this is my first try, I am completely happy with the result. Raksha loved it a lot and took it for her school snack box today. Do try this easy Christmas special snowball cookies recipe for your kids and enjoy the vacation Happy.Lets check out how to make eggless snowball cookies with step by step pictures and a video !
Do check out my other Christmas recipes in THIS LINK


Snowball Cookies Recipe - Easy Christmas recipes


Snowball Cookies Recipe - Easy Christmas recipesEggless snowball cookies recipe with step by step pictures and video
Cuisine:International
Category:Cookies
Serves:14 nos
Prep time:10 Minutes
Cook time:15 Minutes
Total time:25 Minutes
1 cup - 200 ml or 250ml
  • All purpose flour / maida - 1 cup
  • Softened Unsalted butter - 1/2 cup
  • Granulated sugar - 2.5 tbsp ( Powdered sugar can also be used)
  • Vanilla essence - 1 tsp
  • Salt - A small pinch
  • Chopped Nuts - 1/2 cup ( Pecan nuts is preferable, I used combo of walnuts, cashews, hazelnut and melon seeds)
  • Icing sugar or powdered sugar – 1/2 cup ( to coat the cookies)
  • Cinnamon powder – 1/2 tsp ( optional)
METHOD

  • Chop the nuts finely and keep aside. In a wide bowl, mix the softened butter, sugar, salt and vanilla essence. Beat well for 5 minutes. The mixture will become creamy.
  • Add maida, mix well. Add chopped nuts and mix well with your hands. Make a smooth , non-sticky dough. Dough should not be too wet and sticky. Some recipes call for refrigerating the dough for 30 minutes. But some recipes don’t say so. So I baked the cookies immediately using half of the dough. I wrapped the remaining dough in a cover and refrigerated it for 30 minutes.  Then made balls and baked it.

  • To make balls, take the cookie dough ( If refrigerated, thaw it for 10 minutes and then use it) and scoop out a tbsp of dough. Make balls and arrange them in a butter greased or butter paper lined baking tray. Leave half inch gap between each cookies.
  • These cookies don;t expand or flatten much as we have not used baking powder or soda. If your cookies flatten so much, then the quantity of butter is more. In that case, add more maida and sugar, proceed.
  • Preheat the oven in convection mode at 180c and place the baking tray inside the oven.Bake at 180c for 10-12 minutes. Open the oven and touch one cookie,try to move it. If its too soft, immovable, sticky and doughy, bake for another 2 minutes else remove the baking tray and check the bottom of cookies.If its slightly golden in color, your cookies are done. These cookies would be very soft when hot. But it will continue to cook even after taking out from the oven.So do not over bake the cookies.Just 12 –14 minutes is sufficient. My cookies had some cracks on top.
  • Do not touch the cookies till it becomes warm. Take 1/2 cup of icing sugar in a wide bowl. Once the cookies turn warm, dip the cookies in the icing sugar and give one coating. Arrange them in a tray and let the cookies cool down completely. Again dip the cookies in the icing sugar and give the second coating. If you wish, you can go for third coating as well. Keep the cookies in a tray and serve them. These cookies stays good for 2-3 days if done properly.

Enjoy !

Note
  • Do not over bake the cookies. It will turn hard and sometimes burnt. I baked it approx. 13 minutes.
  • The cookie dough I kept in the refrigerator baked quickly ( 2 minutes lesser) than the ones I baked without refrigeration.
  • Do not add more sugar than the mentioned quantity because we are coating the cookies with icing sugar.It will become over sweetened.
  • My cookies were mildy cracked.

Enjoy these delicious, melt in mouth cookies for your tea time!!

Brinjal Masala Fry Recipe – Long Green Brinjal Fry–Kathirikai Vathakkal

$
0
0
Brinjal masala fry
Recently I bought some long green brinjals to try Vangi bath. After making vangi bath, I had some leftover in my pantry. So I tried this easy brinjal masala fry for Andhra Kakarakaya pulusu ( Bittergourd gravy) fromKamala’s corner. It came out really well and tasted great.The actual recipe called for using purple brinjal ( Naatu kathirikai). But I used green brinjals.So you can use any. Basically I am a big fan of brinjal recipes. But Sendhil & Raksha eats brinjal only if the dish is very tasty. They both loved it a lot.I am sure I will make it very often in my kitchen. Do try this easy, tasty Kathirikai Pirattal/ vathakkal at home. You will love it. It goes well with dal rice, sambar rice & curd rice. If you like, you can have it with chapathi as dry subzi. Lets see how to make Indian style brinjal masala poriyal / Long green brinjal fry with step by step pictures !
Check out my other brinjal fry recipes too !
Brinjal fry
Ennai kathirikai poriyal
Kathirikai curry – My MIL’s version
Long green brinjal fry

Brinjal Masala Poriyal Recipe


Brinjal Masala Poriyal RecipeKathirikai pirattal / Brinjal masala fry for rice
Cuisine:South Indian
Category:Side dish for rice
Serves:Serves 2-3
Prep time:10 Minutes
Cook time:15 Minutes
Total time:25 Minutes

  • Long green brinjal - 2 nos OR Purple brinjal – 4 nos
  • Red chilli powder – 1.5 tsp ( I used Kashmiri chilli pwd)
  • Dhania powder - 2 tsp
  • Turmeric powder - 1/4 tsp
  • Besan flour or rice flour – 1/4 cup 
  • Salt & water - as needed
  • Tamarind extract - 1 tsp
To Temper
  • Cooking oil - 2 tbsp
  • Mustard seeds - 1/2 tsp
  • Urad dal - 1 tsp
  • Fennel seeds/ soambu – 1/2 tsp
  • Curry leaves - few
  • Big onion - 1 no ( finely chopped)
Coriander leaves – To garnish ( 2 tbsp chopped)
METHOD

  • Wash and chop the brinjals into 1 inch piece. In a wide bowl. take the besan flour, red chilli powder, dhania/coriander seeds powder, turmeric powder, salt and tamarind extract. Add the brinjal pieces to the spice powders and mix well.
  • Add little water if needed to make the masala coat well with brinjal. Let it marinate for 10 minutes.
    Brinjal masala fry
  • In the mean time, chop the big onion. Heat oil in a kadai, splutter mustard seeds,fennel seeds, urad dal, curry leaves and saute onions. Add the marinated brinjal pieces and mix well for few minutes in medium flame.
    Brinjal masala fry
  • After the raw smell of masala goes away, add little water (1/4 cup) and cover cook the brinjal for 5 minutes in low flame. Stir it once in the middle. Make sure brinjal is not mushy. It should retain its shape but cooked soft. Open the lid and check if its cooked soft. Mix well and garnish with coriander leaves if you wish. Serve with sambar rice & curd rice. Tastes yumm !!
    Brinjal masala fry
Enjoy !

Note
  • Adjust the quantity of spice powders as per your taste.I made it mildly spiced.
  • Any brinjal variety can be used. But make sure masala used for marination should coat well. 
  • Do not over cook the brinjal.Cook in low flame by adding less water and cover it while cooking. It helps to cook faster too.
Enjoy this long green brinjal masala fry with sambar rice or curd rice. It tastes yummy !
Kathirikai vathakkal


Eggless Bread Pudding Recipe – Custard Bread Pudding –Indian style

$
0
0
Bread pudding recipe without eggs
Eggless bread pudding with custard sauce is an easy to make and one of the most popular pudding recipes. Long back I had shared an easy pudding recipe with agar agar/ china grass. After that, I was looking forward to try some interesting pudding recipe. Recently I came across this easy, eggless bread pudding recipe using bread, milk, custard powder, butter, raisins( dry grapes) and nuts in a You tube video. I tried it using my leftover 3 days old bread.Its a good option to use the leftover old bread slices. Pudding came out very well. Even though we are not big fan of pudding recipes, we liked this very much.I have followed baking method. You can try it in pressure cooker as well.This eggless, custard bread pudding tastes really good.Kids would also love it. After making this, I am eager to try out eggless caramel bread pudding too.Friends, do try this easy, Indian style pudding recipe during Christmas and let me know your feed back. Lets see how to make bread pudding recipe without eggs and condensed milk with step by step photos and a video !
Check out my other dessert recipes using bread.

  1. Bread Halwa
  2. Shahi Tukda

Eggless bread pudding

Eggless Bread Pudding Recipe


Eggless Bread Pudding RecipeEggless Bread Pudding Recipe - Indian style bread pudding recipe using custard powder, milk.
Cuisine:Indian
Category:Dessert
Serves:Serves 4
Prep time:10 Minutes
Cook time:45 Minutes
Total time:55 Minutes
1 cup - 200ml
  • White bread/Milk bread - 6 nos
  • Boiled milk - 2 cups
  • Sugar - 1/2 cup + 1 tbsp
  • Vanilla custard powder - 2 tbsp
  • Butter - 1 tbsp
  • Vanilla essence - 1 tsp
  • Cinnamon powder - 1/2 tsp
  • Almonds or cashews – 10nos
  • Dry grapes or raisins – 1-2 tbsp
  • Water – 1/4 cup ( to soak dry grapes)
METHOD

  • Soak dry grapes or raisins in 1/4 cup of hot water. Chop the almonds or cashews into small pieces.Take the bread slices and cut into small cubes. I din’t remove the sides of bread.
    Eggless bread pudding recipe
  • In a wide bowl, take the boiled milk.Add sugar, butter, custard powder, vanilla essence, cinnamon powder and mix well without lumps.( You can add condensed milk in place of sugar but quantity may slightly vary as per taste) Check for sweetness and add more sugar if needed. You can boil the milk for a minute till it starts to thicken.I din’t boil it. I added the milk directly to the bread pieces.
    Eggless bread pudding recipe
  • Now take a baking pan ( I used silver foil box). Grease it with butter. Arrange half of the bread pieces as the first layer. Pour half of the milk all over the bread pieces. Press it & Immerse the bread pieces in the milk using a spatula. Now sprinkle the soaked dry grapes and chopped badam/almonds.
    Eggless bread pudding recipe
  • Again layer the remaining bread pieces and pour the remaining half of milk. Press it well & Immerse the bread pieces in the milk using a spatula and mash it. Top it with the remaining soaked dry grapes and chopped almonds. Lastly sprinkle 1tbsp of sugar.
    Eggless bread pudding recipe
  • Preheat the oven in convection mode at 180c. Keep the baking tray inside the oven and bake it for 30 – 40 minutes OR till the top of bread turns golden brown. Remove the tray and slice the portion of pudding.Serve it hot or warm as you wish.Enjoy !
Eggless bread pudding recipe


Note
  • Adjust the quantity of sugar as per your taste.
  • Baking time may slightly vary. Mine got done in 45 minutes. Bake till the crust changes to golden in color. Do not over bake, the bottom may get burnt. So keep an eye after 30 minutes.
  • If you boil the milk + custard mixture, 20 minutes of baking is sufficient. As I din’t boil the milk mixture, I baked it for more time.
Try this easy, eggless bread pudding and enjoy !
Eggless bread pudding recipe

Easy, 2 Ingredient Chocolate Fudge Recipe With Condensed Milk

$
0
0
Chocolate fudge with condensed milk
I have never thought of making a homemade chocolate fudge is so easy until I come across THIS easy, microwave chocolate fudge recipe with just 2 ingredients. As I wanted to share some easy recipe for this Christmas & New year celebrations, I thought of posting this simple dessert recipe with you all. Basically old fashioned homemade fudge is made using cocoa powder, sugar, milk, butter and vanilla extract from scratch. But this is an easy and quick Chocolate fudge recipe with just 2 ingredients - Sweetened Condensed milk& Choco chips.It came out really well with soft, chewy texture. I have used microwave to melt the Choco chips. It can be done on stove top as well.You can make any number of variations in this recipe by adding nuts, raisins, variety of Choco chips like dark, milk Choco chips etc. Do try this easy homemade vanilla chocolate fudge recipe with condensed milk. I am sure you will love it a lot. Lets see how to make this easy chocolate fudge using 2 ingredients with step by step photos and a video !


easy chocolate fudge

Easy chocolate fudge recipe


Easy chocolate fudge recipeEasy chocolate fudge recipe with condensed milk and Choco chips - 2 ingredient fudge recipe in microwave
Cuisine:Indian
Category:Dessert
Serves:20 nos
Prep time:5 Minutes
Cook time:1 Minutes
Total time:6 Minutes
1 cup - 200ml or 250ml
  • Choco chips - 1 cup ( Dark or milk Choco chips)
  • Sweetened condensed milk - 1/2 cup
  • Vanilla extract - 1/2 tsp ( optional)
METHOD


  • Line a baking pan with parchment paper or thermal foil sheet.
  • In a bowl, take choco chips ( I used 1/2 cup of dark choco chips & 1/2 cup of milk choco chips) and sweetened condensed milk. Mix well
    easy chocolate fudge
  • Microwave in high power (800w) for just 1 minute. Remove the bowl and mix well with a spatula till all the Choco chips melt completely. Add Vanilla essence and mix quickly. Mixture will start to thicken.
    easy chocolate fudge
  • Immediately transfer the mixture to the baking pan. Level it with a spatula and pat it twice. Refrigerate the fudge for 1 hour.
    easy chocolate fudge
  • Invert the fudge in a plate and peel the butter paper. Cut into squares and serve ! It stays good for 2-3 days without refrigeration.
    easy chocolate fudge
Enjoy !

Note
  • I used a combination of dark & milk Choco chips in this recipe. You can use any as u wish.
  • Do not replace sweetened condensed milk with evaporated milk.It won’t work
  • Do not cook the mixture for more than 1 minute in microwave. Its enough for the Choco chips to melt. If not, keep for  just 30 seconds more.
  • For variations, you can add finely chopped nuts, raisins, pecans to the melted chocolate.Just play around.

Enjoy this easy, yummy chocolate fudge for Christmas & New year celebrations !!
The below picture is fudge after a bite Winking
2 ingredient chocolate fudge

Easy Potato Sandwich Recipe - Indian Style Aloo Masala Sandwich

$
0
0
easy potato sandwich recipe

Bread sandwich is one of the easy to make & quick breakfast/dinner/snack recipes.In my family, none of us are a big fan of sandwich recipes.So I make them very rarely and that too mostly in busy week days if I have no choice for quick breakfast. This morning, I tried easy potato masala sandwich in Indian style for the first time with a loaf of fresh wheat bread/brown bread. It came out very well and we loved it. Especially Raksha liked it very much and told me to prepare the same for her school snack box & lunch box. I have prepared a no cook aloo masala and made it without spreading any chutneys or cheese. Still it was tasting good. It a very simple recipe. Bachelors and working women would love the ease of this recipe. If you like this stuffing idea, you can make any number of variations as per your family's taste. Lets see how to make this easy, simple potato sandwich/ aloo masala sandwich recipe with step by step photos !
Aloo masala sandwich

Easy Potato Sandwich/Aloo Masala Sandwich


Easy potato sandwich/aloo masala sandwichEasy potato sandwich/aloo masala sandwich toast in dosa pan
Cuisine:Indian
Category:Breakfast/dinner
Serves:8 set
Prep time:5 Minutes
Cook time: 2 Minutes
Total time: 7 Minutes

  • Bread slices - 15 nos ( milk or wheat bread) 
  • Boiled potato - 4 nos (medium)
  • Cumin seeds/Jeera - 1/2 tsp
  • Fennel seeds powder/soambu powder - 1/2 tsp
  • Red chilli powder - 1.5 tsp
  • Garam masala powder - 1 tsp
  • Turmeric powder - 1/4 tsp
  • Finely chopped mint leaves or coriander leaves - 2 tbsp
  • Salt - as needed
  • Vanilla extract - 1/2 tsp ( optional)
METHOD


  • Wash and pressure cook potato for one to two whistle in low flame. Once its cooked, Peel the skin and mash it well.
  • To the mashed potato, add chilli powder, garam masala powder, salt, turmeric powder, cumin seeds, fennel seeds powder, finely chopped mint or coriander leaves. Mix well.
Aloo masala sandwich

  • Take 2 bread slices. Apply a tsp of tomato ketchup/sauce in one side of a bread slice. Spread the potato masala in another bread slice on one side. Close the bread slices and make a pair.
Aloo masala sandwich

  • Heat a dosa pan and drizzle a tsp of oil /butter/ghee. Place the sandwich and toast both the sides in medium flame till it turns light golden brown on top. Cook patiently in low to medium flame to avoid burnt top. Grease with few drops of  ghee and Serve hot immediately for best taste !
Aloo masala sandwich

  • For variations,you can add grated cheese over the potato masala and toast it. Kids would love it. Instead of tomato ketchup, you can spread green chutney or keep tomato slices, cucumber slices or even grated carrot for healthier options.
Enjoy !
Note
  • Adjust the quantity of spices as per your taste buds.
  • Use fresh milk bread instead of wheat bread for kids if you wish.
  • Do not toast the bread in high flame.Cook patiently to avoid burnt top.
  • For variations, you can add finely chopped nuts, raisins, pecans to the melted chocolate.Just play around.

Make this easy, Indian style potato sandwich at home and enjoy !
Aloo masala sandwich


Easy Ennai Kathirikai Kuzhambu Recipe – Chettinad Brinjal Gravy

$
0
0
Chettinad ennai kathirikai kuzhambu
Basically ennai kathirikai kuzhambu ( Oil roasted brinjal gravy) is prepared by using freshly roasted and ground spices with coconut.I make my MIL’s pepper flavored ennai kathirikai kulambu at least once in a week as it is Sendhil’s one and only favorite brinjal recipe. Recently I tried this easy, no grind, Chettinad style ennai kathirikai kuzhambu just for a change. I followed the recipe from THIS BLOG. I loved it a lot with plain rice and papad/appalam. Its more like my vatha kuzhambu recipe but the flavor of masala coated, roasted brinjals in lots of oil makes a great difference in taste, color and flavor for this kuzhambu. Soon I will make a post about authentic ennai kathirikai kuzhambu recipe. Before that, do try this easy version. I hope you will like it Happy. Now lets see how to make Chettinad ennai kathirikai kuzhambu with step by step pictures !
Don’t forget to check out my Ennai kathirikai poriyal , Brinjal masala kuzhambu , Brinjal masala fry, brinjal gravy for biryani !
Chettinad ennai kathirikai kulambu recipe

Chettinad Ennai Kathirikai Kuzhambu Recipe


Chettinad Ennai Kathirikai Kuzhambu RecipeEasy version of Ennai kathirikai kuzhambu - Chettinad style no grind brinjal gravy
Cuisine:Chettinad
Category:Kuzhambu varieties
Serves:Serves 4
Prep time:10 Minutes
Cook time:20 Minutes
Total time:30 Minutes
1 cup - 250ml
  • Small sized brinjal - 10 nos
  • Small onion / Chinna Vengayam - 10 nos
  • Garlic cloves- 10 nos
  • Tomato - 1 no ( country variety/Naatu thakkali)
  • Tamarind - Small lemon sized
  • Red chilli powder -  2-3 tsp( Kashmiri chilli pwd)
  • Coriander powder/Dhania powder - 2 tbsp
  • Salt & water - as needed
To temper
  • Sesame oil / Gingely oil - 1/4 cup 
  • Mustard seeds - 1 tsp
  • Fenugreek seeds - 2 pinch
  • Curry leaves - few sprigs
METHOD

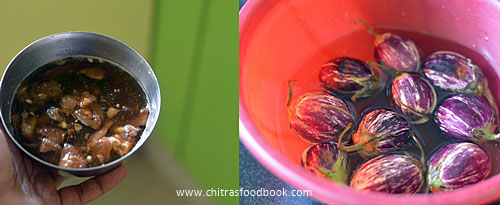
  • Wash the brinjal. Mark X on the top of brinjals till half its way without cutting its stem part. Immerse them in water till use.  Soak small lemon sized tamarind in 1 cup of hot water. Take the extract and set aside. Peel onion, garlic and keep aside.
    Chettinad ennai kathirikai kulambu recipe
    Chettinad ennai kathirikai kuzhambu recipe
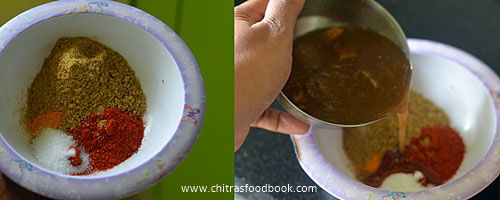
  • In a small bowl, take 1 tbsp tamarind extract, red chilli powder, dhania powder, turmeric powder and salt. Mix well to make a thick paste. Fill the brinjals with this paste.Arrange in a plate.
    Chettinad ennai kathirikai kuzhambu recipe
    Chettinad ennai kathirikai kuzhambu recipe
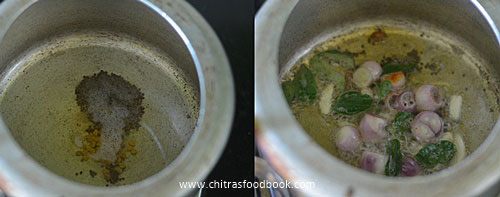
  • Heat 1/4 cup sesame oil in a pressure cooker base ( I used cooked to make the gravy quickly and to save time) Reduce 1 tbsp oil if you feel too much of oil. You can make  this gravy in a kadai as well.Splutter mustard seeds, methi seeds, curry leaves.Add the small onions, garlic cloves and saute till onion turns transparent.
    Chettinad ennai kathirikai kuzhambu recipe
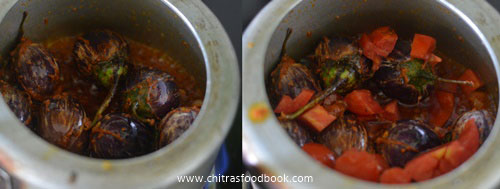
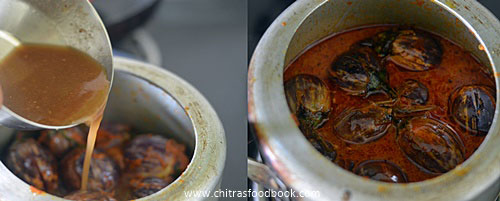
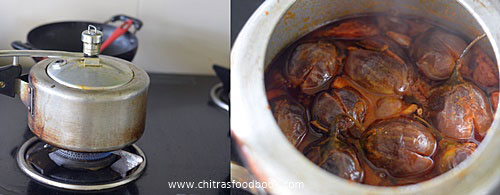
  • Add the masala stuffed brinjal pieces along with the remaining masala and saute well till the brinjal shrinks a bit.Add finely chopped tomato pieces, mix well for a minute. Add tamarind extract, 1/2 cup more water, salt and mix well. Let it come to a roll boil. Cover and pressure cook for one whistle in very low flame.Let the steam release by itself and then open the lid.
  • If cooking in a kadai, cover with a lid and cook till brinjal turns soft and gravy turns thick as you wish. Gravy thickens and oil oozes out. Mix well and serve with plain rice, papad !
    Chettinad ennai kathirikai kuzhambu recipe
    Chettinad ennai kathirikai kuzhambu recipe
    Chettinad ennai kathirikai kuzhambu recipe
    Enjoy !

Note
  • Do not reduce the quantity of dhania powder as it helps to thicken the gravy.
  • You can replace red chilli powder + dhania powder with sambar powder too.
  • You can also add a small piece of jaggery if you like.
  • Add more chilli powder if you like spicy kuzhambu.
  • This gravy stays good for a week even without refrigeration as we are adding more oil.


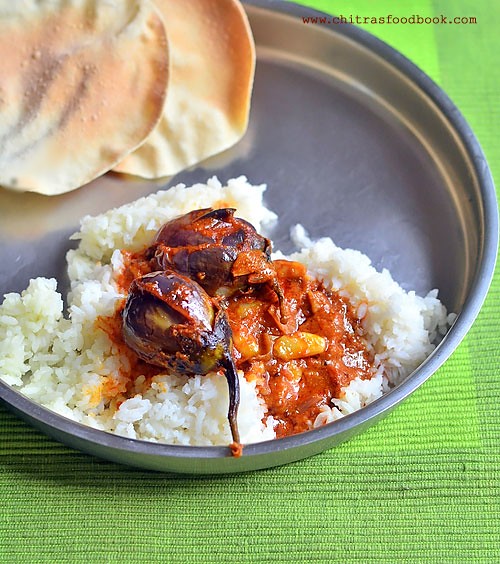
Try this easy ennai kathirikai kuzhambu. Serve with plain rice, enjoy !
I had with plain papad. Yum!!
Easy ennai kathirikai kuzhambu recipe

Eggless Vanilla Cake With Gulab Jamun Mix – Recipes With Gulab Jamun Powder

$
0
0
Cake recipe with gulab jamun mix
During Diwali, I shared a post on how to make Gulab jamun using store bought, Instant MTR gulab jamun mix. As I got two packets of gulab jamun powder in buy one get one offer, I had another pack of gulab jamun mix leftover in my pantry.As I had already shared a jamun kofta gravy recipe, I was looking for some other interesting recipes with gulab jamun mix and came across this eggless vanilla sponge cake recipe. I tried the recipe with small changes and the cake came out super soft, spongy and moist. Raksha loved it a lot and took it for her school Christmas & New year party. She said, all the cake pieces vanished in no time Winking and it got rave reviews from her friends. I was very happy and wanted to share this easy, foolproof  eggless vanilla cake recipe with you all. So I made this as my first ever guest post in my blogger buddy Lubna Karim’s blog “ Yummy Food”. Today I have shared the same recipe with step by step photos. Friends, If you are looking for some easy, yummy recipes using left over gulab jamun mix, this is one of the best options.Do try it for this New year celebration and enjoy ! Its a best teatime cake recipe. Ok, Lets see how to make eggless vanilla sponge cake recipe using gulab jamun mix.
With this cake recipe, I am signing off this year 2016.I thank all my readers and friends for your continuous support and encouragement Happy. With new hopes and dreams, I will catch you all in New year 2017 with a sweet recipe.
I Wish all my readers a very happy and prosperous NEW YEAR 2017 !!
vanilla cake using gulab jamun mix

Eggless Cake Recipe using Gulab Jamun mix


Eggless Cake Recipe using Gulab Jamun mixHow to make eggless vanilla cake recipe using gulab jamun mix - Tea time cake recipe without using butter
Cuisine:Indian
Category:Cakes
Serves:12 pieces
Prep time:10 Minutes
Cook time:20 Minutes
Total time:30 Minutes
1 cup - 200ml
  • Gulab jamun mix - 3/4 cup ( I used MTR mix)
  • Maida/ All purpose flour - 3/4 cup
  • Powdered Sugar - 1 cup
  • Baking powder - 1/2 tsp
  • Baking soda - 1/4 tsp
  • Cooking oil - 1/2 cup ( Odorless oil)
  • Boiled milk - 3/4 cup (Milk at room temp)
  • Vanilla extract - 1 tsp
  • Vinegar/lemon juice - 1 tsp
METHOD

  • In a wide bowl, sieve maida, gulab jamun mix, baking powder, baking soda, powdered sugar. Mix well and set aside.
    Cake using gulab jamun mix
  • In another wide bowl, mix cooking oil, milk and vanilla extract.To this wet ingredients, add the sieved maida mixture. Fold the cake mixture in one direction. Lastly add 1tsp vinegar or lemon juice.Mix well.
Cake using gulab jamun mix
  • Line a baking pan with butter paper OR grease the pan with butter and sprinkle maida all over the baking pan. Pat the excess flour. Pour the cake batter in the baking pan. Batter should fall like a thick ribbon.
    Cake using gulab jamun mix
Cake using gulab jamun mix
  • Preheat the convection oven at 180c .Bake the cake for 25-30 minutes.Keep an eye after 20 minutes. Insert a tooth pick or back of spoon and check it comes out clean. Remove the baking pan and let the cake cool down for 10 minutes. Invert the cake in a plate and peel the butter paper.Cut into pieces and enjoy this yummy, spongy soft vanilla cake !
    Cake using gulab jamun mix
    Cake using gulab jamun mix
Enjoy !

Note
  • Adjust the baking time as per your oven settings. Do not bake for more than 30 minutes. It may burn in the bottom.
  • This cake tastes mildly sweet.So add more powdered sugar if you want more sweetness.
  • The consistency of cake batter should be thick and it should fall like a ribbon as shown in the picture. If the cake batter is too thick, cake comes out hard.

Enjoy this easy, spongy , eggless butter less vanilla cake at home for your teatime !
Eggless vanilla cake using gulab jamun mix

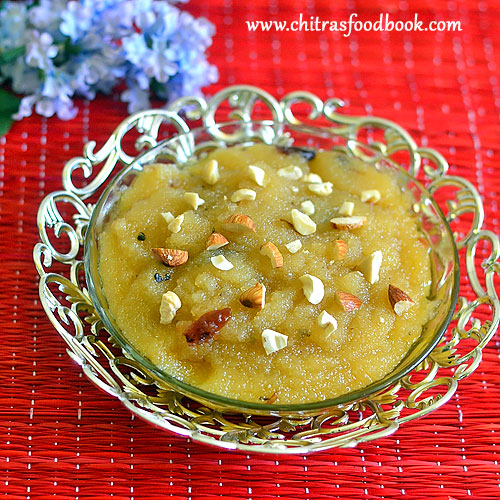
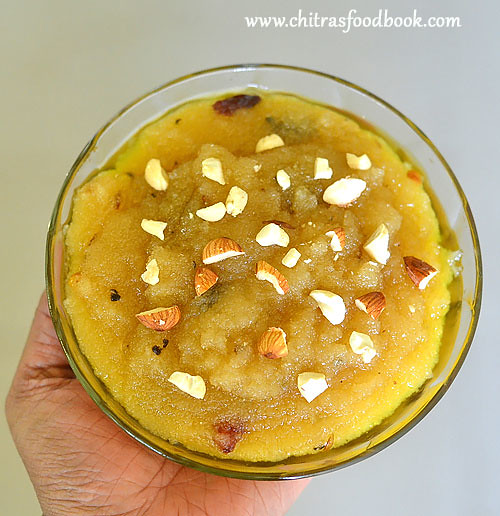
Sooji Halwa, Suji Ka Halwa Recipe – Rava Sheera Recipe

$
0
0
Suji ka halwa
Most of the time I make South Indian style Rava kesari ( Rava = semolina in English) for functions, pooja and celebrations at home as it is our family favorite and the most comfortable sweet for me Happy.I have already shared varieties ofrava kesarirecipes like rava kesari with milk/ Paal kesari,microwave rava kesari,semiya kesari,pineapple kesari, mango kesarietc. Its been my long time wish to try North Indian style Sooji ka halwa/ Rava sheera. So I tried it for New year 2017 celebration yesterday.In North India, Suji ka halwa is one of the most popular and easy halwa recipes that is made in all houses for all the festivals & occasions and is served in most of the temples as Prasad. This halwa is served along with Poori and Chole for breakfast.Halwa poori chole is one of the most popular breakfast combo in North India and Pakistan. In Karnataka, people call this sooji halwa as Kesari bath. Rava/sooji, Sugar and ghee forms the basic ingredients for this sweet recipe. But Rava kesari, suji ka halwa and kesari bath has its own variations in the quantity of ingredients, method of preparation, taste, color and texture.I watched few You tube videos and followed Food viva for the recipe. Though it tastes mildly sweeter than the South Indian rava kesari, it was dripping with ghee and finger licking good. We loved it very much. Its taste reminded me of the banana sheera I had in my friend’s house Satya Narayana pooja. Its very easy to prepare for special occasions and to treat your surprise guests. For variations, you can use milk instead of water. Lets see how to make North Indian special suji ka halwa/ Sooji halwa/Rava sheera recipe with step by step photos and a detailed video !!


Suji ka halwa recipe

Suji Ka Halwa Recipe


Suji Ka Halwa RecipeSuji Ka Halwa - North Indian version of Rava kesari
Cuisine:North Indian
Category:Sweet
Serves:Serves 3
Prep time:10 Minutes
Cook time:10 Minutes
Total time:20 Minutes
1 cup - 200ml or 250ml
  • Bombay Rava/ Sooji /semolina - 1/2 cup ( Do not use chiroti rava)
  • Ghee - 1/3 cup + 1 tbsp
  • Sugar - 1/2 cup
  • Water - 1.5 cups
  • Cardamom powder - 1/2 tsp or 2 pods crushed
  • Saffron threads - few
  • Milk - 1 tbsp ( to soak saffron thread)
  • Chopped cashews, badam and few raisins/dry grapes
METHOD

  • Soak saffron threads in 1 tbsp hot milk.I din’t use saffron in this recipe. I used cardamom powder alone.
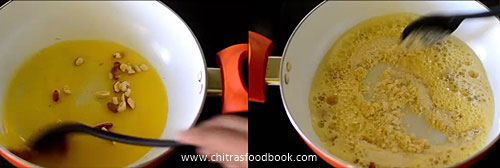
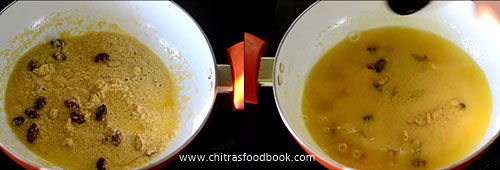
  • Heat 1/3 cup of ghee in a kadai.Roast the dry grapes, cashews and almonds till dry grapes bloat and nuts turns golden. Add rava and roast well for 4-5 minutes in medium flame. Rava turns light golden brown in color.
    Suji ka halwa recipe
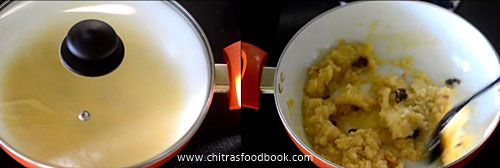
  • Add 1.5 cups of water to the rava and mix well till 3/4 th of the water is absorbed by the rava and becomes semi thick.Keep the flame low and cover the kadai with a lid. Cook the rava for 2-3 minutes.
    Suji ka halwa recipe
    Suji ka halwa recipe
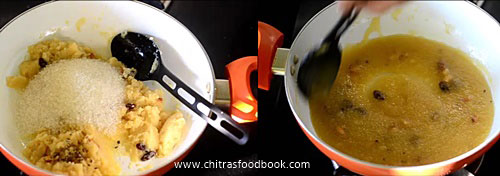
  • Open the lid and add sugar, cardamom powder and saffron milk ( if using). Mix well without lumps.Sugar melts and the mixture will become watery. Keep the flame medium and mix well. 
    Suji ka halwa recipe
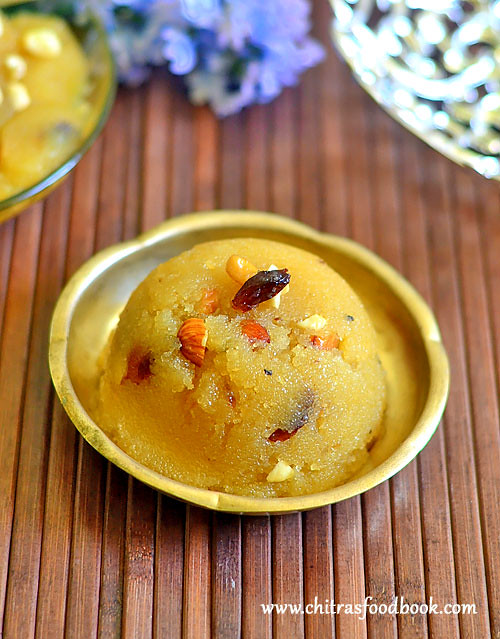
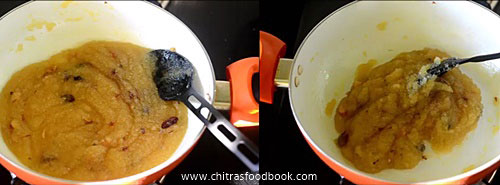
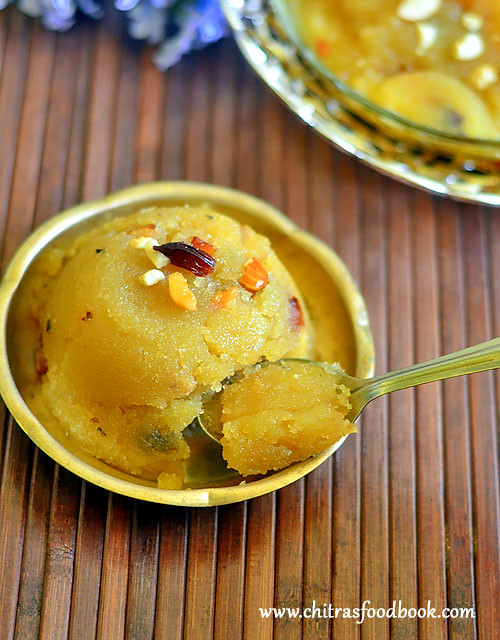
  • Halwa turns thick and starts to leave the sides of pan. Immediately add 1tbsp of ghee, mix well quickly and transfer the halwa to a bowl. Do not wait for the halwa to thicken completely. Remove it as soon as it becomes semi thick because this suji ka halwa becomes dry and hard when it cools down.So remove it at the right time. Garnish with few nuts and serve warm.
    Suji ka halwa recipe
Enjoy !

Note
  • Add more sugar ( Say 3/4 cup of sugar) if you need more sweetness.
  • You can use milk instead of water but cook the rava for more time if using milk.
  • Do not reduce the quantity of ghee. It helps to keep the halwa soft.
  • If you don’t want to add more ghee, use half the quantity of oil.
Sooji halwa recipe
Try this easy, yummy Suji Ka halwa/Rava sheera at home and enjoy !!
Sooji halwa

Gobi Paratha Recipe–How To Make Cauliflower Paratha With Step By Step Photo,Video Recipe

$
0
0
Gobi paratha recipe with step by step pictures
Gobi Paratha is Sendhil’s most favorite Paratha recipe. After marriage he took me to In-swing restaurant in BDA complex, Banashankari and got this cauliflower paratha for me as he loves it very muchHappy. That’s the first time I tasted a stuffed paratha in my lifeBatting Eyelashes.He told me to try the same at homeWinking. As I was a beginner in cooking, I did not have any idea about the stuffing part, how to roll paratha etc. When I tried it, all the stuffing came out while rolling and the paratha became a disasterTongue. Still he appreciated me for my attempt and ate well. And that’s my manLove Struck. Now after so many years of cooking, I can make a good gobi paratha for him.So I wanted to share this recipe in my blog with step by step photos and a detailed video recipe to help beginners. You can try this yummy paratha recipe for dinner or lunch box. Even Kids would love this paratha if you cook it adding ghee or butter. It comes out soft and stays good for hours. Lets see how to make Gobi paratha/Cauliflower paratha at home easily !


Cauliflower paratha

Gobi paratha recipe/ Cauliflower paratha recipe


Gobi paratha recipe/ Cauliflower paratha recipeHow to make gobi paratha/Cauliflower paratha at home with step by step photos and video !
Cuisine:Indian
Category:Paratha recipes
Serves:6 nos
Prep time:30 Minutes
Cook time:10 Minutes
Total time:40 Minutes
1 cup - 250ml
  • Atta/Wheat flour - 1cup
  • Cooking oil - 1 tbsp
  • Salt & water - as needed
For paratha stuffing
  • Cauliflower - 1 no or Grated cauliflower - 1.5 cups
  • Cooking oil - 2 tbsp
  • Green chilli - 1 no ( finely chopped)
  • Grated ginger - 1 tsp
  • Ajwain/Carom seeds – 1 tsp
  • Red chilli powder - 1 tsp
  • Dhania powder/coriander seeds powder - 1 tsp
  • Garam masala powder - 1 tsp
  • Cumin seeds powder - 1/4 tsp
  • Turmeric powder - 1/4 tsp
  • Aamchur powder - 1/4 tsp ( optional)
  • Coriander leaves - 2 tbsp. ( to garnish)
  • Salt - as needed
METHOD

  • In a wide bowl, take the wheat flour, add required salt and 1/2 tbsp. of cooking oil. Mix well. Add water little by little and make a smooth, non-sticky dough.Knead well, apply a tsp of oil and cover the dough with a dry cloth, leave it for 20 minutes. In the mean time, lets prepare the stuffing.
    Gobi paratha recipe - step by step
    Gobi paratha recipe - step by step
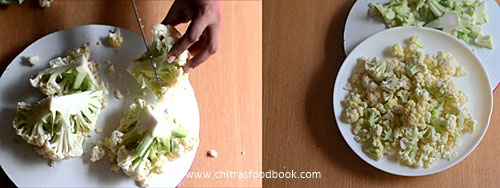
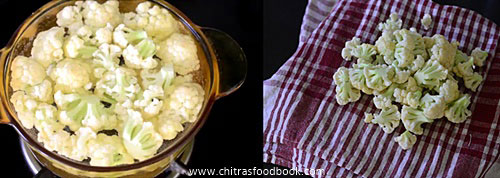
  • Take the cauliflower and remove the leaves, cut into 4. Remove the stem part and separate the florets in a plate. In a wide bowl, boil water and add the florets. Boil for few minutes, parboil and drain the excess water. Remove the half cooked cauliflower florets to a dry kitchen towel/cloth. Pat it dry.
    Gobi paratha recipe - step by step
    Gobi paratha recipe - step by step
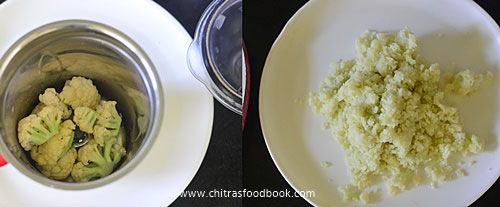
  • Grind the florets in a dry mixer jar without water. Wipe the sides of jar and grind in batches. You can also grate it. But grinding is easy. Take in a plate.
    Gobi paratha recipe - step by step
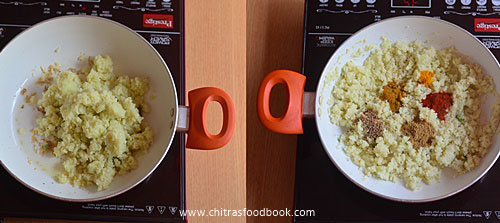
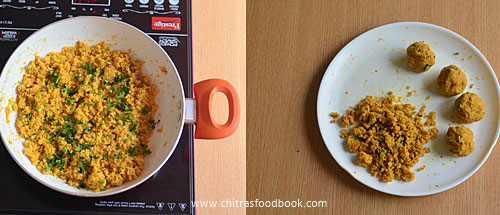
  • Heat oil in a kadai and when it gets heated , add the finely chopped green chilli, grated ginger and saute well. Add the grated cauliflower, salt, red chilli powder, dhania powder, cumin powder, garam masala powder,aamchur powder and ajwain. Mix well till all the moisture is absorbed. Let the mixture cool down.Divide the stuffing into lemon sized balls.
     Gobi paratha recipe - step by step
    Gobi paratha recipe - step by step
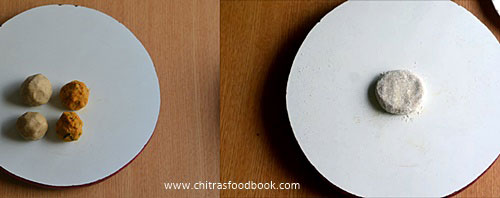
  • Take the chapathi dough and make lemon sized balls. The size of dough ball & stuffing ball should be equal.
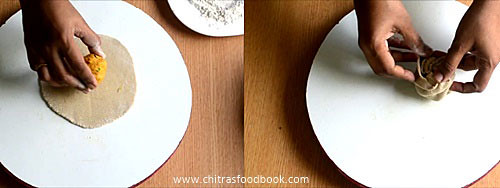
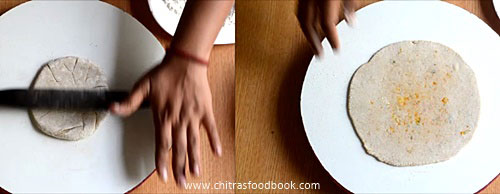
  • Take one dough ball, dust it in wheat flour and roll into small poori size.Make the corners thinner than center. Keep the stuffing ball in the center and seal it. Again dust in the flour and roll to a thick or thin paratha as u wish. Sendhil likes it medium thick.So I do it accordingly.
    Gobi paratha recipe - step by step
    Gobi paratha recipe - step by step
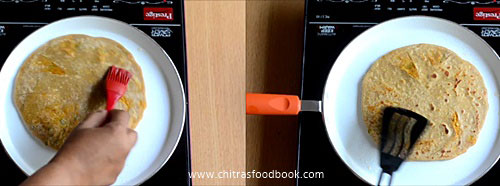
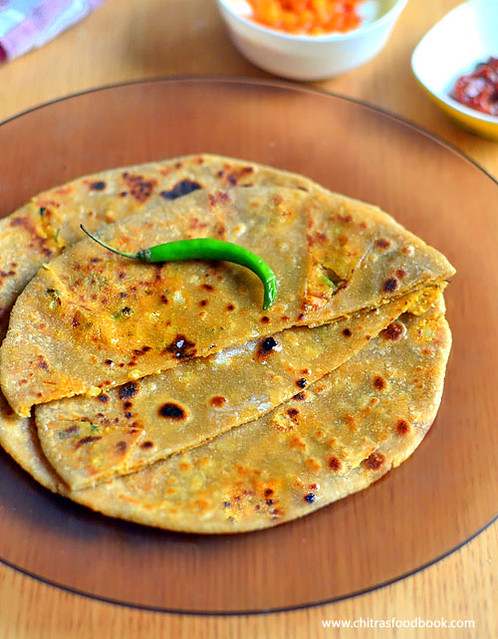
  • Heat a dosa tawa, cook the paratha on both the sides till half cooked in medium flame. Brush one side of paratha with ghee or cooking oil and cook for few seconds till brown spot appear.Flip the paratha and brush the other side of paratha.Cook for a minute. Keep flipping and cooking till brown spots appear all over the paratha. Brush with ghee and remove in a plate. Serve hot immediately with raita or pickle OR stack the paratha in a clean kitchen towel or thermal foil for later use. (Remember the more you brush with ghee, softer the paratha would be.) Gobi paratha recipe - step by step
Enjoy !

Note
  • Do not make the chapathi dough very sticky. Rolling will be difficult. You may have to dust the paratha with more flour which leads to dry paratha.
  • You should grease the paratha with cooking oil or ghee for best taste.
  • Cauliflower stuffing should be free from moisture so that paratha won’t become sticky while rolling.
  • Adding aamchur powder gives a mild tangy taste. Skip if you don’t have it.
Gobi paratha recipe
Enjoy this yummy, flavorful gobi paratha with your favorite side dish or simple masala raita.
How to make gobi paratha

How To Celebrate Thiruvathirai At Home/ Arudhra Darshan

$
0
0
How to celebrate thiruvathirai
Significance of Arudra darshan
Soure:wiki and google
Thiruvathirai/Arudhra darshan is a popular Hindu festival celebrated in Tamil Nadu and Kerala.
Arudhra Darshan or Arudara Darshan is observed in the Tamil month of Margazhi (December – January) on Thiruvathirai Nakshathram day. In this year 2017, it falls on January 11th,Wednesday ( tomorrow). It is essentially a Shaivite festival and celebrates the cosmic dance of Lord Shiva, which is represented by the Nataraja form. Arudra festival is celebrated with fervor in Lord Shiva temples in Tamil Nadu, Sri Lanka, Singapore, Malaysia, South Africa, Australia and in other parts of the world by Tamil speaking population. In Kerala, this festival is primarily celebrated for women.The most important Arudhra Darisanam festival takes place at the Chidambaram Lord Nataraja Temple in Tamil Nadu. Arudhra signifies the golden red flame and Shiva performs in the form of this red-flamed light.The cosmic dance of Lord Shiva represents five activities – Creation, Protection, Destruction, Embodiment and Release. In essence, it represents the continuous cycle of creation and destruction.Arudra Darshan celebrates this ecstatic dance of Lord Shiva.
It takes place on the full moon night in the month of Margazhi and this is also the longest night in a year. The festival is mainly observed in the Tamil speaking world.As per the Puranaas, on this day Lord Shiva has shown this blissful dance that energizes this world to two of his devotees - Vyagrapadha and Adisesha (on whom Lord Vishnu Reside). Hence this day is celebrated, in appreciation of the cosmic dance of Lord Shiva, by offering Prayers to the Nataraja aspect of the Lord.


Special prayers are held on the day at all Shiva temples. Milk, honey, water, sandal paste and other cooling liquids are offered to Lord Shiva on this day. This is to cool a burning and turbulent Shiva who is performing the Tandava – the cosmic dance of Nataraja.Special abhishekam, rituals and celebrations are held on the night of Thiruvathirai.
Our Celebration

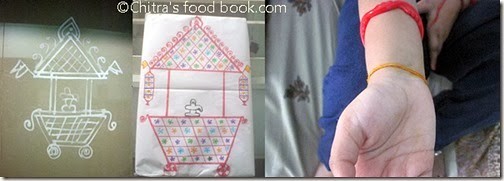
In our house, we celebrate this festival in a grand manner by offering kali, ezhu kai kootu and adai made of rice flour and jaggery to Lord Nataraja. We also draw maakolam all over our house. My MIL draws a procession car(Thaer) with Shiva lingam in the wall of pooja room and consider it as idol.We tie a yellow rope in our hands after pooja. I have shared our pooja procedures in detail . Please check it. You can follow/alter this method based on your tradition.

How to celebrate thiruvathirai


Ingredients Required

Please CLICK THIS LINK for Thiruvathirai Adai, Kali and kootu recipes.

Thiruvathirai kali recipe with video

Visit my in-laws blog LEARN KOLAM for Thiruvathirai Kolam
  • Raw rice
  • Moong dal
  • Jaggery
  • Rice flour
  • Cardamom powder
  • Grated coconut
  • Ghee
  • Butter
  • Any 7 vegetables ( Raw banana, sweet potato, yam, pumpkin, broad beans, arbi, field beans, brinjal, chow chow, cluster beans, ladies finger)
  • Green chilli
  • Cumin seeds
  • Coconut oil
  • Tempering ingredients for kootu
For Pooja
  • Coconut
  • Betel leaves and nuts ( 7 each)
  • Fruits ( 7 banana)
  • Banana leaves ( 7 leaves)
  • Turmeric pieces ( 7 nos)
  • Yellow rope ( to tie around wrist or neck)
  • Lamp, wick
  • Incense stick, camphor
Thiruvathirai celebration
Pre Preparatory activities
The previous day, clean the house. Wash the lamps, put the wick. Keep turmeric, kumkum dots & make it ready for the next day neivedyam. We have the practice of drawing procession car ( thear) in the wall of pooja room as shown in the first picture and in the entrance of house. We draw maa kolam in the house entrance and in pooja room. As mine is a wooden pooja room shelf, I draw in a paper & keep it as GOD and I draw maakolam at the house entrance alone.We keep 7 dots using viboodhi, manjal, kumkum, sandal, kajal( Kanmai), red saandhu , rice flour in the middle of thear picture for this nonbu. We keep 7 betel leaves, 7 nuts, 7 banana, 7 turmeric pieces, 2 yellow ropes (for me & my daughter) in a plate & keep in front of God.All these things are time consuming jobs.So we do it the previous day night & keep them ready. If you don’t have this practice at home, just do the pooja by keeping a Lord Nataraja or Lord Shiva photo in the auspicious time.
We make kali, 7 kai kootu, adai, cooked rice, thayir pachadi, dal/paruppu and sambar for neivedyam. So we do some pre-preparatory works for cooking as well. We roast rice + dal, powder & keep it for kali. We chop the vegetables for kootu & sambar and refrigerate it in a box.
Thiruvathirai day 
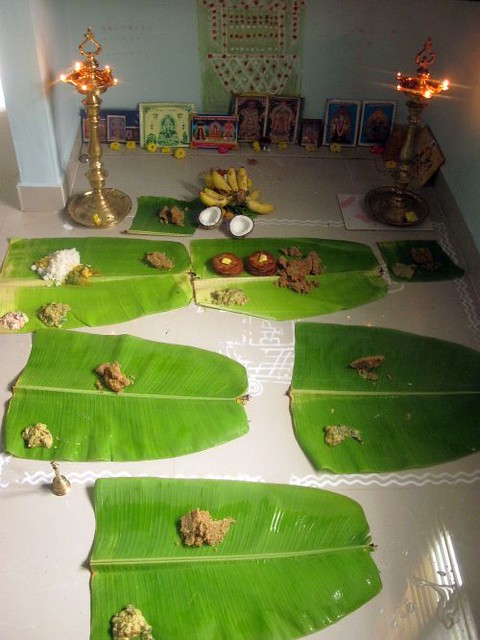
On Festival day, we should do the pooja in the early morning in auspicious time. This year as it falls on Wednesday, we should do the pooja before 7.30am ( Avoid rahu kalam, yama kandam). So start the cooking activities by 6 am. Prepare thirivathirai kali, adai & kootu ( Rice, dal, sambar, thayir pachadi). Decorate the pooja room with flowers and light the lamp. Arrange all the neivedyam dishes in the banana leaf. Keep a plate with banana, coconut, betel leaf and nut, turmeric pieces along with yellow rope. Do the pooja by showing dhoop, dheep and mangala harathi. After doing the pooja, tie the yellow rope around your wrist or neck.
Enjoy kali, kootu and adai !!
DISCLAIMER : The pooja procedures I have shared above is as per my family’s practice. Many people don’t have the habit of drawing thear, maakolam, offering adai. Even my mom makes kali and kootu for thiruvathirai and offers them in front of Lord Nataraja picture for pooja. So take this post as a guidance and change it according to your custom.


Thiruvathirai Kali – Thiruvathirakali Recipe

$
0
0
Thiruvathirai also called as Arudra darshan is one of the most important festivals celebrated in Tamil Nadu and Kerala. In most of the Tamil houses, Kali will be prepared and offered to Lord Shiva on this festival day. In my family, my mom has the practice of making thiruvathirakali alone whereas my MIL makes Thiruvadirai kali, kootu and adai, sambar/thalagam, thayir pachadi along with cooked rice as well.So I follow that every year. Long back, I had shared a post for Thiruvathirai adai, kali, kooturecipes. This year, I made a detailed video and wanted to have a separate post in my blog.Thiruvathirai kali is prepared with roasted, ground raw rice and moong dal cooked in jaggery syrup flavored with cardamom powder, grated coconut and ghee. It is one of the tastiest kali recipes and my family loves it a lot. Basically we make the kali with a fluffy texture whereas I saw many recipes with kali in Pongal/halwa texture. It purely depends on how we powder the rice+dal. If you want fluffy kali, powder it coarsely else powder it nicely like fine rava. Whatever be the texture, this kali tastes absolutely yummyLove Struck.Now Lets see how to make Thiruvathirai kali recipe with step by step photos and video !!
Check out my thiruvathirai celebration post& Adai, kootu recipes post too !


Thiruvathirai Kali Recipe


Thiruvathirai Kali RecipeThiruvadirai/Thiruvathirai kali recipe for neivedyam
Cuisine:Indian
Category:Sweet
Serves:Serves 2
Prep time:10 Minutes
Cook time:20 Minutes
Total time:30 Minutes
1 cup - 250ml
  • Raw rice/Pacharisi - 1/2 cup
  • Moong dal/Paasi paruppu - 1 tbsp
  • Water - 1.5 cups ( to cook rice)
For syrup
  • Powdered jaggery - 3/4 cup
  • Water - 1/4 cup
  • Cardamom powder - 1/2 tsp
  • Grated coconut - 1/4 cup
  • Ghee - 2 tbsp
  • Cashew nuts - few
METHOD

  • In a kadai, dry roast moong dal till it turns golden brown in color. Stay nearby and keep roasting patiently.Transfer to a plate. In the same kadai, dry roast rice till it becomes puffy and slightly golden in color.Do it in medium flame. When the vapor starts to come from the kadai while roasting, roasting is done. Rice takes nearly 4-6 minutes for roasting. Transfer to the plate and let them cool down.
    Thiruvathirai kali recipe
  • Grind the rice+ dal to a coarse rava. Pulse it 4 or 5 times using inch button for few seconds.Transfer it to a cooker base. Add 1.5 cups of water ( 1:3) and pressure cook in very low flame for 2 whistles. Open the lid after the steam is released. Mix well and set aside.
    Thiruvathirai kali recipe
  • In a kadai, take the powdered jaggery. Melt it by adding 1/4 cup of water. Strain the impurities in a wire mesh. Again pour the syrup to the washed kadai and boil it. Add grated coconut & cardamom powder.
    Thiruvathirai kali recipe
  • When the syrup starts to roll boil, simmer the flame to low and add the cooked rice+dal mixture.Break all the lumps with  a ladle and keep mixing.Rice absorbs all the syrup and becomes thick and smooth.switch off the flame. Roast cashews in 2 tbsp ghee till golden in color. Add this to the kali, mix well and serve hot !
    Thiruvathirai kali recipe
    Thiruvathirai kali recipe
Enjoy !

Note
  • Do not burn the dal or rice while roasting.It spoils the entire flavor of kali.So do it patiently in medium flame.
  • Pressure cook rice & water in the ratio of 1:3 else rice will not be cooked well and kali tastes hard and chewy.
  • Do not add less jaggery, kali tastes bland. Rice & jaggery ratio is 1:1.5
  • Cardamom powder and grated coconut is a must for kali. It adds flavor.
  • Adding ghee & roasted cashews makes the kali rich.So do add it.

Try this easy, yummy kali at home on this Thiruvathirai festival and Enjoy !!

Ellu Bella Recipe – Sankranti Ellu Bella Mix

$
0
0
Ellu bella recipe
Ellu Bella (Sesame seeds-Jaggery trail mix in English) is one of the most popular Makar Sankranti recipes in Karnataka.This is basically a mix of 5 main ingredients – Sesame seeds, Jaggery, Dried coconut pieces, Roasted Peanuts and Fried Gram dal.During Sankranti festival, this mix sold in small packets in all the shops.This ellu bella mix is exchanged with friends & relatives to celebrate this harvest festival and as a token of love for better bonding of relationship. In Kannada, they call this as Ellu beerodu in which they give a pack of ellu bella mix, betel leaves & nuts, fruits ( preferably banana), Sugar moulds ( Sakkare achu) and sugar cane to the near & dear. I have seen my friends ( School moms group) preparing this ellu bella mix 2-3 days before Sankranti and distribute to all. Being in Karnataka for the past ten years, I wanted to share their traditional sankranti recipes in my blog. So I asked my friend Archana to share the recipe and the method of making ellu bella.She explained patiently and clarified all my doubts on how to cut jaggery & coconut into small pieces etc. Thank you so much ArchuHappy. Some people add equal measure of all the ingredients whereas some use according to their preferences. I have just followed my friend’s recipe. I prepared ellu bella for the first time in my house successfully and distributed to Raksha’s friends as well. They all loved it very much.Next year I must try homemade sakkare achu. Now lets see how to make Ellu bella recipe at home with step by step pictures !
Check out my other Karnataka recipes too!
Ellu bella ingredients

Ellu Bella Recipe


Ellu Bella RecipeSankranti Ellu Bella Mix Recipe
Cuisine:Indian
Category:Sweet
Serves:Serves 3
Prep time:120 Minutes
Cook time:5 Minutes
Total time:125 Minutes
1 cup - 200ml
  • Roasted peanuts - 1/4 cup
  • Fried gram dal/Hurigadale - 1/4 cup
  • White sesame seeds - 2 tbsp
  • Dried coconut pieces - 2 -3 tbsp
  • Jaggery pieces - 1/4 cup
  • Sugar balls - 2 tbsp ( optional)
  • Sugar coated Jeera or fennel seeds - 2 tbsp
METHOD

  • Take the whole dried coconut. Grate it using a grater to remove the skin. Slice it using a chips slicer to make thin slices.Chop into very small pieces using a sharp knife. Spread in a plate.
    ellu bella recipe
    ellu bella recipe
  • Take the jaggery and cut into small blocks using a knife.Then cut them into very small pieces using scissors or nut cracker tool. I used scissors ( Achu vellam/Achu bella works the best. But I used round ones).Spread the jaggery pieces in the plate.
    ellu bella recipe
  • Microwave peanuts in high power for 2-3 minutes.Remove in a cover or cloth and rub it well to remove the skin. Break them into 2 and keep aside.
  • Sun dry the coconut & jaggery pieces for 2 – 4 hours OR Dry roast the coconut pieces without changing the color. Warm the jaggery pieces without melting.Sun drying is the best option though. Dry roast sesame seeds till it crackles. Set aside to cool.
    ellu bella recipe
    ellu bella recipe
  • In a wide bowl, take the roasted, broken peanuts, fried gram dal, sugar balls, jeera mittai, dried coconut pieces and jaggery pieces. Mix well and store in a box. Distribute to your Family & Friends !
    ellu bella recipe
Enjoy !

Try this easy,traditional Karnataka special ellu bella mix at home and have a great celebration !
ellu bella mix recipe
Distribute ellu bella with a pair of banana, betel leaves & nuts, sakkare achu & sugarcane piece as shown below ( sugar cane is missing in the pic Winking)
sankranti ellu bella


Brinjal Kurma Recipe / Kathirikai Kurma For Idli, Dosa,Chapathi

$
0
0
Brinjal kurma recipe

Many of you would have heard about and tasted brinjal kurma for biryani and rice. Even I have posted the same in my blog. But when I came across this brinjal kurma (Kathirikai kuruma in Tamil) recipe for idli,dosa and chapathi in a cookbook, it was new and interesting to me. As I am a big fan of brinjal recipes, I tried it immediately as a side dish for thatte idli for our weekend breakfast. It was very nice with mild flavor of masala/spices. I just loved it with idli and dosa. I hope it tastes good with chapathi/roti as well. Sendhil is not a big fan of brinjal, still he tasted this kurma without any complaints. So I thought of sharing( DedicatingWinking) this yummy, interesting brinjal kurma recipe especially for all the ardent fans of brinjal like me. I have used long green brinjal in this recipe. I guess you can try with purple variety brinjal too. Friends, do try this different kurma recipe at home and share your feedback with me Happy.Ok, Lets see how to make Brinjal kurma with step by step pictures !
Check out my Brinjal kurma for biryani too !

Brinjal kurma recipe

Brinjal Kurma Recipe


Brinjal Kurma RecipeBrinjal kurma/ Kathirikai kuruma for idli,dosa and chapathi
Cuisine:Indian
Category:Kurma varieties
Serves:Serves 2-3
Prep time:10 Minutes
Cook time:20 Minutes
Total time:30 Minutes
1 cup - 250ml
  • Long Green Brinjal – 2 nos
  • Small onion Or Big onion – 20 nos / 1 no ( big) 
  • Tomato – 1 no
  • Curry leaves - Few
  • Red chilli powder – 1 tsp
  • Turmeric powder – 1/2 tsp
To grind
  • Grated Coconut – 1/4 cup
  • Pottukadalai / Fried Gram Dal – 1.5 tsp
  • Soambu/Fennel seeds – 3/4 tsp
  • Pattai /Cinnamon – 1 piece
  • Garlic cloves – 3 nos
  • Green chilli – 1 no ( use 2 for spicy kurma)
To Temper
  • Cooking oil – 2 tbsp
  • Mustard seeds – 1/2 tsp
  • Urad dal – 1 tsp
  • Cumin seeds – 1/2 tsp
Coriander leaves – to garnish
METHOD

  • Wash and chop brinjal into small pieces.Keep immersed in water till use. Chop onion & tomato. Keep aside.
  • In a mixie jar, take all the ingredients given under “ To grind” and grind them to a smooth paste adding enough water. Keep it aside.
    Brinjal kurma recipe
  • In a cooker base, heat oil and temper mustard seeds, urad dal, curry leaves and cumin seeds. Add the chopped onions and saute until transparent. Add the chopped tomato pieces and saute till mushy. Then add the chopped brinjal pieces and saute till they shrink in size and reduce in quantity. It takes 2-3 minutes.
    Brinjal kurma recipe

  • Now add the turmeric powder, red chilli powder, salt and ground coconut paste.Mix well. Saute the mixture for a minute. Add 1 to 1.5 cups of water and pressure cook in very low flame for one whistle. Open the lid after the steam is released. If the kurma is too thick, add 1/4 cup of water, mix well and check for taste. Add more salt or chilli powder if needed. Garnish with coriander leaves. Give a boil and serve hot with idli, dosa or chapathi.
    Brinjal kurma recipe
    Brinjal kurma recipe
Enjoy !

Note
  • Adjust the quantity of green chilli if you want more spicy taste.
  • You can use Garam masala powder if you wish. Just use 1/2 tsp.
  • You can replace brinjal with finely chopped potato or parboiled cauliflower florets too.


Kathirikai kurma
Try this easy, one pot Brinjal kurma recipe for idli, dosa or chapathi. Enjoy !!
Kathirikai kurma

Avarekalu Dantina Soppu Palya Recipe – Field Beans Amaranth Leaves Curry

$
0
0
Avarekalu dantina soppu palya
Every year during Avarekalu (Indian Field beans/Surti/Lilva beans in English, Mochai in Tamil) season, I would like to try some new and interesting recipes with it. As I say in all my Karnataka recipes post, my 7 Kannadiga friends ( School moms group) are the biggest source and inspiration for me to try and share Karnataka recipes in Chitra’s Food Book. According to me, each and every recipe I learn from them is a GemLove Struck.I have already shared few avarekalu recipes like Hitikida Avarekalu gravy for Ragi mudde, Avarekalu methi pulao, Avarekalu sagu, Avarekalu Huli from my friends. This year I learnt Avarekalu Dantina soppu palya ( Lilva beans/Surti – Amaranth Leaves curry in English, Mochai kottai -Thandu keerai poriyal in Tamil) from my friend Megha. As I had just a handful of leftover Avarekalu after Sankranti celebration, I wanted to use it effectively. So Megha suggested me to make avarekalu palya adding soppu so that the yield will be more and its a healthy option as well. She told they reserve the cooked soppu water to make bassaru recipe. But I used it to make Lauki gravy.Soon I will learn Bassaru from my friends and share it here. I still have avarekalu akki roti and avarekalu uppittu recipes in my try list. I will try to share them at least by next year during this seasonWinking.Now lets see how to make this healthy, Karnataka style avarekalu Soppu palya.
avarekalu soppu palya

Avarekalu Danitina soppu palya


Avarekalu Danitina soppu palyaField beans - Amaranth leaves Curry for rice
Cuisine:Indian
Category:Side dish for rice
Serves:Serves 2
Prep time:10 Minutes
Cook time:15 Minutes
Total time:25 Minutes
1 cup - 250ml
  • Avarekalu/ Field beans - 1/2 cup
  • Dantina soppu/ Thandu keerai/ Amaranth leaves - 2 cups ( chopped)
  • Garlic cloves - 5 nos ( crushed)
  • Big onion - 1 no ( Finely chopped)
  • Red chilli - 2 nos ( Pinched)
  • Curry leaves - few
To Temper
  • Cooking oil - 1.5 tbsp
  • Mustard seeds - 1/2 tsp
  • Urad dal - 1 tsp
  • Cumin seeds - 1/2 tsp
  • Grated coconut - 2 tbsp
METHOD

  • Wash and chop the soppu leaves( Keerai leaves) and set aside. In a cooker base, take the avarekalu ( Mochai/Field beans) and add put the chopped leaves. Add 1 cup of water to it and the required salt.
    Avarekalu dantina soppu palya
  • Pressure cook for one whistle in low flame.Drain the excess water in a bowl, use it for making gravies.
    Avarekalu dantina soppu palya
  • In a kadai, heat oil and temper mustard seeds, urad dal, cumin seeds and curry leaves.Add pinched red chillies, crushed garlic and finely chopped big onion. Saute till onion turns transparent.
    Avarekalu dantina soppu palya
  • Add the cooked soppu+avarekalu, mix well. Check for salt and mix well. Lastly add the grated coconut and mix well. Serve with rice !
    Avarekalu dantina soppu palya
Enjoy !

Note
  • Crushed garlic and chopped onion gives a nice flavor to this palya
  • You can skip onion & garlic if you want to make no onion no garlic version. In that case, add more grated coconut at the end.
  • You can use arave soppu/Arai keerai instead of Dantina soppu/Thandu keerai.
Try this healthy, Avarekalu soppu palya recipe for rice and enjoy !
Avarekalu dantina soppu palya recipe

Red Poha Upma – Sigappu Aval Upma – Red Aval Recipes

$
0
0
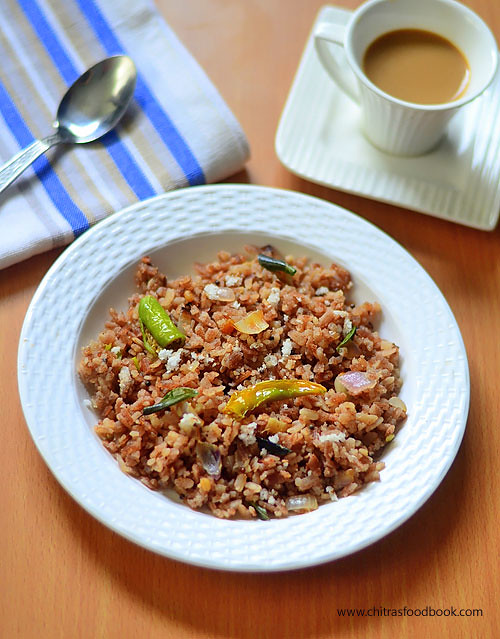
Red Poha Upma
Poha( Flattened Rice/Rice flakes in English, Aval In Tamil, Avalakki In Kannada, Poha in Hindi) is used to make quick and easy, Instant breakfast recipes like Poha upma, Poha idli , Poha pongal etc. Mostly I make Poha recipes using white poha but red poha is considered to be high in nutrition with lots of health benefits.It is prepared from red rice.It is good for diabetes and is rich in fiber, vitamin B and minerals like calcium, zinc, iron, manganese, magnesium. Recently one of my readers suggested me to share some red aval recipes. So last time when I went to Salem, I bought a pack of Red Aval ( Sivappu aval in Tamil), Kambu aval and Ragi aval from Barathi supermarket. I followed my usual aval upma recipe and made this instant sigappu aval upma recipe quickly for our breakfast. It was very nice,flavorful and tasty. Above all, we got a satisfaction of having a healthy food. Ok, Lets see how to make red aval upma with step by step photos !

Check out my Instant, ready to eat Poha Mix Recipe !

Red Poha - Sigappu aval

Red Poha Upma Recipe


Red Poha Upma RecipeRed Poha Upma - Sigappu Aval Upma recipe for easy, instant breakfast !
Cuisine:Indian
Category:Breakfast recipes
Serves:Serves 2
Prep time:10 Minutes
Cook time:15 Minutes
Total time:25 Minutes
1 cup - 250ml
  • Red Poha/ Sigappu aval - 1 cup
  • Big onion - 1 no ( Finely chopped)
  • Green chillies - 2 nos ( slitted)
  • Ginger - 1 tsp ( finely chopped)
  • Curry leaves - few
  • Grated coconut - 1/4 cup
  • Coriander leaves - to garnish
  • Lemon juice - few drops
To temper
  • Cooking oil or coconut oil - 2 tbsp
  • Mustard seeds - 1 tsp
  • Cumin seeds – 1/2 tsp
  • Urad dal - 1 tsp
  • Chana dal - 1.5 tsp
  • Hing/Asafetida - few pinches
METHOD

  • Wash the red poha twice to remove the debris & HUSK.( If the red poha is thin, it will become soft after washing. So no need to soak it. If the poha is thick and hard, it will not become soft even after washing. In that case, you should soak it) I used red thick poha, so I washed and soaked it for 10 minutes till all the water is absorbed by the red poha. Keep it covered. Water should be just 1 inch above the poha while soaking.
  • Chop the onion, green chilli and ginger. Keep it aside.
    Sigappu aval upma - Red poha upma
    Sigappu aval upma - Red poha upma
  • In a kadai, heat oil and splutter mustard seeds, urad dal, chana dal and cumin seeds.Saute finely chopped onion, slit green chillies, ginger pieces and torn curry leaves.Saute till onion turns transparent.
    Sigappu aval upma - Red poha upma
  • Add the soaked poha, required salt and mix well gently. Make sure poha doesn’t turn mushy while mixing. Keep the flame completely low and cover the upma with a lid. Cook it for 8-10 minutes. Open it once or twice in the middle and stir it. Check if the poha is cooked soft else add little water and mix well.Cook till done.Sometimes thick poha needs little more water to cook.Lastly add the lemon juice, coriander leaves and grated coconut. Mix well and switch off the flame.Serve hot !!
    Red aval upma
Enjoy !
Note
  • Add finely chopped chillies instead of slit chillies for spicy taste.I used slit chillies for mildly spicy.
  • Adding lemon juice helps to absorb the iron content in poha.So do not skip it.
  • If you want to make no onion version, just use boiled potato pieces and sprinkle 2 tbsp of roasted, coarsely powdered peanuts at the end.


Enjoy this healthy Red Poha Upma For your breakfast or dinner !
Red Poha Upma


Carrot Halwa – Gajar Ka Halwa Recipe Without Khoya

$
0
0

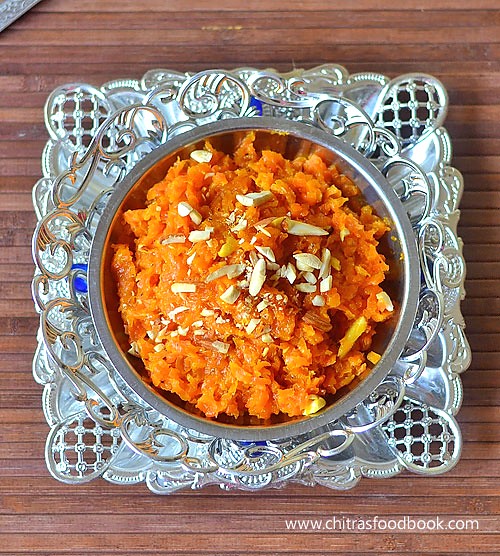
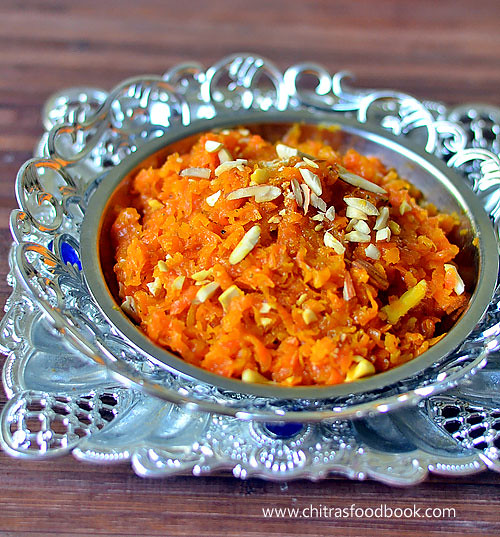
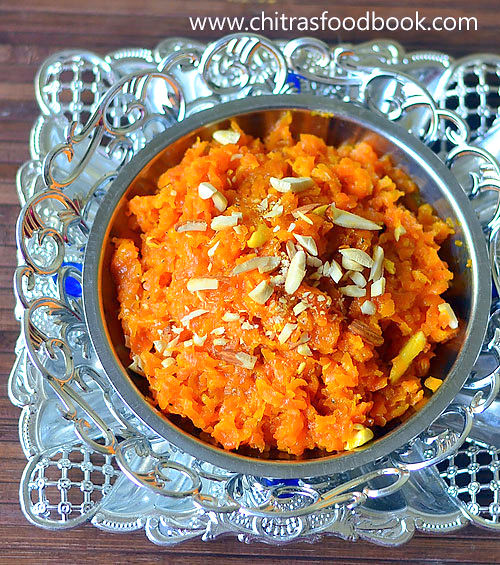
Carrot halwa recipe with step by step photo and a video !
Carrot halwa (Gajar Ka halwa In Hindi) is one of the most popular Indian desserts that is loved by all. Long back I had shared “How to prepare carrot halwa in pressure cooker”. That’s my go-to recipe for making easy and quick carrot halwa. Yesterday for a change, I prepared this traditional method of making carrot halwa in a kadai by using milk,sugar and ghee. I offered it as prasadam for my Friday Lakshmi Pooja. For making carrot halwa, Delhi carrots are mostly used by North Indians whereas I made it with our South Indian orange carrots(Ooty carrot). Traditionally it is prepared in a big iron kadai but I used my non-stick kadai that suits my Induction stove as I wanted to make a video recipe as well. So there are mild deviations from the perfect traditional ones but this one tastes and looks equally good. I have not used condensed milk ( Milk maid) Or Khoya/ mawa. So the preparation time and cooking time takes a bit longer that pressure cooker version. Still the final result makes you forget all the painHappy .Lets see how to make carrot halwa/ Gajar Halwa at home with step by step photos and video !!


Carrot Halwa Recipe - Gajar Ka Halwa


Carrot Halwa Recipe - Gajar Ka HalwaHow to make carrot halwa - Gajar Halwa Recipe using milk
Cuisine:Indian
Category:Sweet
Serves:Serves 2
Prep time:10 Minutes
Cook time:25 Minutes
Total time:35 Minutes
1 cup - 250ml
  • Carrot - 4 nos OR Grated carrot - 2.5 cups
  • Sugar - 1/2 cup (heaped)
  • Ghee - 3 tbsp
  • Cashews & Almonds/Badam - 5 each ( chopped)
  • Cardamom powder - 1/2 tsp
METHOD

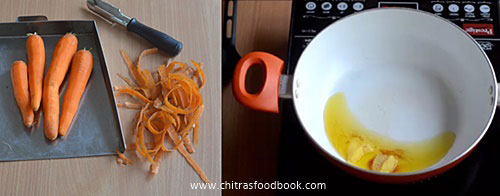
  • Wash and peel the skin of carrots. Grate it using a big sized holes grater.Do not use a small hole grater because halwa turns mushy and the end of cooking.Grate and keep in a plate.

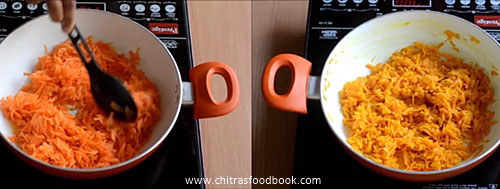
  • In a kadai, heat 2 tbsp ghee and add the grated carrot.Saute well till the raw smell goes off and color of carrot changes to pale orange. It takes nearly 3-5 minutes. 
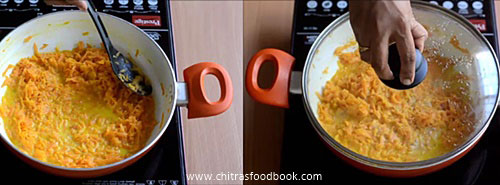
  • Now add 1 cup of milk and mix well.Keep the flame medium and cover the kadai with a lid. Carrots get cooked in milk. Wait till all the milk is absorbed by the milk. Open the kadai every now & then, stir till bottom to avoid burning. Cooking takes nearly 10-15 minutes.
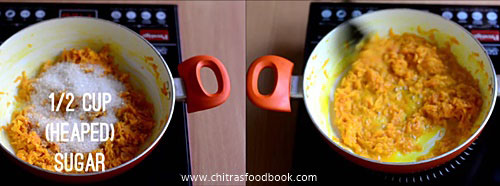
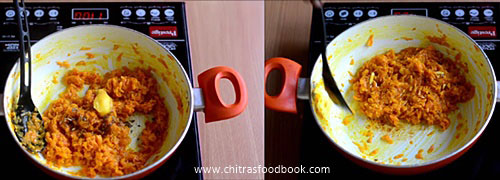
  • Now add 1/2 cup (heaped)sugar and mix well. Sugar melts and mixture will become watery.Check for taste and add 2 tbsp more sugar if needed. Keep the flame medium and keep stirring till 3/4th of the moisture is lost. When the halwa becomes thick and starts to leave the sides of kadai, add cardamom powder, 1tbsp ghee and mix well. When the halwa becomes thick, gathers in the center with very little moisture, remove it and sprinkle chopped nuts. Serve warm with ice cream or cold !
  • ** Do not stir the halwa for long time to become thick & dry because when the halwa cools down, it will become hard & chewy.So remove it when there is very little moisture content. This halwa can be refrigerated and stored for a week.Reheat in a microwave for 1 minute and serve warm if needed.
  • Enjoy !


Note
  • Add more sugar ( 2 tbsp extra) for more sweetness.Sugar can be added any time while cooking carrot halwa.
  • You can use Delhi carrots instead of the regular orange carrot for bright color.
  • Serve warm with your favorite ice cream to enjoy its best taste !
Enjoy this delicious carrot halwa with a scoop of vanilla ice cream. Its a blissful combo !!
Carrot halwa

Coimbatore Annapoorna Hotel Sambar Recipe – Restaurant Style Idli Sambar Recipe

$
0
0
Coimbatore Annapoorna hotel sambar recipe
I make varieties of idli, dosa at least thrice in week. So I keep trying different side dishes, it may be either chutney or sambar. As a result of this, I could share a collection of South Indian style 50 chutney recipes and 30 idli sambar/Tiffin sambar recipes in my blogTongue. In my idli sambar collection, I have already shared few hotel style sambar recipes like Saravana bhavan hotel sambar, Tamilnadu style hotel sambar ( Madurai, Tirunelveli), easy restaurant style sambar, Udupi hotel style sambar and AAB sambar recipes. But my collection won’t be a complete one without some of the most popular idli sambar recipes like Coimbatore Annapoorna Hotel Tiffin sambar and Madras Ratna Cafe Sambar. I have tasted this sambar only once from Hotel Sree Annapoorna Sree Gowri Shankar near Coimbatore Bus stand and that too before marriage. To be frank, I did not remember its taste at allBatting Eyelashes.So I was hesitant to try this sambar recipe from other blogs. Recently my friend Sudha suggested me to try this sambar recipe from Kannamma’s blog.Thank you so much Suguna & Chef Mr.Palanisami for sharing this wonderful recipe with usHappy . After seeing the excellent feedbacks from many readers of Coimbatore, I got the confidence to try it. Just like other hotel sambar recipes, this one also calls for roasting, grinding and adding freshly ground spices.But the ingredients for sambar powder is different. Actually my friend had advised me to use half the quantity of ingredients as the yield of this sambar will be more for a 2-3 members family. So I reduced the quantity of sambar powder ingredients & dal, modified the cooking procedure slightly for ease. As per the original recipe, drumstick is one of the most important ingredients. But I have skipped it as the cost is very high in market ( Yes, Rs.15 per drumstick Worried). Still the sambar came out finger licking goodPeace Sign. Raksha & Sendhil loved it a lot. Friends, do try this yummy hotel style sambar recipe at home (If possible with drumstick). Its one of the best side dish for idli/ mini idli, dosa, pongal and vada. You will love it for sureParty. If you want to make it for rice, you need to add more tamarind and chillies. Ok, Lets see how to make this yummy, Coimbatore special Annapoorna hotel sambar recipe with step by step photos and a video !! Don’t forget to go through the “Points to note” given below.


Annapoorna hotel sambar powder recipe

POINTS TO NOTE
  1. As per the original recipe, the quantity of drumstick should be twice that of toor dal. For this quantity, u should use 1 drumstick. Chop into small finger size pieces.Alternatively, you can use 2 brinjal, 1 medium carrot,1 medium sized potato. But flavor of the sambar may vary.
  2. This Sambar masala needs 12 ingredients. So please keep them ready in a plate before roasting. Roasting the spices perfectly is the key for this sambar.So do not burn them.
  3. According to the original recipe, the quantity of tamarind and jaggery should be equal. But I reduced the jaggery as Sendhil doesn’t like the sweet taste in sambar.
  4. The original recipe called for pressure cooking tomato, onion and drumstick pieces separately for one or two whistles in high flame whereas I cooked them along with the dal by keeping them in a small box inside the cooker. Refer the pics and video for more detail. I did this to reduce the cooking time of sambar.
  5. As a general rule of hotel sambar, it tastes the best when you give more standing time.So if you prepare this sambar for your guest, prepare it 3-4 hours in advance. Reheat it at the time of serving.
  6. The yield of this sambar will be more as it thickens when cools down.So add little water at the end, mix well, check for salt and then serve.
  7. If you want to make this sambar only for 2 people, use half of the quantity of ingredients mentioned.
  8. Adding ghee at the end is a must. It gives awesome flavor to this sambar.
  9. Garnish with coriander leaves without fail.
Annapoorna hotel sambar recipe

Annapoorna Hotel Style Idli Sambar Recipe


Annapoorna Hotel Style Idli Sambar RecipeCoimbatore Annapoorna Hotel Idli Sambar Recipe - One of the best hotel sambar recipes !
Cuisine:South Indian
Category:Side dish for Idli, dosa
Serves:Serves 4
Prep time:10 Minutes
Cook time:20 Minutes
Total time:30 Minutes


INGREDIENTS
1 cup - 250ml
To pressure cook
  • Toor dal - 1/3 cup
  • Water - 2 cups
  • Turmeric powder - 1/4 tsp
  • Cooking oil - Few drops
  • Tomato - 1 no ( Chopped)
  • Big onion - 1 no ( cube cut)
  • Drumstick - 1 no ( Chop into small finger size)
For sambar powder
  • Sesame oil/Gingely oil - 1 tsp
  • Methi seeds - 1/8 tsp
  • Cumin seeds - 1/2 tsp
  • Pepper corns - 5 nos
  • Red chilli - 4 nos ( I used long variety, Guntur chilli can also be used)
  • Coriander seeds/Dhania - 2 tsp
  • Chana dal - 1.5 tbsp
  • Urad dal - 1/2 tbsp
  • Grated coconut or dry coconut - 1.5 tbsp
  • Curry leaves - 6 nos ( 1/2 sprig)
  • Asafetida - 2 big pinches
  • Jaggery - 1 tsp
  • Tamarind - Medium gooseberry size
  • Water – 2 + 1/2 cup ( To boil + grind)
To temper
  • Sesame oil/Gingely oil - 2 tsp
  • Mustard seeds - 1/2 tsp
  • Curry leaves - few
  • Red chilli powder - 1/2 tsp
To garnish
  • Coriander leaves - 2 tbsp ( finely chopped)
  • Ghee - 1 tbsp
METHOD

  • In a cooker base, add toor dal, 2 cups water, 1/4 tsp turmeric powder and few drops of cooking oil. In a small box, add chopped onion, tomato, drumstick pieces or other vegetables if using. Add 1/4 cup water. Keep the box inside the cooker.
    Annapoorna hotel sambar recipe
  • Pressure cook in low flame for 2 whistles. Open the cooker and take the box out. Keep aside.Mash the dal with a whisk or ladle. Set aside.
    Annapoorna hotel sambar recipe
  • In a kadai, heat 1 tsp sesame oil.Roast methi seeds, cumin seeds, chana dal, urad dal, red chilli, pepper corns, dhania and roast till dals turn golden in color. Add pinched tamarind. Saute for a second. Add the curry leaves, hing, grated coconut and jaggery. Saute for 30 seconds. Grind this mixture to a smooth paste adding 1/2 cup water. Slightly coarse paste is also fine.
    Annapoorna hotel sambar recipe
  • In the same kadai, add the ground paste + 2 cups of water.Mix well and boil for few minutes. Add the cooked onion+ tomato + Veggies mixture.Boil for a minute. Add the mashed dal, boil the sambar in medium flame for few minutes.
    Annapoorna hotel sambar recipe
    Annapoorna hotel sambar recipe
  • Heat oil in a kadai and when it gets heated , splutter mustard seeds, curry leaves.SWITCH OFF THE FLAME ! Add red chilli powder, mix well quickly and add this to the boiling sambar. Do not burn the red chilli powder. Boil the sambar for a minute.
  • Last but not the least, add 2 tsp ghee,  chopped coriander leaves and mix well. Serve hot with idli !
  • This sambar becomes thick as it cools down.So add water to adjust the consistency before serving.Check for salt as well.
    Annapoorna hotel sambar recipe
    Annapoorna hotel sambar recipe
Enjoy !

Note
  • Adjust the quantity of red chilli & chilli powder if u want more spicy taste.
  • Do not add more tamarind. Tamarind should be minimum for idli sambar.
  • This sambar becomes thick as it cools down.So add water whenever needed, mix well. Check for salt and serve.
Annapoorna hotel style idli sambar recipe
Enjoy this yummy idli sambar with piping hot idli ! Tastes great Love Struck

Annapoorna hotel style idli sambar recipe

Eggless Chocolate Chip Cookies Recipe

$
0
0
Eggless chocolate chip cookies recipe
Eggless chocolate chip cookies recipe without brown sugar with step by step photos and a video !
Eggless Chocolate chip cookies recipe was in my try list for years. Recently Sendhil bought some chewy chocolate chip cookies from abroad. Even though it was yummy, crispy choco chip cookies are our favoriteLove Struck. It tempted me to try at home. So I was looking for some recipes that yields crispy chocolate chip cookies. Finally I got this eggless chocolate chip cookies recipe without brown sugar from Gayathri’s cook spot. It is Tarla Dalal’s recipe. Gayathri had tried & shared it with her own tips. So this recipe was a double assurance for me. I baked this egg free chocolate chip cookies for Raksha’s evening snacks yesterday. It came out crispy, buttery and tasted great as I expected. I passed on few cookies to Raksha’s friends in my apartment. All the kids gave a big thumbs up. What else I need to share this recipe in my blog Winking.Friends, do try this easy eggless chocolate chip cookies for your kids. It can be served as a breakfast along with a glass of milk or as an after school snack in the evening. These cookies can also be served for kids birthday parties and get together. In that case, cookie dough can be made in advanced and refrigerated till use. It can be thawed and baked at anytime. Lets see how to make eggless chocolate chip cookies with step by step photo and a video !


Eggless chocolate chip cookies

Eggless Chocolate chip cookies recipe


Eggless Chocolate chip cookies recipeHow to make crispy chocolate chip cookies recipe with step by step photo and video !
Cuisine:Indian
Category:Cookies recipes
Serves:16 nos
Prep time:10 Minutes
Cook time:15 Minutes
Total time:25 Minutes
1 cup - 250ml
  • Maida/All purpose flour - 1 cup
  • Baking powder - 1 tsp
  • Baking soda - 1/2 tsp
  • Powdered Sugar - 1/2 cup
  • Softened butter - 1/3 cup ( at room temperature)
  • Vanilla essence - 1/2 tsp
  • Choco chips - 1/4 cup
  • Milk - 1 tbsp
METHOD

  • Powder 1/2 cup of sugar. You get 1/2 cup + 1.5 tbsp powdered sugar.Measure 1/2 cup from it and keep it aside.
    Eggless chocolate chip cookies recipe
  • Measure 1/3 cup of soft butter at room temperature. It should not be melted. Just soft.
    Eggless chocolate chip cookies recipe
  • In a wide bowl, sieve maida, baking powder and baking soda. Set aside.
    Eggless chocolate chip cookies recipe
  • In another bowl, take the butter and sugar. Whisk it well for 5 minutes to make it creamy. To this, add boiled milk at room temperature and vanilla essence. Again beat it. 
    Eggless chocolate chip cookies recipe
  • Add in the sieved maida mixture to the creamy butter mixture. Add choco chips and mix well with your hands to make a non-sticky dough.
    Eggless chocolate chip cookies recipe
  • Scoop a tbsp of dough and make balls. Arrange them in a butter paper lined baking tray. Place 2 inch gap between each balls giving room to flatten while baking. Slightly flatten the balls. No problem if there are mild cracks. Just seal it with your fingers.Keep the remaining dough covered till use.
    Eggless chocolate chip cookies recipe
  • Preheat the oven in convection mode at 180c and bake the cookies for 15 - 17 minutes. Cookies expand and cracks while baking. When the sides of cookies turn slightly golden, remove the cookies and let them cool down completely.Please check the “Note” section below on how to check the cookies for doneness. These cookies would be soft when hot and turns crispy when cool down.So be patient !
    Eggless chocolate chip cookies recipe
Enjoy these crispy, buttery chocolate chip cookies with milk !

Note
  • If you want more sweetness in cookies, u can add a tbsp more of powdered sugar.For us, it was just right.
  • Add more vanilla essence for more flavor.
  • If the cookie is under baked, it tastes chewy and soft. 
  • Do not over bake the cookies. It will turn hard. Keep an eye after 12 minutes. Touch the cookies in the oven carefully. If its too soft, bake for another 2 minutes. Now try to move the cookie from its place, if they still stick to the butter paper, bake for another 2-3 minutes. If it moves easily and the top of cookie is not so soft, you can remove the cookie from the tray and let it cool to become crispy

Try this easy to make, eggless chocolate chip cookies at home and enjoy with your family !
Eggless chocolate chip cookies

Potato Poori – Aloo ki Puri – Aloo Poori Recipe

$
0
0
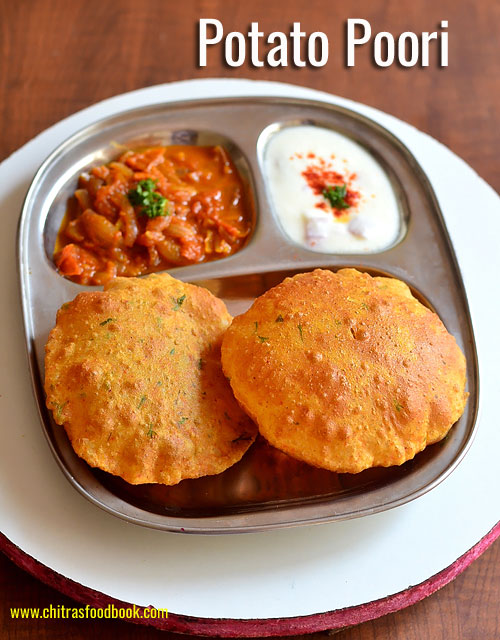
Potato poori
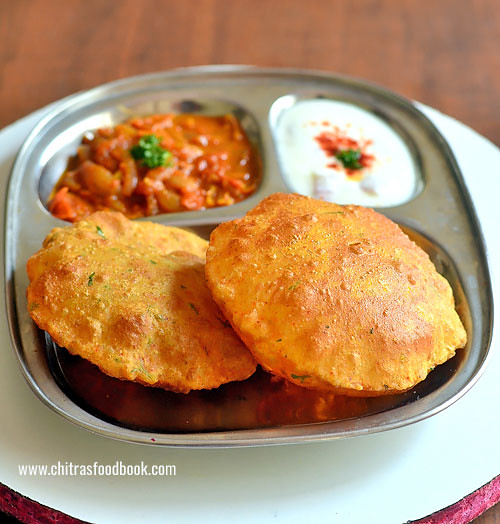
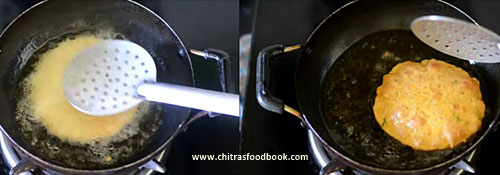
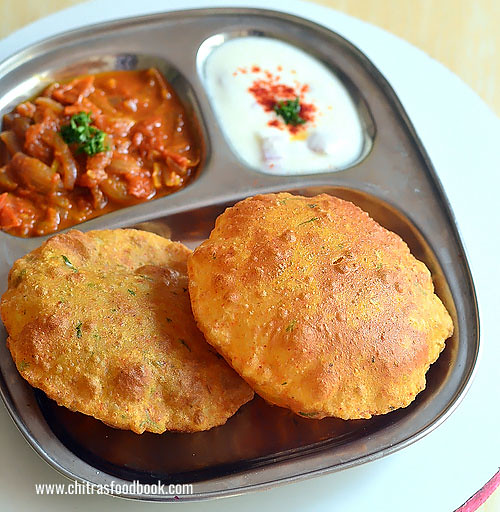
Poori would be our Sunday breakfast mostly. So I started exploring varieties of poori for a change. I have already shared Palak Poori, Masala poori, Beetroot poori, Tomato poori, chola poori recipes. This Sunday I tried potato poori ( Aloo ki poori in Hindi) for the first time. I made the poori dough by mixing wheat flour with boiled, mashed potato and spice powders. Poori came out super soft with awesome masala flavor. It stays soft for hours together.So it can be packed for lunch box and ideal for travel as well. Side dish is not required for this puri recipe. Still I served it with tomato sabji and onion raita. Mixed veg kurma also goes well I guess.We loved it a lot. Its a winner recipe in my house. Do try this potato poori recipe for your kids and family. They will love it very muchHappy. Next I am planning to make methi poori and mint poori. Friends, If you know any other interesting poori varieties, do share them in the comments section. I will make it HappyAs I say in all my poori posts, thickness of poori while rolling and the proper temperature(heat) of oil is the secret to get nicely puffed up poori. I have shared those points below in detail. If you are a beginner, It will sure come by practice. Ok, Lets see how to make Aloo Poori recipe with step by step photos and a video !


Aloo ki puri recipe

Potato Poori - Aloo Ki Poori Recipe


Potato Poori - Aloo Ki Poori RecipeHow to make aloo ki puri / Potato poori recipe with step by step photos and video
Cuisine:North Indian
Category:Breakfast
Yields :12 nos
Prep time:10 Minutes
Cook time:2 Minutes
Total time:12 Minutes
1 cup - 250ml
  • Whole Wheat flour / atta - 1 cup ( I used Aashirvad)
  • Medium sized potato - 2 nos
  • Cumin seeds or Ajwain - 1/4 tsp
  • Red chilli powder - 1 tsp ( I used Kashmiri chilli powder)
  • Dhania powder - 1 tsp
  • Garam masala powder - 1/2 tsp
  • Coriander leaves - 2 tbsp ( finely chopped)
  • Crushed kasoori methi – 1 tsp
  • Salt - as needed
  • Water - as required ( I added 1/3 cup)
METHOD

  • Wash and pressure cook potato in required water in very low flame for 2 whistles.Open the cooker and remove the potato. Peel the skin. Place the potato in a wide plate or bowl and mash it.
  • To the mashed potato, add turmeric powder, red chilli powder, dhania powder, cumin seeds, garam masala powder, salt, finely chopped coriander leaves, crushed kasoori methi, wheat flour and mix well without adding water.
    Aloo ki puri
  • Add wheat flour and mix well without adding water.
    Aloo ki puri
  • Now add water little by little and make a smooth, non-sticky dough. No need to rest the dough. Roll immediately. Grease your hands with oil. Take a portion of dough.Knead for a minute. Make balls roughly. Keep the remaining dough closed till use. Take one ball, roll it well and flatten it. Dust in wheat flour once and roll the poori slightly thick. Make sure corners are thick. Remember it should not be rolled too thin like roti. It won’t puff up.
  • Roll all the poori and arrange in a plate without overlapping each other.
    Aloo ki puri
  • Heat oil in a kadai and when it gets heated , put a pinch of dough. If it rises immediately to the top, oil temperature is right. It should not be smoky. Pat the excess flour in the poori and drop one in the oil. Let it rise to the top.
    Aloo ki puri
  • When it comes to top, pat it gently with the ladle. It will puff up nicely. Flip it after the bubbles cease.Cook the other side too.Press with the ladle for uniform cooking. Drain in a tissue paper and serve hot with raita or any sabji. Do not make any side dish with potato. U can make tomato sabji or mixed veg kurma for this poori.
    Aloo poori recipe
Enjoy !

Note
  • Poori gets puffed up only if its rolled thick evenly and properly. Oil temperature should be perfect. If its rolled thin, it comes like a papad. If the oil temperature is less, poori absorbs lot of oil and it won’t puff up.
  • At the same time, oil should not be smoking hot. Poori will become dark golden. So after you deep fry one poori, reduce the flame completely low. After dropping the next poori, increase the flame to high. By doing this way, heat of the oil can be maintained. If oil becomes smoky hot, switch off the stove for sometime. When the oil comes to right temperature, deep fry again.
  • As I have added Kashmiri red chilli powder, color of my poori was red. If you like white colored poori, add finely chopped green chilli instead of red chilli powder.
  • Do not rest the dough for long time. Poori may drink oil while frying.Try to make puri as soon as u make the dough.
  • No side dish is required for this poori. If you want to make it , mixed veg kurma and tomato onion sabji would be some good options.
Enjoy this soft, masala flavored Potato Poori at home with raita and sabji !
Aloo ki puri

Crispy Corn Cheese Balls Recipe – Party Snacks Recipes

$
0
0
Corn cheese balls recipe
Long back I have shared a recipe for Masala corn cheese balls in which all the spice powders, ginger-garlic paste are used. Its purely of our Indian style with all the masala flavor in it. Its made without potato. Cheese and sweet corn are the major ingredients.I used to make it for my guest and kids parties at home. Recently I came across this video of Corn cheese balls with Oregano & chilli flakes. I got tempted and tried it last Sunday for evening snacks. I followed my Aloo patties( Burger) recipe technique, coated the balls twice in maida paste and bread crumbs to get super crispy exterior. It came out very well. Use Panko crumbs for best result. Raksha liked it very much but she wanted the Indian masala flavor instead of Oregano. Then I made few balls adding garam masala powderWinking.Overall this recipe is a big hit in home. Friends, do try this recipe either with Indian masala or Italian seasoning based on your kids liking. Follow the same procedure and make this yummy, crispy corn cheese balls to celebrate kids birthday party, get together, kitty parties to serve as a starter. The dough can be made in advanced and refrigerated till use. All the kids would easily fall for this cheesy snackLove Struck. For variations, these balls can be made like nuggets. Ok, Lets see how to make this easy corn cheese balls with step by step photos, tips and tricks and a video !
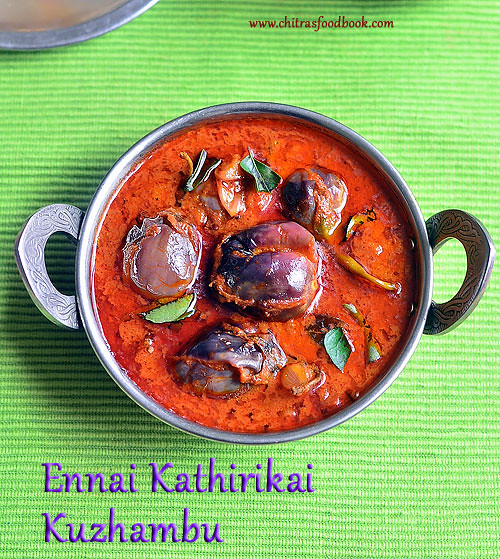
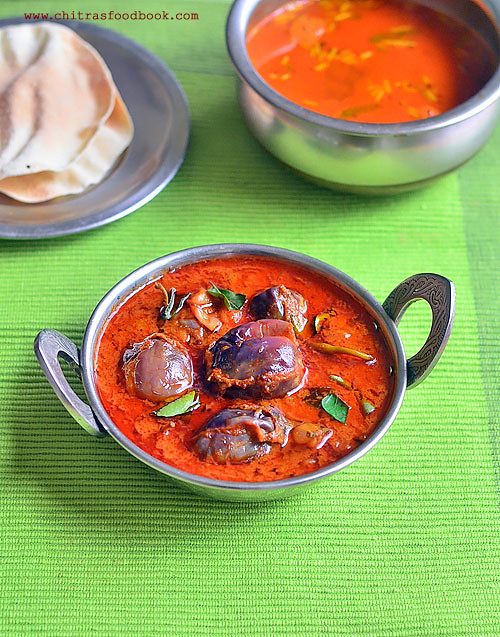


Corn cheese balls recipe

Corn cheese balls Recipe


Corn cheese balls RecipeCorn cheese balls recipe - Indian party snacks recipe
Cuisine:Indian
Category:Snacks
Serves: 10 nos
Prep time:20 Minutes
Cook time:10 Minutes
Total time:30 Minutes
1 cup - 250ml
  • Sweet corn - 1/2 cup
  • Grated cheese - 3/4 cup ( I used Mozzarella cheese)
  • Boiled potato - 1 no ( Medium sized)
  • Corn flour – 1 tbsp
  • Red chilli flakes - 1 tsp or red chilli powder
  • Pepper powder - 1/2 tsp
  • Oregano - 1 tsp OR Garam masala powder
  • Garlic paste – 1/2 tsp ( optional)
  • Salt - as needed
  • Cooking oil - to deep fry
For outer covering
  • Maida / all purpose flour - 2 tbsp
  • Water - 1/4 cup ( to make paste)
  • Bread crumbs - 1 cup
METHOD

  • Pressure cook sweet corn and potato adding required water in low flame for 2 whistles. Remove the corn kernels by scraping with a knife. Refer video for more detail. Grind the corn kernels coarsely without adding water.
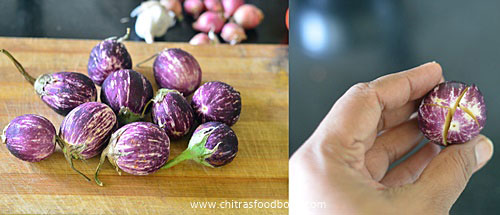
  • To make homemade breadcrumbs, remove the sides of bread and grind to a fine powder. But use it immediately. Do not store it.
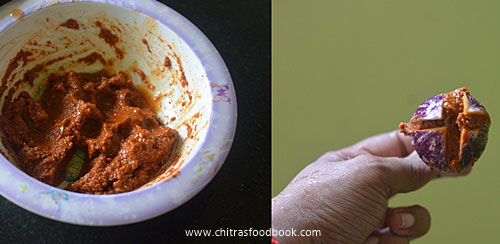
    Corn cheese balls
    Corn cheese balls recipe
  • Peel the skin of potato. Grate cheese, measure 3/4 cup and keep aside.

    Corn cheese balls recipe
  • In a bowl, take the boiled potato, ground sweet corn, grated cheese, chilli flakes, oregano, pepper powder, corn flour and required salt. Mix well and make a smooth dough.
    Corn cheese balls recipe
  • Take 2 tbsp maida in a deep plate or bowl and add 1/4 cup water. Mix well without lumps. Take the bread crumbs and spread in a plate.
    Corn cheese balls recipe
  • Make small balls out of the dough. Alternatively you can stuff in a small cube of cheese inside the balls. You can try this for kids who want extra cheese. I recommend  Amul mozzarella cheese for best results.
    Corn cheese balls recipe
  • Dip the ball in maida paste. Then coat in bread crumbs. Again dip the ball in maida paste and roll in bread crumbs. Yes, do it twice. This helps to get super crispy exterior. Use Panko crumbs for perfect crispiness Or you can use powdered cornflakes.
    Corn cheese balls recipe
  • I did not refrigerate or freeze the dough. If you wish, you can refrigerate the balls for 30 minutes by covering with a cling wrap. This helps to prevent the cheese from oozing out while deep frying.
    Corn cheese balls recipe
  • Heat oil in a kadai and when it gets heated , put the balls and deep fry them. Keep turning and cook in medium flame till balls turn golden in color. Do not fry for long time. Cheese will ooze out. So remove it when the balls turn golden. Do not wait for bubbles to cease completely.
    Corn cheese balls recipe
Enjoy !

Note
  • Grinding corn kernels is optional. If you like whole sweet corn, add it without grinding.
  • You can use rice flour instead of corn flour.
  • Use cheddar or parmesan cheese instead of mozzarella.
  • You can dip in milk instead of maida paste.
  • Dipping in maida paste and bread crumbs twice is a must to get super crispy exterior. Try it.
  • Instead of bread crumbs, you can use powdered corn flakes.
  • Skip oregano, chilli flakes and use red chilli powder and garam masala powder if you want Indian masala flavor.
Yummy, crispy corn cheese balls are ready to relish with tomato ketchup !!
Viewing all 968 articles
Browse latest View live