Quantcast
Channel: Chitra's Food Book
Viewing all 967 articles
Browse latest View live

Kids Birthday Party Menu List Indian – Party Food Items List

$
0
0
List of birthday party menu for kids / vegetarian food items list for Indian kids birthday party– Organizing Children’s birthday party is really a challenging task for parents. Some people love to conduct an elaborate dinner or lunch party and some prefer to make a simple tea party by just providing cake and snacks based on their budget. Most of the people wish to keep the party in the evening or in the afternoon if its a weekend. Since its a kids party, many people stick to vegetarian menu if they have a mix of vegetarian and non-vegetarian guests. Be it a simple snacks party or an elaborate dinner/lunch party, choosing the cake, planning the menu, decoration of home/ party hall and arrangements would be tough for many especially beginners.

Birthday party menu food items list Indian  
So I have tried my best to help you choose the party menu. Birthday party food items should be attractive, kids friendly and healthy at least to some extentHappy . Not just for kids, menu should be appealing to adults as well. Long back I had shared a simple kids birthday party menu idea after getting inspired from one of my friend’s party. After I made that post, I too got the confidence and started conducting simple birthday party at home for Raksha’s birthday. I got many mails from my readers to post more related to this topic. So today I have come up with the list of kids friendly, birthday party menu items list for Indian kids to help parents like me. I have also linked the recipes for reference. Its purely a vegetarian menu but you can find both South Indian & North Indian recipes. Non-vegetarians, please excuse me. You can get some ideas from this list and make fries, gravies, biryani with chicken, mutton and egg. I took the help of my friend Shalini to frame this list. As we live in apartments, we have the chance of attending many parties. Shalini is in US now. Being in abroad, her friends conduct some potluck, get together and parties during weekends to meet people and build relationships. So she could help me well with her own ideas. I have also got some menu ideas from my school moms friends. With the help of this list, you can decide the party menu based on your budget. You can cook the food on your own or buy from outside/ restaurants.You can also opt to make Jain food without using onion and garlic.
All these pictures shared in this post are the ones I collected for yearsHappy. The picture given below is the simple decoration I made at home for Raksha’s birthday party.

Birthday party decoration ideas

I have categorized this list as Starters/Appetizers, Main course, Dessert, Drinks & Beverages that are suitable and loved by kids from 3 to 10 years. Basically kids love to have foods based on tomato, paneer, sweet corn, cauliflower, baby corn, bread, cheese and fruits. So I have given most of the dishes using these ingredients. These recipes would be surely a winner among the kids. Friends, do make your own permutations and combinations according to your kids preferences and frame the party menu. Hope you all find this list useful. Do leave a few words in the comment section and help me with your suggestions for more recipes and a few words of appreciation to motivate me if you find this post helpful Happy. Ok, lets move on to the list of birthday party menu ideas ! Friends, do help me by sharing your thoughts and more recipes to include in this list.


Birthday party menu

In the above picture, you can find a sample of simple snacks party and the lunch party menu. If you are inviting kids without parents, you can give a simple party by giving a drink, starter/snacks, cake and a dessert. Finger foods is the best option for kids below 10 years. Skip the main course. To make it even more simple, you can just finish it with cake & samosa or veg puffs.  If you are inviting adults/parents, then you can go for wider options. Birthday party should be more of fun, hassle free and memorable. So you can arrange for small games, magic shows, music, dance to make the party more interesting Happy.

Do refer my Simple birthday menu post to get some ideas on how to conduct the party & gifting for kids. I have also shared a sample menu at the end of this post to get some idea.

Drinks/ Beverages/Welcome Drinks

Starter/Appetizer/ Snacks

Main course

Salad

  • Sweet corn salad
  • Mixed Fruit salad
  • Kosambari
  • Vegetables with dip/ hummus
  • Fruits on skewers

Dessert

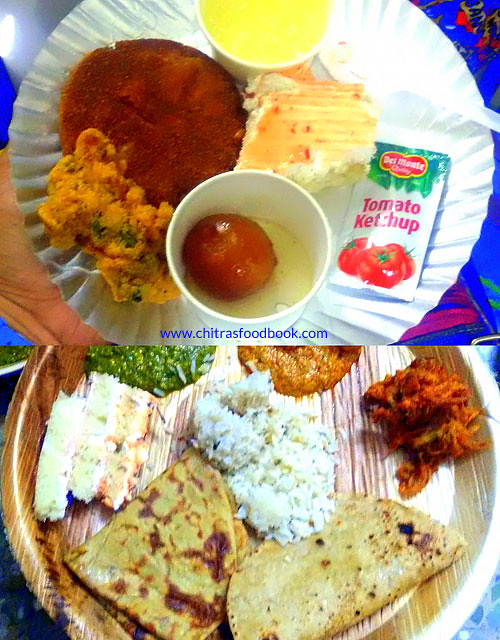
Sample menu for simple birthday party

  • Orange juice
  • A slice of Birthday cake
  • Mini samosa with ketchup or Veg puffs or cashew pakoda
  • Gulab Jamun

Sample menu for Dinner or Lunch party buffet

  • Any aerated drink or Fruit punch for welcome drink
  • Tomato soup/Sweet corn soup
  • French fries or aloo tikki or kabab with tomato sauce/green chutney
  • Gobi manchurian
  • Roti / Naan / Kulcha
  • Paneer butter masala or Mixed veg gravy
  • Dal tadka
  • Dum aloo or baby potato gravy
  • Veg Dum Biryani with raita
  • Plain rice, rasam, fryums
  • Curd and pickle
  • Gulab jamun
  • Carrot halwa
  • Ice cream
  • Fruit salad
  • Paan/ Beeda

POINTS TO NOTE

  • Pastry cakes are better than the old fashioned cream cakes. So choose the cake accordingly. Kids love to have it chilled.
  • Make less spicy food as you are cooking for kids. Parents will adjust/ compensate about the taste.
  • Kids prefer deep fried foods for starters. Gobi 65 or manchurian is the best choice.
  • They love the food more if its cheese, paneer and potato based.
  • Kids love to have poori more than roti.
  • Most of the kids love paneer butter masala and potato, peas kurma more than mixed vegetable kurma.
  • Always keep some plain rice, dal and rasam to tackle fussy kids.
  • If you arrange for dinner party, make some idli too.
  • Its always better to avoid aerated drinks like pepsi, 7up etc. You can give some fruit juices instead. No problem even if its store bought.
  • Gulab jamun would be the best dessert for Kids. No kid would say NO.
  • Ice cream is also a must for kids Happy.
  • Keep some hot water ready. Many kids are allergic to cold stuffs like ice cream , chocolate and cakes. So you can tell the parents to give them hot water to prevent from cold, fever. I am sure this tip works.
  • Finally, do not force your kids to eat everything provided in the menu. Most of the kids would love to eat the cake, starter and dessert. Do not worry about it. Parents can feed them later at their house if needed.
Hope this list helps you to decide the menu quickly. Thanks for visiting this page !


10 Poori Recipes / Stuffed Puri Varieties–Different Types Of Puri Recipe

$
0
0
Poori varieties - puri recipes
Collection of 10 different puri recipes / stuffed poori varieties – Indian deep fried bread. I make Poori recipe / Puri recipe for breakfast regularly during weekends. When I was a beginner in cooking, making a puffy poori just like hotel ones was my dream. Slowly my dream came true by practiceDancing. After making several attempts, I got to know the technique, tips and tricks for making puffy and soft puri.In this post, I have shared all the possible tips & tricks to make perfect poori based on my observation. Hope these points would be useful for beginners. Once I started making it perfect, I got tempted to try different types of puri recipes. So I prepared varieties of poori along with different side dish recipes for our Sunday breakfast and blogged the same. This is how I got a collection of these 10 poori varieties in my websiteHappy. You can find basic poori/puri recipe with wheat flour(atta in Hindi), Chola poori/Maida puri, Tomato poori, Paneer stuffed puri, Spinach/ Palak pooriBeetroot poori, Potato poori, Kutta atta puri, Spicy masala puri, Finger millet/Ragi poori in this collection. I have given step by step pictures for all these recipes and few video recipes as well.

I am yet to try North Indian stuffed puri recipes like urad dal puri, peas stuffed puri, dal poori, bharva puri, bhatura and the most popular Pani puri recipe and puri recipes for vrat/fasting like rajgira puri and Shingare ki puri. I will try to add them in this list soon. Generally Kids love to eat poori more than roti. So you can try these varieties at home for their breakfast or evening snacks and make it healthy with some stuffing.  Ok, lets see the collection of 10 poori recipes / Puri recipes / Indian flat bread varieties to make at home for weekend breakfast & special occasions. Please click on the images to view the recipe.


Basic poori recipe/Puffy Puri recipe with video
Chola Poori Recipe
Potato Recipe/Aloo Puri with video
Paneer Puri Recipe With Video
Ragi Poori Recipe
Palak Poori Recipe
Beetroot Poori Recipe
Kuttu atta Poori Recipe
Tomato Poori Recipe
Masala Poori Recipe With Video

Tomato Rava Upma – Rava Upma Recipe With Tomato–How To Make Tomato Upma

$
0
0
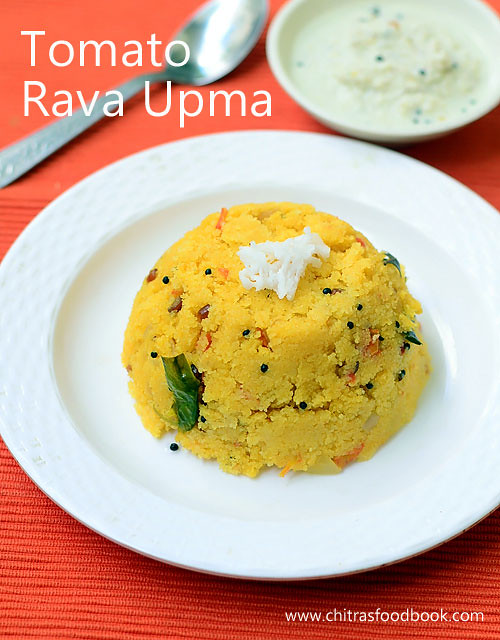
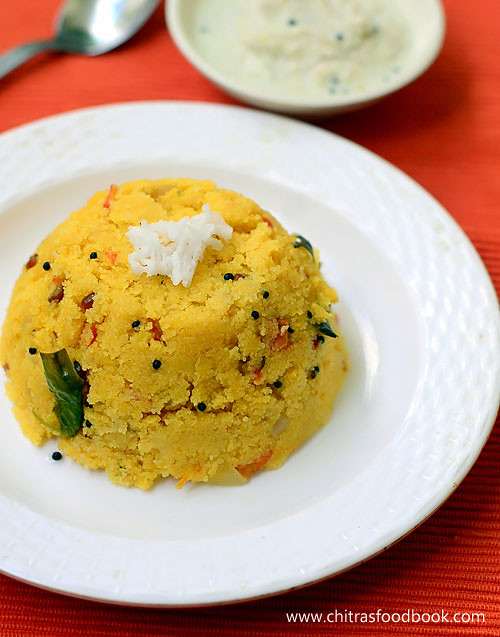
Tomato rava upma recipe / Rava upma with tomatowith step by step pictures - Tomato rava upma is an yummy, instant, South Indian breakfast recipe with a nice variation from our regular rava upma. Usually I add tomato and vegetables only for rava kichadi but this morning I prepared rava upma with tomato just for a change. Basically I am a big fan of tomato based recipes. Even though I don’t like rava upma, I loved this tomato rava upma a lot. It tastes tangy and spicy as well just like rava kichadi. If you wish you can add green peas in this upma to make it look colorful.
Tomato rava upma
I had some leftover upma for my dinner too. It was good and stayed soft. So you can pack it for lunch box as well. Friends, If you are bored of making rava upma, do try this tomato upma for your breakfast or dinner. It tastes good with coconut chutney as side dish. Try and let me know your feedback Happy .My School moms friends make Karnataka style tomato rava bath. I will ask them and share that recipe later. Now lets see how to make this Tamil nadu style tomato upma recipe with step by step photos.

Do check out my Basic Rava Upma,Rava kichadi, Masala Rava Kichadi,rava upma mix, rava pongal, Karnataka Khara bath recipes too !

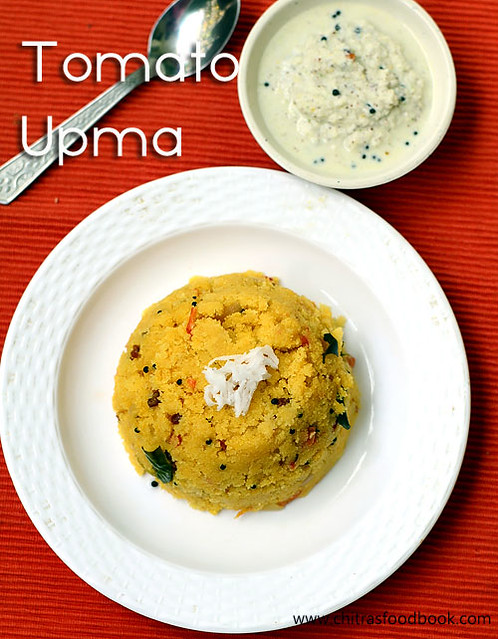
Tomato upma recipe

Tomato rava upma - Tomato upma recipe

Tomato rava upma

How to make Tomato rava upma recipe

South Indian
Main Course
2-3

Ingredients (1 cup - 250ml)

  • Coarse rava/Sooji/Semolina - 1 cup
  • Cooking oil - 3 tbsp
  • Mustard seeds - 1 tsp
  • Urad dal - 1/2 tbsp
  • Chana dal - 1 tbsp
  • Ginger - 1/2 inch piece (Finely chopped)
  • Green chilli - 2 nos(Slit)
  • Big onion - 1 no (Finely chopped)
  • Curry leaves - Few
  • Ripe tomato - 2 nos(Finely chopped)
  • Sambar powder or Red chilli powder - 1 tsp
  • Turmeric powder - 1/8 tsp
  • Salt - as needed
  • Water - 2.5 cups
  • Coconut oil - 1 tbsp (to add at the end)
  • Coriander leaves - 1.5 tbsp(to garnish)
  • Grated coconut - 2 tbsp (to garnish, optional)

How to make the recipe

  1. Wash and chop tomato, onion into small pieces.
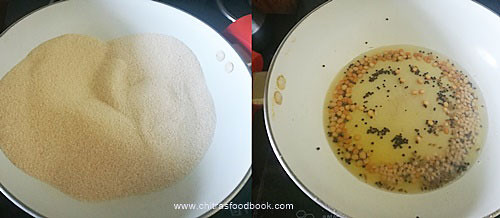
  2. Roast rava till nice aroma arises.
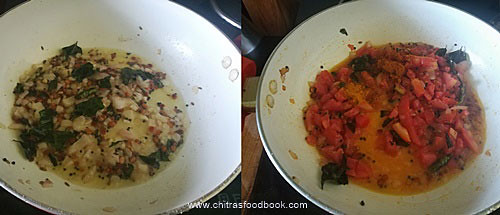
  3. Heat oil, Temper mustard, dals.Saute the vegetables adding salt.
  4. After tomato becomes mushy, add spice powders.
  5. Mix well and add water. After water comes to boil, add rava.
  6. Mix well, cover cook for 5 minutes.
  7. Add coconut oil.Garnish with coriander leaves and serve with coconut chutney.

Tomato Rava Upma Recipe - Step by step photos

  • Wash and chop the tomato, onion, chilli.Set aside.Dry roast rava for 7 minutes in medium flame without burning it.Keep in a plate.
  • Heat oil in a kadai.Splutter mustard seeds, urad dal, chana dal and curry leaves. After it turns golden, add finely chopped onion and slit green chilli.
    Tomato rava upma recipe
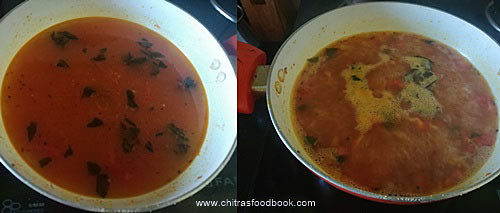
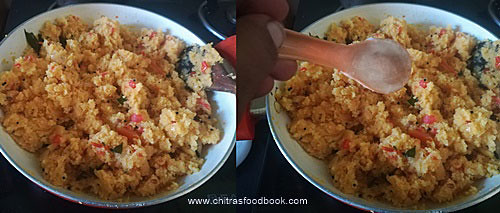
  • After onion becomes transparent, add finely chopped tomato.Saute till tomato becomes mushy. Add salt to cook tomato quickly.
    Tomato rava upma recipe
  • Add red chilli powder or sambar powder and turmeric powder. Mix well till raw smell goes off.Add water and let it roll boil.
     Tomato rava upma recipe
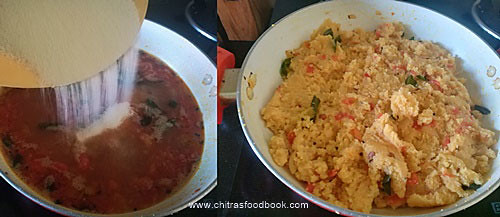
  • Lower the flame completely.Add the roasted rava in a sprinkled way using one hand while stirring constantly with other hand. It helps to avoid lumps.Once all the rava is added, it absorbs the water and becomes thick. Cover it with a lid and cook for 5 minutes in low flame.Mix once in the middle.
    Tomato rava upma recipe
  • Switch off the flame after rava is cooked soft. Add coconut oil. Garnish with coriander leaves.Mix well and serve hot with coconut chutney!
    Tomato rava upma recipe

Notes

  • Adjust the quantity of chillies as per your taste.
  • For variations, you can add 1/2 tsp garam masala powder for masala flavor.
  • Remember to add rava in a sprinkled way to avoid lumps.
  • No need to add more water. Adding more water makes it kichadi.
  • You can use wheat rava instead of semolina and make the same. But add 3 cups of water.
  • Color of this upma varies as per the chilli powder you use. Use Kashmiri chilli powder for bright red color.
Tomato rava upma tastes the best with coconut chutney. Do give a try !

Tomato rava upma recipe

Parangikai Puli Kuzhambu – Pumpkin Vatha Kuzhambu Recipe

$
0
0
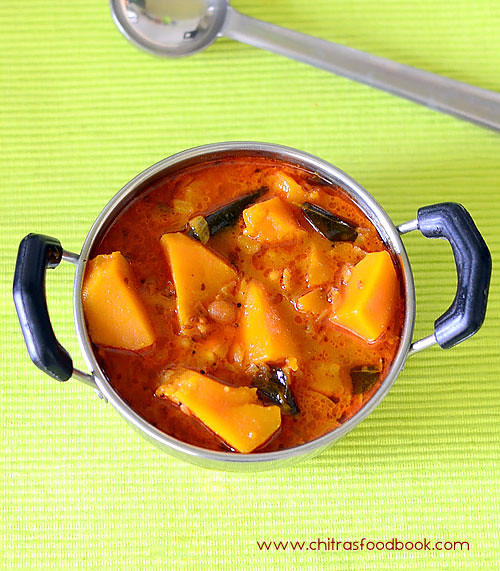
Parangikai puli kulambu/ Manjal poosanikai kuzhambu/ Yellow Pumpkin Vatha kuzhambu is a yummy South Indian kuzhambu recipe I learnt from my MIL. Whenever my MIL visits my place, I try to learn some new & traditional dish from her. When we were discussing about yellow pumpkin recipes, she suggested me to make this vatha kuzhambu adding pumpkin(Parangikai/Manjal poosanikai in Tamil). She also told me as easy method of doing this kulambu directly in a pressure cooker. I found it interesting and tried it for our lunch on the same day.
Parangikai vatha kuzhambu
I prepared this gravy along with mixed vegetable kootu as side dish. It was a nice combination. Everybody loved its taste. As we are doing in a pressure cooker directly, time taken to cook this gravy is just 15 minutes. So bachelors and working women can  The taste of pumpkin gives a natural sweetness to the gravy. So we don’t have to add jaggery to this puli kuzhambu unlike other vatha kuzhambu recipes. You can make this gravy thick or thin as you wish. It tastes good either ways. Adding Homemade sambar powder or Vatha kuzhambu powder gives the best taste. I don’t think you can make this puli kuzhambu with white pumpkin because it absorbs all the tanginess of the gravy. So friends, do try this yummy, easy, no grind parangikai puli kuzhambu and share your feedback with me. Lets see how to make Parangikai puli kuzhambu/Pumpkin vatha kuzhambu with step by step pictures.

Do check out my 40+ South Indian Kuzhambu recipes, Pumpkin gravy/Parangikai chutney for rice, Pumpkin sambar.

Parangikai puli kulambu

Parangikai Puli Kuzhambu Recipe

Parangikai Puli Kuzhambu Recipe

How to make Parangikai Puli Kuzhambu Recipe

South Indian
Main Course
3-4

Ingredients (1 cup - 250ml)

  • Yellow pumpkin/Parangikai- 12 cubes
  • Small onion or Big onion - 12 nos/1 no
  • Garlic cloves - 12 nos
  • Tamarind - Big gooseberry size
  • Sambar powder - 1 tbsp
  • Turmeric powder - 1/4 tsp
  • Curry leaves - Few(Finely chopped)
  • Cooking oil or Sesame oil - 2 tbsp
  • Mustard seeds - 1/2 tsp
  • Urad dal - 1 tsp
  • Toor dal - 1.5 tsp
  • Cumin seeds - 1/2 tsp
  • Methi seeds - 1/8 tsp
  • Salt - as needed
  • Water - as needed

How to make the recipe

  1. Wash and chop pumpkin into big cubes.
  2. Heat oil in a cooker base.
  3. Temper mustard, dals.Saute the onion,garlic,curry leaves adding salt.
  4. Add tamarind extract, spice powders and pumpkin cubes.
  5. Pressure cook for 2 whistles in low flame.
  6. Remove and boil if needed.Serve hot with rice.

Parangikai Puli Kuzhambu - Step by step photos

  • Wash and chop pumpkin into big cubes as shown the picture below.Finely chop 2 small onions or quarter big onion and 2 garlic cloves, curry leaves and set aside.
  • Heat oil in a cooker base.Splutter mustard seeds, methi seeds,urad dal, toor dal, cumin seeds, finely chopped onion, garlic and curry leaves. After it turns golden, add the remaining onion and whole garlic cloves. Saute till onion becomes transparent.
    Tomato rava upma recipe
  • Add 1 cup of tamarind extract, turmeric powder, sambar powder and salt.Then add pumpkin cubes.
    Parangikai puli kuzhambu
  • Pressure cook for 2 whistles in low flame. Remove after the steam is released. Boil the gravy if thin and watery else mix well and serve with rice.
    Parangikai puli kuzhambu

Notes

  • Adjust the quantity of sambar powder as per the tanginess of tamarind.
  • For variations, you can add 1tbsp red chilli powder and 1tbsp coriander powder instead of sambar powder.
  • No need to use jaggery
  • As we are cooking directly in a pressure cooker, we don't need to add more water.
  • Chop pumpkin into big cubes else it will get mashed in the gravy.
I served Parangikai puli kulambu with mixed veg kootu and koozh vadam !

Pumpkin vatha kuzhambu

Navratri Recipes For 9 Days– South Indian & North Indian Prasadam Recipes

$
0
0
South Indian, North IndianNavratri Recipes for 9 days golu at home . In this post, I have framed a list of Navarathri prasadam recipes of Tamil nadu, Andhra and North India for nine days as per my readers request. Last year I made a detailed post on how to keep golu at home. At that time, many of my readers asked me to make a post on Navratri naivedyam recipes list. So today I have come up with the list of prasad recipes like rice varieties, sweets, sundal recipes/snacks based on South Indian and North Indian Navratri festival. Hope this post will be helpful to you all.

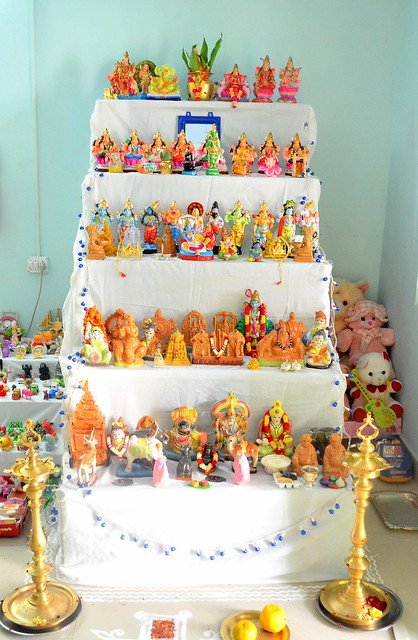
Here is the picture of our last year’s Golu!

Navratri recipes for 9 days golu at home


Do refer my Navaratri recipes collection for more ideas.

TAMIL NADU RECIPES FOR NAVARATHRI

In Tamil nadu, people worship Goddess Durga for the first three days, Goddess Lakshmi for the second three days and Goddess Saraswathi for the last 3 days. People used to offer some sweets and sundal recipes for God in front of Golu. Even though navarathri is a 9 days festival, the day that comes before Navarathri i.e Amavasya and the day after Navratri where we celebrate the victory of good over evil as Vijayadasami, comes to 11 days. Married ladies & young girls are invited to home and we give thaamboolam along with a sundal variety or sweet as Golu prasadham. We usually keep the golu on Pradhamai day evening. So we offer sweet pongal/sakkarai pongal and chana sundal/kondakadalai sundal for neivedyam and we offer some fruits, rock candy on Vijayadasami day.

I have shared this table of naivedyam recipes by referring Nataraja Deekshithar’s blog post. He had given a clear explanation about Navaratri celebration in temples and its importance. He has also mentioned the list of flowers, leaves, kolam, fruits, Neivedyam and Raaga to be used for Navratri 9 days. I took the neivedyam recipes, added 2 more recipes for each day morning & evening neivedyam and framed this table. I have given different sweet recipes, rice variety and sundal recipes for 9 days. You can alter the sweets and sundal varieties based on your liking. But the rice variety given here is as per the tradition according to Deekshithar’s post. So you can follow the same. I have linked all the recipes to my post. You can click on that to view the respective ones. I am yet to post few sundal recipes in this list. I will do it this week.  I hope this table would be useful for people who wants to get some ideas for Navratri recipes. Ok, lets check the table below.

GOLU DAY EVENING ( On Pradhamai day)SWEET PONGAL CHANA SUNDAL
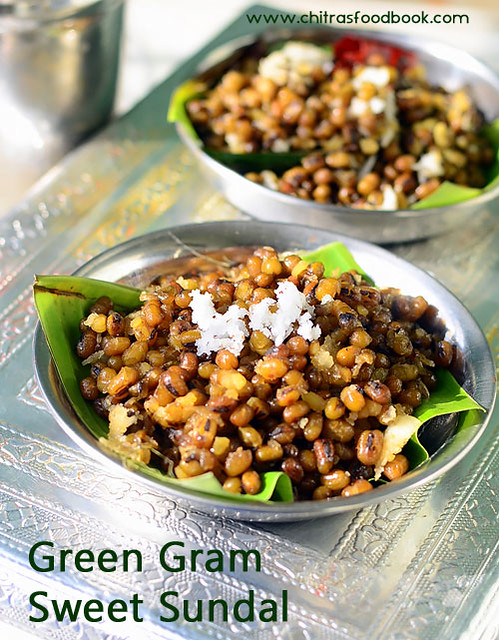
DAY 1VEN PONGAL RICE - DAL, GREEN GRAM SUNDAL(SWEET & SPICE)
DAY 2RAVA KESARI , TAMARIND RICE ,  KARAMANI SWEET SUNDAL , SPICY SUNDAL 
DAY 3SAKKARAI PONGAL , PARUPPU VADAI PEANUT SUNDAL
DAY 4WHEAT FLOUR APPAM KADAMBA SADAM, PEAS SUNDAL
DAY 5RICE PAYASAMCURD RICE, DOUBLE BEANS SUNDAL
DAY 6RAVA LADOO COCONUT RICE , FIELD BEANS SUNDAL
DAY 7RAW RICE IDLI , LEMON RICE KADALA PARUPPU SUNDAL
DAY 8COCONUT BURFI PAAL SADAM MULTI GRAIN SUNDAL
DAY 9(SARASWATHI POOJA)AKKARA ADISAL 5 RICE VARIETIESOR LUNCH MENU, VADA, BROWN CHANA SUNDAL Or CHANA DAL SUNDAL
DAY 10 (For Vijayadasami)FRUITS, ROCK CANDY & DRY GRAPES


Apart from this list, you can refer more recipes in my collection of Navratri recipes post. Do check it !

ANDHRA RECIPES FOR NAVRATRI

In Andhra Pradesh, Navadurga  ( Nine aspects of Goddess Durga) is worshipped during Navratri. Varieties of  prasadam is offered to God on these nine days.


DAY 1CHALIMIDI, VADA PAPPU, PARAMANNAM
DAY 2SWEET BOONDI, CHICKPEAS
DAY 3RAVA KESARI , PULIHORA
DAY 4PONGALI
DAY 5PULIHORA , PESARA BOORELU
DAY 6ATUKULU, BELLAM, SENAGA PAPPU, COCONUT
DAY 7KSHEERANNAM, BELLAM, SUGAR
DAY 8GARELU, LEMON JUICE
DAY 9CHAKKARA PONGALI
DAY 10PULIHORA , GARELU

NORTH INDIAN NAVRATRI BHOG FOR 9 DAYS

In North India, People worship nine different forms of Maa Durga.

Day 1 – Maa Shailaputri to bless disease free life
Day 2 - Mata Brahmacharini to increase longevity of family members
Day 3 - Mata Chandraghanta to fulfill all the wishes and provides relief from worldly pains
Day 4 - Maa Kushmanda to improve the intellect and decision making ability
Day 5 - Mata Skandmata to keep the physique healthy
Day 6 - Maa Katyayani for health and happiness
Day 7 - Maa Kaalratri to remove Evil powers
Day 8 - Maa Mahagauri to provide success in life(Kanya puja is performed)
Day 9 - Maa Siddhidatri for all sidhi

People perform fasting, pooja and pray the Goddess by offering nine different bhog on these 9 days. Lets see them below. Sorry, I have not shared Vrat ka recipes ideas. I have just mentioned the sweet recipes and the ingredients you can offer on these 9 days.


DAY 1PURE GHEE OR RECIPES WITH GHEE
DAY 2SUGAR, FRUITS
DAY 3MILK, SWEETS,KHEER
DAY 4MALPUA
DAY 5BANANA
DAY 6HONEY
DAY 7JAGGERY OR SWEETS WITH JAGGERY
DAY 8COCONUT,  RICE KHEER FOR KANYA PUJA
DAY 9TIL or SESAME SEEDS

SOURCE: http://blog.onlineprasad.com/navratri-recipes-bhog-for-nine-days/


DISCLAIMER : I have made this list based on the inputs from various sources. Please alter them according to your tradition by consulting your family elders.

Green Tomato Sambar For Idli – Thakkali Kai / Raw Tomato Gotsu Recipe

$
0
0
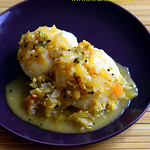
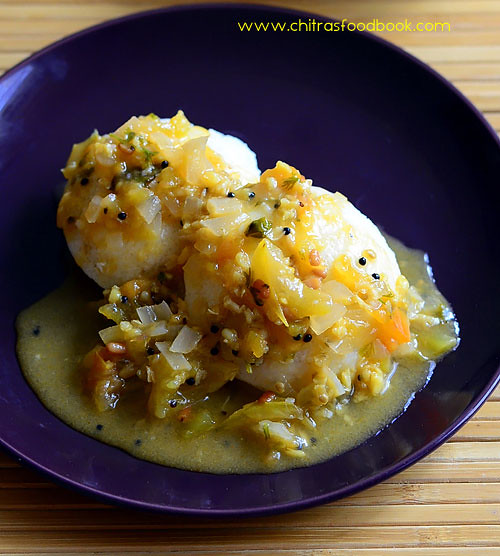
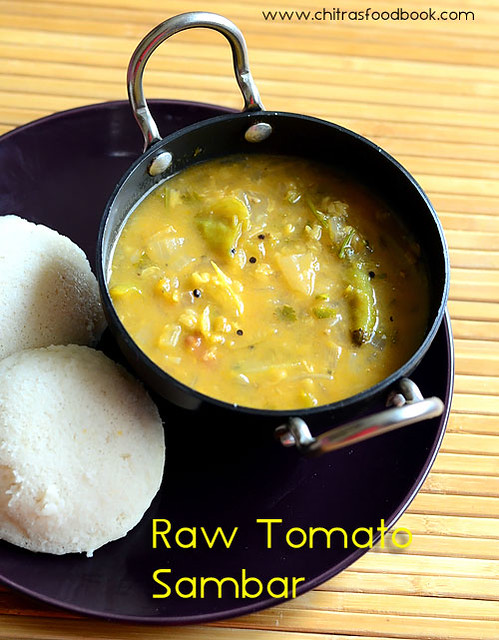
Green tomato sambar for idli– We call it as Thakkali kai gotsu in Tamil. I started buying green tomato ( Raw tomato / thakkali kai / Pacha thakkali in Malayalam ) recently as I wanted to learn some yummy South Indian recipes with it. I have heard people make green tomato kootu, curry, thogayal for rice and chutney for idli, dosa. My MIL suggested to try this easy thakkali kai gotsu as the first step. Usually we make Thanjavur style tomato onion gosthu for idli but my MIL told her mom make gotsu only using raw tomato. But my MIL started making with ripe tomatoes. So I too followed the same.
Green tomato sambar
When she suggested this, I was very happy and tried it because thakkali gotsu is our family favorite side dish for idli. So this recipe would never fail. Its a very easy, one pot sambar recipe for idli / dosa.  Even though moong dal is added, we make it watery in consistency so that it tastes juicy with idli.Both adults & kids would love this recipe.  This thakkali kai gotsu is completely different from Chidambaram gosthu. You must try it know the difference Happy. Ok, lets see how to make green tomato sambar / Thakkali kai gotsu for idli with step by step pictures !
Do check out my ripe tomato onion gotsu, Chidambaram brinjal gosthu recipes.

Thakkali kai sambar

Green Tomato Sambar/Thakkali kai Gotsu Recipe

Green tomato sambar Recipe

How to make Green tomato sambar Recipe

South Indian
Main Course
3-4

Ingredients (1 cup - 250ml)

  • Green tomato- 5 nos
  • Yellow moong dal - 1 tbsp
  • Big onion - 1 no (Finely chopped)
  • Tamarind - Berry size(Sundakkai alavu)
  • Green chilli - 3 nos (Use 5 for more spicy sambar)
  • Turmeric powder - 1/8 tsp
  • Idli batter - 1 tbsp
  • Coriander leaves - to garnish
  • Cooking oil or Sesame oil - 2 tbsp
  • Mustard seeds - 1/2 tsp
  • Urad dal - 1 tsp
  • Curry leaves - Few(Finely chopped)
  • Salt - as needed
  • Water - as needed (I used 2 to 2.5 cups)

How to make the recipe

  1. Wash and chop tomato into small pieces.
  2. Heat oil in a cooker base.
  3. Temper mustard,urad dal,curry leaves.Saute the onion,green chilli adding salt.
  4. When onion becomes transparent, add tomato and saute till mushy.
  5. Add turmeric powder, moong dal and water.
  6. Pressure cook in low flame for 2 whistles.Remove & add idli batter. Boil for 2 minutes.
  7. Garnish & serve with Idli.

Green tomato sambar / Thakkali Kai Gotsu - Step by step photos

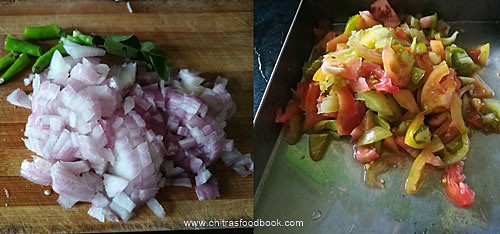
  • Wash and chop tomato into small pieces.Finely chop onion and slit green chillies, curry leaves and set aside.
    Green tomato sambar recipe
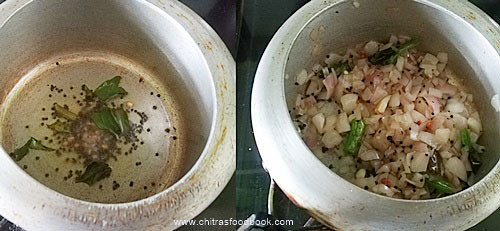
  • Heat oil in a cooker base.Splutter mustard seeds, urad dal, cumin seeds and curry leaves. Saute finely chopped onion, slit chilli.Saute till onion becomes transparent.
    Green tomato sambar recipe
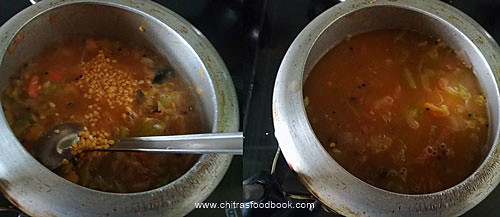
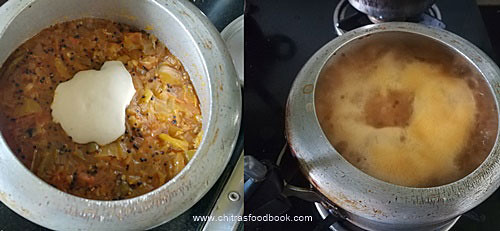
  • Add tomato pieces, saute till mushy.Add turmeric powder, tamarind extract and 2 cups of water. Add moong dal and Pressure cook in low flame for 2 whistles.
    Green tomato sambar recipe
  • Remove after the steam is released. Add more water if the sambar is thick. Add idli batter, boil the gravy for 2 minutes and garnish with coriander leaves. Serve with idli drizzled with sesame oil.
    Green tomato sambar Recipe

Notes

  • Adjust the quantity of chilli as per taste.
  • Do not skip tamarind extract. It helps to balance the taste.
  • No need to use jaggery.
  • As we are cooking directly in a pressure cooker, moong dal cooks perfectly.
  • If the sambar is too thick, add more water and boil.

Hot idli topped with gotsu, drizzled with a tsp of sesame oil is divine ! Do try this combo !
Green tomato sambar recipe

Rice Kheer Recipe Without Condensed Milk – Chawal Ki Kheer With Video

$
0
0
When I posted North Indian Navratri recipes for 9 days, I found Rice kheer recipe (Chawal ki kheer in Hindi) is one of the most important prasad recipes offered on Navratri 3rd day for Mata Chandraghanta & 8th day for Maa MahaGauri & Kanya puja. So I wanted to try rice kheer and post in my food book. Usually I make South Indian rice kheer (Paal payasam in Tamil) by roasting and pressure cooking rice in milk. But North Indian kheer is prepared in a different method. Authentically, basmati rice or long grain rice (Chawal) is soaked in water, cooked in full fat milk in an open kadai simmering in low flame for long time. As the rice gets cooked, quantity of milk is reduced. It becomes thick and creamy. Kheer gets a natural color & sweetness from rice & milk. Then cooked rice is sweetened with sugar, boiled till thick and then flavored with cardamom & garnished with nuts. It can be served warm or chilled as you like. It tastes finger licking delicious. I saw few recipes with condensed milk (Milk maid) instead of sugar but I went with the traditional procedure & used sugar. Some people also made it with left over rice.
Rice kheer recipe
As I had already posted Bengali Chaler Payesh, making this North Indian rice kheer was not so difficult for me as the procedure is similar. After watching many video recipes and websites, I could do it confidently. It came out really well and tasty. Even though the quantity of rice is less, the yield of this kheer is more. Sendhil & myself enjoyed it taking 2 to 3 servings. Do try this simple and easy rice kheer during this navratri, offer God and get her blessings. Soon I till try to post an easier version of this kheer by using pressure cooker & condensed milk.  Now Lets see how to make rice kheer recipe with step by step pictures and video !

Do refer my  18 payasam  / kheer varieties& Bengali Chaler Payesh recipes.


Chawal ki kheer recipe


Rice kheer recipe / Chawal ki kheer

Rice kheer recipe

How to make Rice kheer recipe

North Indian
Dessert
4

Ingredients (1 cup - 250ml)

  • Basmati rice / long grain rice - 1.5 tbsp
  • Full fat milk - 1/2 liter(2 cups)
  • Sugar - 1/4 cup (1/3 cup for more sweetness)
  • Cardamom powder - 1/4 tsp
  • Chopped cashews, badam & pista - handful
  • Saffron threads - Few to garnish
  • Rose petals - to garnish (optional)

How to make the recipe

  1. Wash and soak rice in water for 30 mins to 1 hour.
  2. Roll boil milk in a pan.
  3. Add soaked rice, boil in medium flame.
  4. Stir at regular intervals and boil till rice is cooked soft.
  5. Add sugar, cardamom powder and boil till slightly thick.
  6. Garnish with chopped nuts and serve warm or chilled.

Rice Kheer Recipe / Chawal Ki Kheer - Step by step photos

  • Wash and soak rice in water for 30 minutes to 1 hour.
  • Boil milk in a wide pan. When it roll boils, simmer the flame. Add the soaked rice.
    Rice kheer recipe
  • Cook rice in medium flame by stirring at regular intervals to avoid burnt bottom. It takes nearly 20 to 25 minutes for rice to cook. You can also cover cook for last 5 minutes to make the rice soft. But keep the flame very low.
    Rice kheer recipe
  • After rice is cooked, add sugar, cardamom powder.Sugar melts and kheer becomes watery.
    Rice kheer recipe
  • Boil till kheer becomes slightly thick.i.e when you pour, rice & milk should not separate. They should be well blended but pourable. This is the right consistency. Remember this kheer thickens when cool down. So add more boiled milk, adjust sugar if needed. Garnish with chopped nuts, saffron threads and serve warm or chilled by refrigerating it.
    Rice kheer recipe

Notes

  • Soaking helps the rice to cook quick & soft. If you don't have time, you can wash and cook the rice without soaking too.
  • Add more sugar if you have sweet teeth, but not more than 1/3 cup.
  • I have not used ghee. If you wish, you can roast the nuts in ghee and add to kheer.
  • To make a quick version, you can cook rice & milk in a pressure cooker.
  • You can also use condensed milk instead of sugar.Add 3 tbsp. Guess it will be enough.
  • If you like kesar flavor, add saffron soaked milk.But color of kheer becomes yellow.

Easy to cook, delicious, festival special rice kheer is ready to enjoy !
Rice kheer recipe without condensed milk

Pachai Payaru Sundal Without Soaking – Green Gram Sundal Recipe( Sweet & Spicy)

$
0
0
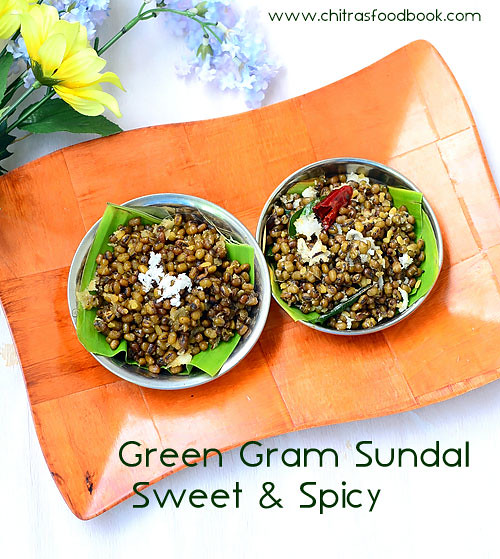
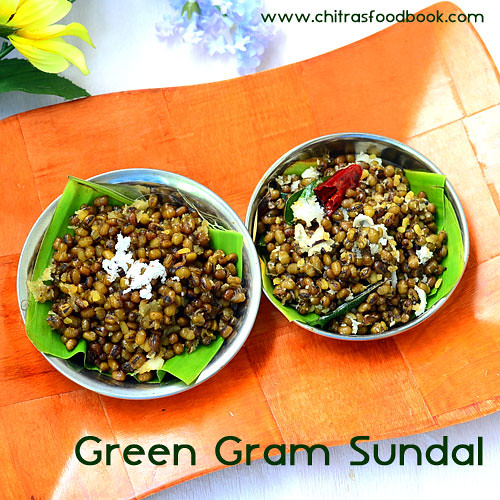
Easy Green gram sweet sundal and kara sundal recipe without soaking with step by step and Video– We call it as Pachai payaru sundal / Pasi payaru sundal in Tamil. Generally We South Indians make sundal recipes for neivedyam without fail during navaratri festival. So I thought of sharing some sundal varieties this week. To begin with, I have come up with an easy green gram sundal recipe without soaking . Usually people make green moong dal sundal by soaking it for hours together. But my MIL always make it instantly by roasting the dal. This year I followed her method as it is so easy and quick to make.
Green gram sundal without soaking
If you forget to soak the legumes or when you want to make sundal instantly, you can go ahead with this recipe. I prepared green gram sweet sundal and spicy sundal varieties. Both came out very well and tasty. But the color of this sundal won’t be green. Hope you will try this easy sundal recipe and share your feedback with me. Ok, Lets see how to make pachai payaru sundal recipe with step by step pictures and video.
You can also check out my green gram sundal with soakingand my other sundal varieties.

Green gram sweet sundal

Pachai Payaru Sundal Without Soaking - Instant Green Gram Sundal - Sweet & Spicy

Rice kheer recipe

How to make Green gram sundal without soaking

South Indian
Festival recipes
4

Ingredients (1 cup - 250ml)

  • Green gram / Pachai payaru - 1 cup
  • Cooking oil - 1 tbsp (to roast dal)
  • Water - 2.5 to 3 cups (For pressure cooking dal)
  • Salt - 1/4 tsp

    Green Gram Sweet Sundal recipe

  • Cooked green gram - 1 cup(Heaped)
  • Grated jaggery - 1/3 cup
  • Water - 1/4 cup
  • Cardamom powder - 1/4 tsp
  • Grated coconut - 1/4 cup

    Green Gram Spicy Sundal recipe

  • Cooked green gram - 1.5 cups
  • Coconut oil - 1 tbsp
  • Mustard seeds - 1/2 tsp
  • Urad dal - 1/2 tsp
  • Red chilli - 1-2 no(pinched)
  • Curry leaves - few
  • Salt - as needed
  • Hing/asafetida - 1/4 tsp
  • Grated coconut - 1/4 cup

How to make the recipe

  1. Heat oil in a cooker base. Roast green gram for 5 minutes.
  2. Nice aroma arises. Add water & cook in high flame for 7 whistles.
  3. Remove & drain excess water.
  4. For sweet sundal,melt jaggery adding water.Strain & boil for a minute.
  5. Add cooked green gram, cardamom powder, coconut.Mix & boil till slightly moist.Serve!
  6. For spicy sundal, temper mustard,urad,curry leaves and hing in oil.Add cooked green gram,salt and grated coconut.Mix well and serve.

Green Gram Sundal Recipe / Pachai Payaru Sundal - Step by step photos

  • Heat oil in a cooker base and roast green gram till it gets roasted smell and turns slightly golden brown in color.
    Green Gram Sundal Recipe without soaking
  • Add 2.5 to 3 cups of water and pressure cook in low flame for 2 whistles or in high flame for 7 whistles.
    Green Gram Sundal Recipe without soaking
  • Remove after the steam is released.Drain the excess water using a colander.Let it become warm.
    Green Gram Sundal Recipe without soaking
  • For green gram sweet sundal : Heat and melt jaggery adding little water in a pan.Strain the syrup.
    Green Gram Sundal Recipe without soaking
  • Wash the pan.Add the syrup in the same pan. Let it roll boil. Put 1 cup of cooked green gram. Mix well.
    Green Gram Sundal Recipe without soaking
  • Add cardamom powder, grated coconut and mix well. Make sure this sundal is slightly moist in texture. Do not mix till its dry.Dal will become hard.
    Green Gram Sundal Recipe without soaking
  • So switch off the flame when there is slight wetness. It will become normal when sundal cools down.Serve & enjoy !
  • For green gram spicy sundal: Heat coconut oil in a pan. Temper mustard seeds, urad dal, curry leaves, hing and pinched red chillies.
  • Saute for a minute and then add cooked green gram, salt and grated coconut. Mix well & serve.
    Green Gram Sundal Recipe without soaking
  • Green gram sweet sundal and spicy sundal are ready !
    Green Gram Sundal Recipe without soaking


Pachai payaru sundal without soaking

Notes

  • This sundal won't be bright green in color as we are roasting the green gram.
  • To get green color sundal, you need to soak the dal for 6 to 8 hours without roasting.
  • For sweet sundal: if the jaggery is pure, you can add grated jaggery directly to the cooked green gram. Mix till it melts.
  • You can add some lemon juice to spicy sundal if you like. But add it after switching off the flame.

Try this easy, no soaking, Instant green gram sundal recipe and enjoy !
Pachai payaru sundal without soaking

Milagu Jeeraga Sadam – Pepper Cumin Rice Recipe

$
0
0
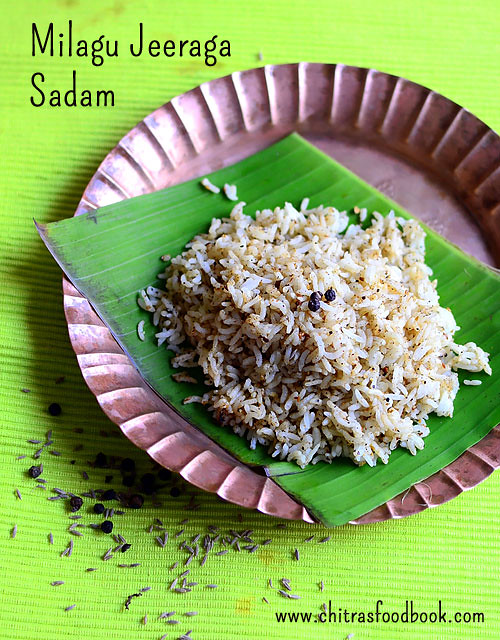
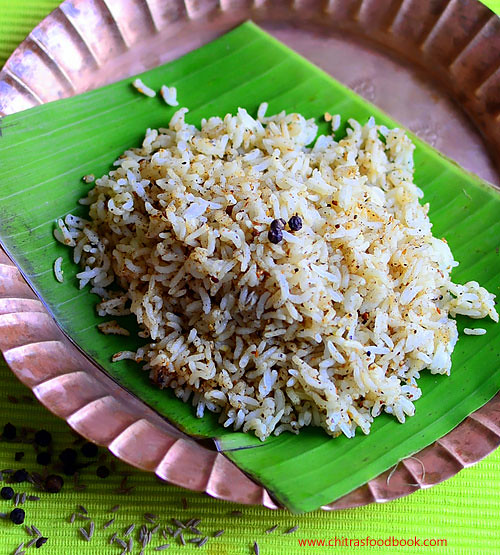
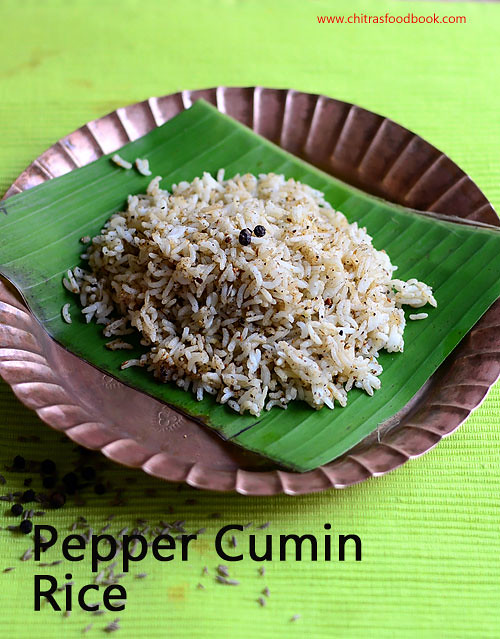
Pepper cumin rice / Milagu jeeraga sadam in Tamil is one of the yummy, South Indian rice recipes we make as prasadam for Navratri, Saraswathi pooja, Purattasi sani thaligai, aadi 18 etc. Yesterday I made this rice for navaratri afternoon neivedyam learning from my MIL. My MIL make this rice at least once in a week as pepper is a healthy Indian spice that helps to purify blood, improves appetite and digestion. Sendhil loves this rice variety a lot. So we make this pepper rice for his lunch box and  one day travel as well.
Pepper cumin rice
Sometimes we used to combine Saraswathi pooja, Purattasi sani thaligai festivals and make 5 rice varieties, chana sundal and thullu maavu(rice flour mixed with jaggery) for Saraswathi pooja neivedyam. We make this milagu jeeraga sadam as one of the 5 rice varieties. As its so easy to make, I thought it would be useful for you all. I have already shared a video on how to make 5 rice varieties. You can replace sesame seeds rice/ ellu sadam with milagu jeeraga sadam and offer to God for tomorrow Saraswathi pooja festival. Lets see how to make this easy milagu sadam /pepper rice with step by step pictures !
Milagu jeeraga sadam

Milagu Jeeraga Sadam - Pepper Cumin Rice

Pepper cumin rice recipe

How to Pepper cumin rice

South Indian
Main course
2

Ingredients (1 cup - 250ml)

  • Cooked rice - 1 cup
  • Ghee - 1 tsp (to roast)
  • Pepper corns - 1 tbsp
  • Cumin seeds/Jeera - 1/2 tbsp
  • Salt - as needed
  • Ghee - to mix with rice

How to make the recipe

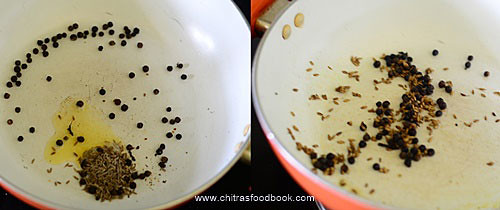
  1. Heat ghee in a kadai.Roast pepper & cumin seeds till it starts to crackle.
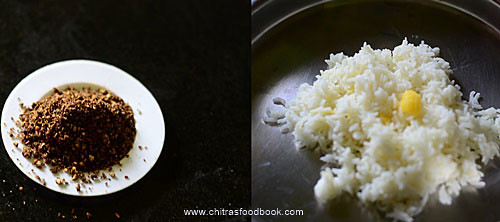
  2. Remove and grind to powder adding salt.
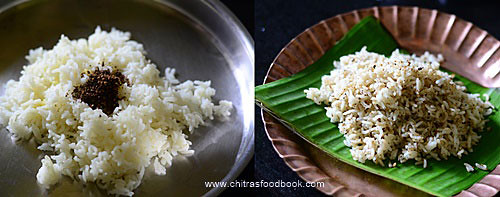
  3. Mix this powder with cooked rice.
  4. Enjoy !

Pepper cumin rice - Step by step photos

  • Heat ghee in a kadai and roast pepper & cumin seeds in medium flame till cumin seeds starts to splutter.
    Pepper cumin rice/ Milagu jeeraga sadam
  • Remove in a plate and let it cool down. Grind to a slightly coarse powder adding salt.
  • Take the required cooked rice. Add 2 tsp of ghee, ground powder, mix well and check for taste.
    Pepper cumin rice/ Milagu jeeraga sadam
  • Add more salt & powder if required. Serve !
    Pepper cumin rice/ Milagu jeeraga sadam
  • If you wish, you can temper mustard seeds, curry leaves in ghee and add to rice.

Notes

  • Pepper alone gives spiciness to the rice. So you can add more pepper if you want spicy taste.
  • Do not add more cumin seeds. Its flavor will dominate.
  • Adding ghee helps to enhance the flavor and taste. If you don't want to add ghee, you can add sesame oil.

Try this easy and flavorful pepper cumin rice and enjoy !
Milagu sadam

Pattani Sundal Recipe – Green Peas Sundal – Sundal Varieties

$
0
0

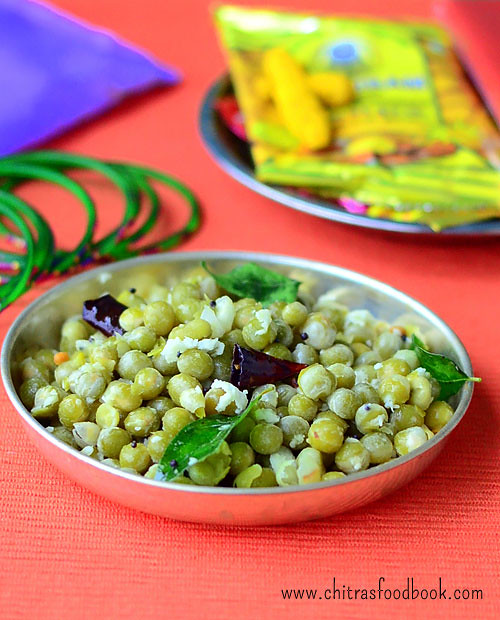
I had to post this Green Peas Sundal Recipe (Pattani sundal in Tamil) last week during Navaratri. But I couldn’t do it due to some personal work. I am yet to start Diwali recipes. So today I am posting this recipe from my draft. From tomorrow, you can expect some yummy Diwali sweets and snacks from here : )). Pattani sundal is one of the easy and yummy sundal varieties we make during Navaratri for neivedyam. Last week I prepared this sundal recipe for Golu. I used dried green peas, soaked it overnight and prepared this sundal. If you have frozen or fresh green peas (pachai pattani) in hand, your job becomes easier. Cooking green peas perfectly is a bit tricky. Most of us face the problem of peas becoming mushy after pressure cooking. 

Green peas sundal

Proper soaking and addition of salt while pressure cooking helps to retain its shape and cooks soft as well. Recently my neighbor shared this sundal by adding masala. It was tasting great and truly flavorful. But I made it in the usual way as we need to avoid onion & garlic for neivedyam. Soon I will share my neighbor’s masala sundal recipe. For variations, you can make this sundal with white peas or yellow peas as well. Today lets see how to make green peas sundal recipe with step by step pictures.

Pattani sundal

Green Peas Sundal Recipe / Pattani Sundal

Green peas sundal

How to make Green Peas Sundal Recipe

South Indian
Sundal Recipes
4


Ingredients (1 cup - 250ml)

  • Dried Green Peas - 1 cup
  • Water - as needed (to soak & cook the peas)
  • Salt - as needed

    To Grind

  • Grated coconut - 1/4 cup
  • Green chilli - 1 to 2 nos
  • Cumin seeds - 1/2 tsp

    To temper

  • Coconut oil - 1 tbsp
  • Mustard seeds - 1/2 tsp
  • Curry leaves - Few
  • Red chilli - 1 no (pinched)
  • Hing - 1/8 tsp

How to make the recipe

  1. Wash and soak the dried green peas for 8 hours.
  2. Pressure cook the green peas adding soaked water and salt in low flame for 2 whistles.
  3. Drain the excess water if any and keep the cooked peas aside.
  4. Grind coconut, chilli and cumin seeds to a coarse paste without water.
  5. Temper mustard seeds, curry leaves, hing and add cooked peas, ground paste.
  6. Mix till raw smell goes off. Sprinkle some lemon juice if you like.

Green Peas Sundal Recipe - Step by step photos

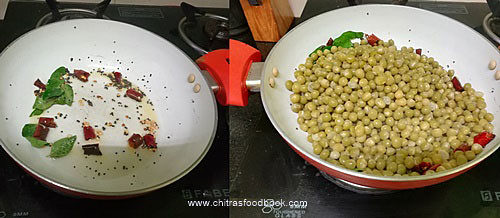
  • Wash and soak dried green peas for 8 hours or overnight.Pressure cook it adding enough water and salt in low flame ofr 2 whistles.
    Pattani Sundal Recipe
  • Adding salt helps to prevent peas becoming mushy.So don't forget to add salt.Remove after the steam is released.
  • Drain in a colander. Grind coconut, chilli and cumin seeds to a coarse paste without adding water.
  • Heat coconut oil in a kadai. Splutter mustard seeds, curry leaves, hing and pinched red chilli.
    Pattani Sundal Recipe
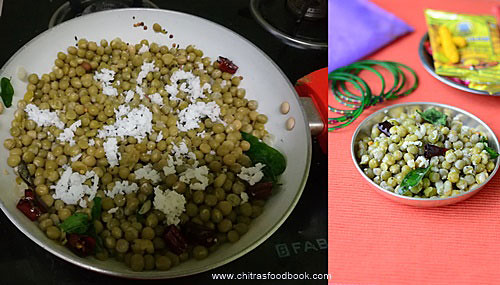
  • Add cooked peas, ground coconut paste and saute till raw smell goes off.You can sprinkle some lemon juice if you like. Serve warm !
    Pattani Sundal Recipe

Notes

  • Dried green peas should be soaked at least for 6 to 8 hours.If using fresh peas, no need to soak it.
  • Addition of salt while cooking peas helps to prevent it becoming mushy.
  • For variations, you can add grated coconut instead of grinding it.

Try this easy, kids friendly Green peas sundal recipe at home and share your feedback with me Happy.

pattani sundal recipe

Maida Burfi Recipe – Maida Sweet Cake - Easy Maida Sweets For Diwali

$
0
0
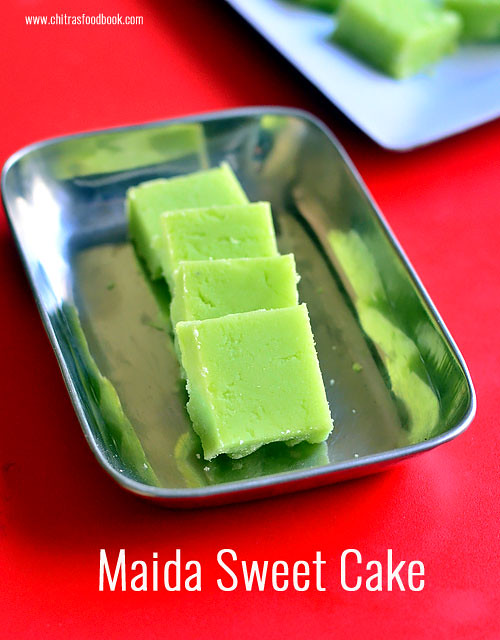
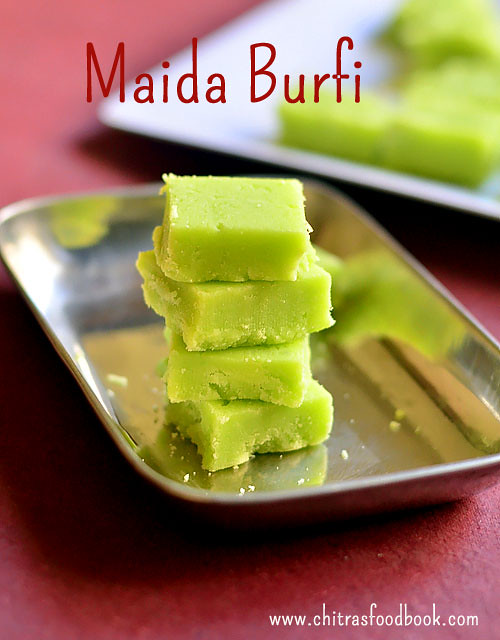
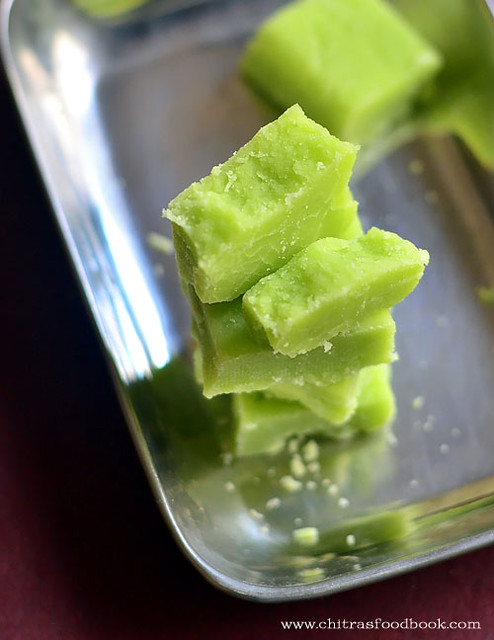
Every year during Diwali, my MIL makes Maida Burfi without fail. She calls it as Maida cake (All purpose flour sweet cake in English). Usually Tamil people mention burfi recipes as cake. For Diwali, many people especially South Indians love to try sweets recipes made from maida like burfi, badusha, sweet samosa, sweet maida biscuits etc.  Few years back, I posted an easy maida burfi with milk powder without using ghee during Diwali. Today I have shared my MIL’s version of maida burfi which has melt in mouth texture and tastes great. This is a beginners sweet that gives fool proof results if you use good conditioned non-stick pan.
Maida burfi
It can be made with simple ingredients that are easily available at home like maida, sugar, ghee and cardamom powder. I have used green food color as we see in sweet stalls. But my MIL never uses food color. So this burfi comes out pale white without adding food color. Addition of food color is purely optional. If you are looking for an easy burfi recipe to try for this Diwali, you must try this maida burfi. I am sure anyone can make it easily and perfectly. I have made a full video recipe to help beginners. Hope you will try it and share your feedback with meHappy. Once you make it perfect, you can easily make chocolate maida burfi. I will post that recipe next week. Ok, lets see how to make maida burfi recipe with step by step pictures and video !


If you wish to avoid maida and make some easy burfi recipe, you can try this cashew badam burfi& badam burfiwhich is of similar procedure. Chocolate khoya burfi and Dates roll / Khajur 
katri are my other suggestions.

Do check out my Maida sweet biscuit which is also a beginners sweet !

Maida burfi recipe


Maida burfi recipe - Easy maida cake

Maida burfi

How to make Maida burfi Recipe

Indian
Indian Sweets Recipes
12 to 16 pieces

Ingredients (1 cup - 250ml)

  • All purpose flour/ Maida - 1/2 cup
  • Sugar - 1 cup
  • Melted Ghee - 1/4 cup
  • Water - 1/2 cup (for sugar syrup)
  • Cardamom powder - 1/4 tsp
  • Food color - Green or Orange

How to make the recipe

  1. Heat ghee in a good non-stick pan and roast maida till nice aroma wafts.
  2. In another non-stick pan, melt sugar adding water and boil till 1 string consistency.
  3. Switch off the flame. Add food color and cardamom powder to sugar syrup.
  4. Mix well and add roasted maida paste.Keep mixing without fire.
  5. Mixture becomes thick and starts to leave the sides of pan.
  6. Remove and spread in a greased tray.Level it and make pieces when warm.Remove after it cools down.
  7. Remove after it cools down. Store in a box. Stays good for 10 days!

Maida burfi Recipe - Step by step photos

  • Heat 1/4 cup of melted ghee in a non-stick pan.Add maida/all purpose flour and roast in medium flame without burning it. It becomes a smooth paste leaving a nice aroma.
    Maida burfi Recipe
  • Remove the pan from the flame and keep aside. No need to remove the maida paste from pan.
  • In another non-stick pan or kadai, melt 1 cup of sugar adding 1/2 cup of water. Stir well and melt the sugar completely. Scrape the sides as well.
  • Boil the syrup in medium flame till frothy. Lower the flame completely and check for one string consistency.
    Maida burfi Recipe
  • To check it, take little syrup in your pointer finger from the back of ladle and slide it between your thumb and pointer finger.When you release the fingers, you will get single thin string without breaking.
  • If it doesn't form one string, boil the syrup for one more minute and check it again.
    Maida burfi Recipe
  • Switch off the flame. Add food color and cardamom powder, mix well and remove the kadai from stove. Add roasted maida paste and mix well without lumps.
    Maida burfi Recipe
  • Initially the mixture looks watery but when you keep mixing, it thickens and becomes a paste. It starts to leave the sides of pan and becomes thick but pourable paste.
    Maida burfi Recipe
  • As soon as it becomes a thick paste, remove from the kadai and spread it in the ghee greased plate OR a bowl lined with butter paper.Do not wait to become thick dough. Use a square shaped plate or bowl to make uniform pieces.Immediately spread the burfi mixture with a ghee greased bowl. Press it really well and seal the cracks if any using your fingers . Act quickly before it sets completely.
  • Let it rest for 20 minutes to become warm. Invert into a plate. Remove the butter paper. Then cut into square shapes with a sharp knife greased with ghee. Remove the pieces after its cooled completely.Store in an air tight box and enjoy for one week to 10 days.
    Maida burfi Recipe

Notes

  • Do not reduce or increase the quantity of sugar and ghee. Burfi becomes hard if the sugar or ghee is reduced. It will become too soft and break if you add more ghee or sugar. So please follow the same measurement.
  • One string consistency is most important for this burfi. If you are unable to check it, just boil the syrup till frothy and pour it using a ladle. The last drop falls slowly by forming a string. This is also an indication for one string sugar syrup.
  • You should add the roasted maida only after switching off the flame. Heat of the kadai is sufficient for the mixture to thicken.
  • Remove the burfi mixture as soon as it becomes thick and pourable. Do not wait for the paste to become thick dough. Burfi will get more cracks.
Easy maida burfi


Try this easy, yummy melt in mouth Maida burfi for this Diwali and enjoy the festival !

Maida sweet cake

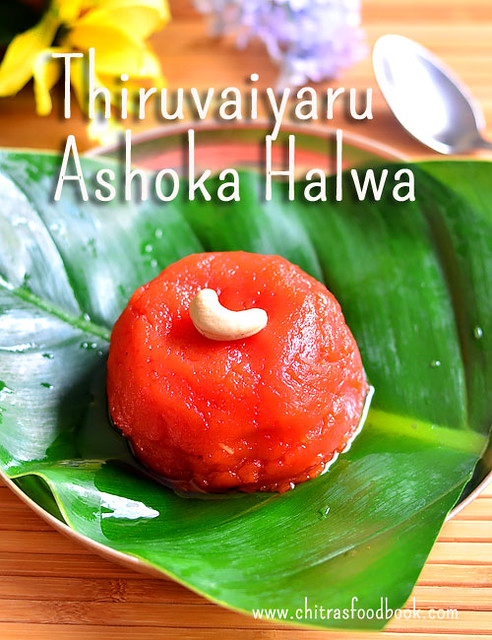
Ashoka Halwa Recipe –Thiruvaiyaru Pasi Paruppu Halwa–Moong Dal Halwa

$
0
0
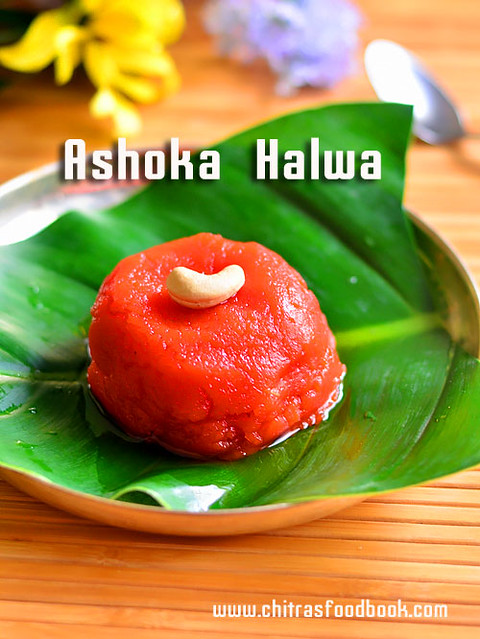
Today I have shared South India’s most popular Ashoka halwa(Pasi paruppu halwa) made with yellow moong dal, sugar and ghee. This halwa is completely different from North Indian moong dal halwa. Basically Ashoka halwa is originated in Thiruvaiyaru , Thanjavur district Tamilnadu. More than 60 years ago, this halwa was first prepared by Ramu iyer in a small hotel in Thiruvaiyar. He named it as “Ashoka halwa”. People started calling it as “asoga sweet” colloquially. You can find this halwa in all the marriage banquets in and around Tanjore. I got this authentic and traditional Ashoka halwa recipe shared by cookery experts Mrs.Usha and Mrs.Lakshmi from Aval Vikatan’s Kalyana samayal Supplementary issue. I found this recipe completely different from the ones I saw online. Most of the recipes called for moong dal, wheat flour, sugar and ghee as the major ingredients. But in the book, they had mentioned to use maida and cooking oil as well. To check the authenticity of this recipe, I watched the making and interview of Thiruvaiyaru Andavar hotel ashoka halwa video in Makkal TV. 
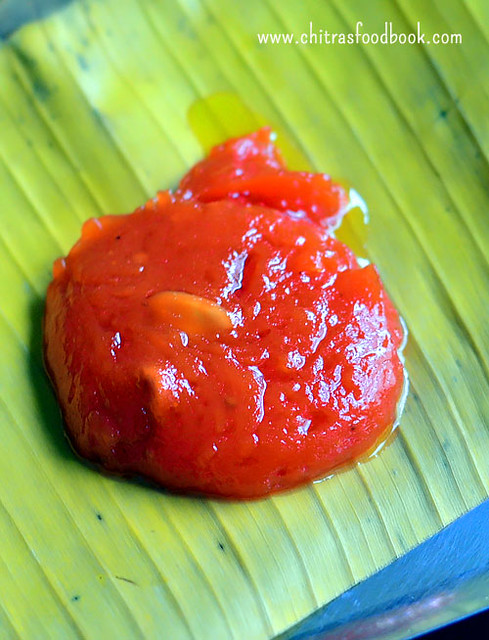
Finally I got convinced and confident enough to try the magazine’s recipe by altering the quantity of ingredients as per my requirement. It came out excellent in taste and texture , very close to the original Ashoka halwa of the most famous Andavar hotel, Thiruvaiyaru. They serve this halwa with south Indian mixture. I had tasted this halwa only once when I had a trip to Tanjore. We also took a parcel of the hot halwa wrapped in a banana leaf. I could still remember the taste and the texture of the red colored, ghee dripping ashoka halwa. I am very happy and proud that I could make a similar one at home. It was like my dream came true moment when I tasted this halwa Love Struck. All you need is “PATIENCE” to make this halwa. As I mentioned in my Tirunelveli halwa recipe , this halwa also needs constant stirring with lots of patience. You should stir this halwa till ghee ooze out. But it doesn’t take hours like wheat flour halwa. It takes 30 to 45 minutes based on the quantity. Ok, lets see how to make South India’s one of the most popular Ashoka halwa recipe perfectly with step by step pictures. I will update the video tomorrow !

Do check out my Tirunelveli halwa recipe using wheat flour– Its a simplified version that tastes so close to the original Iruttukadai halwa.

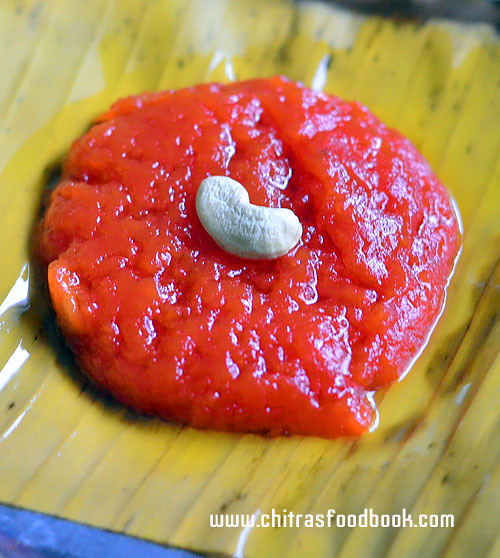
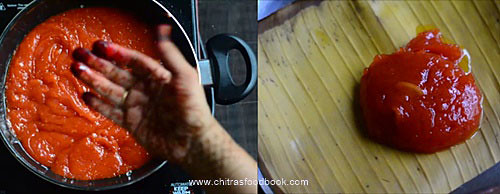
See the consistency of the halwa immediately after cooking in the pictures below.

Hot Ashoka halwa served in a banana leaf immediately after cooking
Hot Ashoka halwa


Ashoka Halwa recipe - Pasi paruppu halwa

Ashoka halwa

How to make Ashoka halwa Recipe

South Indian
Diwali sweets
2 cups

Ingredients (1 cup - 250ml)

  • Yellow moong dal - 1/2 cup
  • Wheat flour - 1/4 cup
  • Maida/all purpose flour - 1 tbsp
  • Water - 3 cups(for cooking moong dal)
  • Sugar - 1 cup
  • Cooking oil - 1/2 cup(Use refined oil, odourless oil)
  • Melted Ghee - 1/2 cup ( at room temperature)
  • Cardamom powder - 1/2 tsp
  • Cashew nuts - 5 nos
  • Food color - Red(2 pinches mixed with 1 tbsp water, I used Orange red)

How to make the recipe

  1. In a pressure cooker base, dry roast moong dal for one minute in high flame.
  2. Add 3 cups of water and cook till mushy and soft. Mash it well or grind to smooth paste.
  3. In a kadai, heat oil and roast cashews, maida, wheat flour.
  4. Add cooked dal,mix well.Then add sugar, cardamom powder, food color.
  5. Mix well till mixture becomes thick.
  6. Add 1 tbsp oil + ghee at regular intervals and mix till halwa becomes non-sticky and ooze ghee.
  7. Collect the ghee if needed. Remove and cool down. Store in a box. Stays good for 10 days!
Ashoka halwa Recipe - Step by step photos

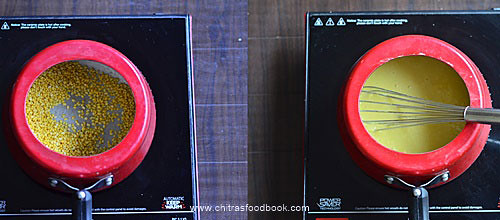
  • Heat a pressure cooker base and dry roast 1/2 cup of moong dal just for one minute in high flame without changing its color.
  • Add 3 cups of water, mix well and cook till mushy. I cooked in low flame for 3 whistles.Mash the dal really well. If not, grind to smooth paste without adding water.
    Ashoka Halwa Recipe
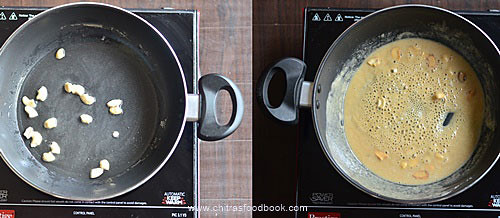
  • In a good non-stick kadai, heat 1/2 cup of cooking oil (use odorless refined oil), roast cashews.When it starts to turn golden, reduce the flame completely and add wheat flour, maida. Mix well till it emits roasted aroma.
    Ashoka Halwa Recipe
  • It looks like a paste. Then add Cooked moong dal paste to the roasted flour and mix in medium flame. Flour and dal should get mixed well. It thickens soon.
    Ashoka Halwa Recipe
  • Now add sugar, food color and cardamom powder.Mix well in medium flame. Sugar melts and mixture becomes watery.
    Ashoka Halwa Recipe
  • Increase the flame to medium high and mix till the mixture becomes slightly thick. Then add 1/2 tbsp ghee. Mix well till ghee is absorbed. As soon as ghee is absorbed, add another 1/2 tbsp ghee again.
    Ashoka Halwa Recipe
  • At one stage, You will find halwa turning dark red in color, becoming glossy and leaves the pan completely. Keep adding the ghee at regular intervals. Adjust the flame whenever needed. You can also use cooking oil to reduce the quantity of ghee.
    Ashoka Halwa Recipe
  • Stay nearby and keep adding ghee. Finally halwa starts to rotate with the ladle.Touch the halwa and check if its sticky. As soon as it turns non-sticky, it starts to ooze ghee.
  • Keep mixing till more ghee comes out from all the sides and center.Switch off the flame now and transfer the halwa to a bowl. If you want, you can collect the excess ghee from the halwa and use it for regular cooking.
  • This halwa thickens as it cools down. So reheat it in a kadai or dosa tawa every time you serve.Whenever you heat the halwa, it becomes soft, glossy and releases ghee. Hope you can see the difference between hot halwa and the cold ones from the main pictures (See 1st & 2 nd pictures).
    Ashoka Halwa Recipe

Notes

  • Do not reduce the quantity of sugar and ghee.If you want, you can add more cooking oil and less ghee.
  • The ratio of moong dal, wheat flour and maida given in the book is 1:1:1/2. But I altered the quantity based on the one I tasted.
  • The quantity of ghee as per the original recipe is double the quantity of moong dal.
  • Amount of cooking oil and ghee may vary slightly. You may need to add more or less than the quantity mentioned. I had approximately given the quantity I used.
  • Total cooking time takes from 30 minutes to 45 minutes.
Try this yummy moong dal halwa for this diwali. Serve with South Indian Mixture and enjoy !

15 Murukku Recipes – South Indian Murukku Varieties For Diwali

$
0
0
Diwali is fast approaching. Murukku recipes is a must & should snack for South Indians during diwali. So I have made a collection of 15 Indian murukku varieties for easy reference. Murukku / Chakli  is a crunchy, deep fried Indian snack made with rice flour and urad dal flour. Most of the Tamil people used to grind murukku maavu during Diwali to make thenkuzhal and mullu murukku as these two are the most common types. In this list, I have shared different types of murukku recipes that includes our traditional thenkuzhal murukku, mullu mururkku @ magizhampoo with coconut milk, Instant chakli / Instant murukku recipe with besan flour (Karnataka style), Some flavored murkku recipes like Butter murukku, Garlic murukku, Potato murukku, Lemon murukku , Ragi chakli , Karnataka style kodubale etc. Tirunelveli Manoharam and Achu murrukku / Kerala achappam known as rose cookies that is commonly made during Christmas are some of the sweet murukku varieties. Apart from them, I have shared an interesting sweet murukku podi recipe especially for kids and toothless elders which my mom used to make with leftover mullu murukku or thenkuzhal when I was young.
I am yet to try some more murukku recipes like pottukadalai murukku, wheat flour murukku and thengai paal murukku. I will try to share some of them before Diwali and include them in this list.
Lets see the list of 15 different types of South Indian murukku recipes. Please click on the pictures to see the respective recipes. All these recipes are with step by step pictures and some recipes have video as well. Do try any of these murukku varieties based on your liking and share your feedback with me.


Corn flour murukku

Curd Kodubale

Bombay Karachi Halwa Recipe – Corn Flour Halwa Recipe With Video

$
0
0
Long back I had shared a version of easy Bombay Karachi halwa / corn flour halwa as a beginners sweet. It tastes soft and slides in mouth. But recently I came across this chewy Bombay Karachi Halwa also known as Jelly halwa using the same ingredients but slightly different in procedure. The basic difference between soft halwa and chewy halwa (rubbery halwa) lies in the cooking time. Usually we remove the halwa as soon as it starts to release the ghee. For chewy halwa, we need to cook for more time even after it released the ghee. So this halwa takes some extra cooking time when compared with the easy corn flour halwa. However we make it, this is a no fail recipe.Tastes great and its a must have sweet for Diwali.
Any beginner can dare to try this recipe as it doesn’t need any sugar syrup consistency.  Just mixing and  continuous stirring is the only job here. Corn flour, sugar, cardamom powder and ghee are the major ingredients. To make this chewy Bombay halwa recipe, I watched some Sindhi halwa recipes and Classic masala hut video in Youtube for the ingredients and measurements. It came out really well as I wished. Actually I have divided the halwa mixture into two parts and tried it to know the difference in taste between soft halwa and chewy halwa.  So I have made orange colored halwa with soft texture and the yellow ones tastes slightly chewy. So this is a two in one recipe Happy. You can try any based on your liking.
Its my long time dream to make Kerala Kozhikode halwa. After trying this recipe, I have got some ideas on how to make it. I hope I will try that soon. So now lets see how to make this most popular and delicious Bombay Karachi halwa recipe with step by step pictures and video ! I clicked the cover picture by arranging different colored halwa after getting tempted by some halwa pictures in GoogleWinking.
Lets see how to make Bombay Halwa recipe with step by step pictures. I will upload the video tomorrow !
Do check out my version of soft n easy to cook corn flour halwa !

Bombay Karachi Halwa Recipe - Corn Flour Halwa

Bombay Karachi Halwa

How to make Bombay Karachi Halwa

North Indian
Halwa recipes
15 Pieces

Ingredients (1 cup - 250ml)

  • Corn flour OR Corn starch - 1 cup
  • Water - 2 cups (to dilute cornflour)
  • Sugar - 2.5 cups
  • Water - 1 cup (to melt sugar)
  • Lemon juice - 1/2 tsp + Water - 1/2 tsp
  • Food color - Orange Red & Yellow
  • Ghee - 3/4 cup OR Ghee - 1/2 cup + Refined oil - 1/4 cup
  • Cardamom powder - 1/2 tsp
  • Chopped nuts - a handful (I used cashews, badam and melon seeds)

How to make the recipe

  1. In a wide bowl, dilute corn flour adding water.
  2. In a kadai, dry roast nuts for a minute, remove in a plate.
  3. Add sugar & water, melt it.
  4. When the sugar syrup starts to boil,add corn flour mixture.
  5. Stir till it thickens.Add ghee at regular intervals.
  6. Mix till halwa starts to release ghee.Add cardamom powder, nuts and food color.Mix well.
  7. Remove in a greased plate, cut after it cools down. Enjoy !
  8. To make chewy corn flour halwa, you need to cook for another 20 minutes till ghee oozes out completely.!
  9. Remove in a greased plate, cut after it cools down. Enjoy !

Bombay Karachi halwa Recipe - Step by step photos

  • In a wide bowl, mix 1 cup of corn flour & 2 cups of water.Beat well to make it lumps free. It should resemble milk.Set aside.
  • In a good non-stick kadai, dry roast chopped cashews, badam and whole melon seeds for 2 minutes. Remove in a plate.Keep it aside.
    Bombay Karachi Halwa
  • In the same kadai, add 2.5 cups of sugar and 1 cup of water. Mix well in medium flame till sugar is melted completely. Add 1 tsp lemon juice and mix well.
    Bombay Karachi Halwa
  • When the sugar syrup comes to boil, add diluted corn flour by mixing it well because all the corn flour would be settled in the bottom of bowl.So mix well before adding to sugar syrup.
  • Keep the flame medium high and start mixing with a ladle. In 5 to 10 minutes,corn flour becomes a thick paste.
    Bombay Karachi Halwa
  • Reduce the flame to medium and start adding 1 tbsp ghee. Add 1 tbsp ghee and mix well. After all the ghee is absorbed by the halwa, add 1 tbsp ghee again.As you cook, halwa becomes pale yellow in color.
    Bombay Karachi Halwa
  • Halwa becomes glossy, leaves the pan completely and starts to rotate with the ladle.
  • At this stage, add cardamom powder and roasted nuts.Continue stirring and add 1 tbsp ghee.
    Bombay Karachi Halwa Recipe
  • At one stage, halwa starts to release ghee in the sides. If you want soft halwa, you can remove at this stage to a greased bowl or bowl lined with butter paper.
  • I divided the halwa mixture into two parts to make both soft halwa and chewy halwa.I added orange food color to one. Mixed well and pour the mixture to the greased bowl.To serve as scoop of halwa in a bowl, you can serve it immediately before setting.
  • To make pieces, allow the halwa to cool down for 2 hours and then cut into pieces using a sharp knife.
    Bombay Karachi Halwa Recipe
  • I added yellow food color to another half of halwa mixture to make chewy halwa. For chewy halwa, you need to stir for another 20 to 30 minutes in medium to high flame till ghee comes out completely and halwa turns stretchy.The more time you cook, the more chewy and hard halwa would be.
    Bombay Karachi Halwa Recipe
  • Actually I wanted to make both soft halwa and chewy halwa.So I divided the halwa mixture into two.Added yellow and orange food color to them. Mixed well and transferred orange colored halwa to the greased bowl and allowed to set it.
    Bombay Karachi Halwa Recipe
  • I cooked the yellow halwa for another 20 minutes adding 2 tbsp more ghee. All the ghee oozed out in the corner and middle of halwa. Drop some halwa in a plate and try to stretch it.If it stretches, halwa is ready. Then transfer to a greased bowl and allow it to set for 3 to 4 hours till its cooled down completely. It would be better if you set the halwa in an aluminium tray or bowl that is used for cakes because aluminum helps to withstand heat for long time and halwa becomes hard and chewy. Invert the halwa bowl onto a plate after its cooled down completely. Cut into pieces and enjoy. This halwa can be stored for one week without refrigeration.But keep in an air tight box.
    Bombay Karachi Halwa Recipe
    Bombay Karachi Halwa Recipe

Notes

  • Do not reduce the quantity of sugar and ghee.If you want, you can add more cooking oil and less ghee.
  • To make chewy halwa, you have to stir for long time till the halwa become stretchy.
  • You can add food color in the corn flour water or sugar syrup too. But I wanted to add 2 colors.So I cooked it without adding color and added at the end.
  • To make soft halwa, you have to remove it when it starts to release ghee in the sides of pan.

Try this easy, yummy Bombay halwa for this Diwali and Enjoy !
Bombay karachi halwa

Dry Jamun Recipe With Ready Mix– Dry Gulab Jamun Using MTR mix

$
0
0
Dry jamun recipe with MTR ready mix. Last year I made a detailed post on how to prepare gulab jamun with instant mix. Gulab jamun is considered to be the last minute sweet to me for diwali. As its preparation is very easy using readymade mix, I always make it one day before Diwali. This year I wanted to try dry jamun for a change.
Dry gulab jamun using ready mix
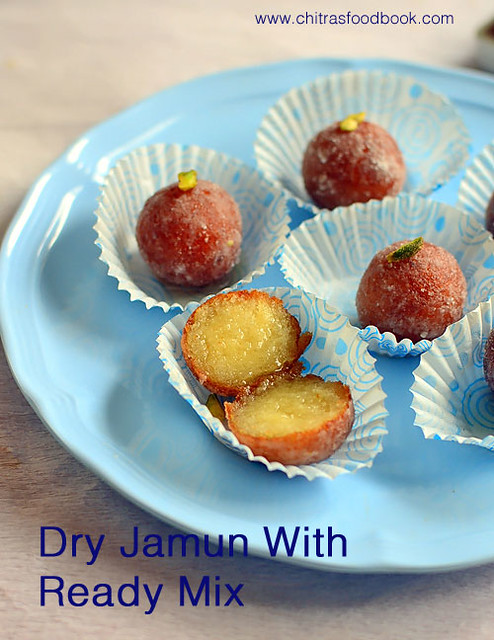
Dry jamoon is our family favorite sweet we buy from Adayar Anandha Bhavan. This year I bought ORKAY Gulab jamun mix in addition to MTR mix as well. It is also equally good but my choice is for MTR because of its softnessWinking. Dry jamun recipe is very similar to our basic gulab jamun recipe except the soaking time. Usually dry jamoon needs less soaking hours. Some people like to have gulab jamun without sugar syrup. For them , Dry gulab jamun is the ideal choice. It tastes mildly sweet but still juicy with all the syrup in it. Ok, lets see how to prepare dry gulab jamun using mtr mix with step by step recipe. I hope this recipe works for Gits, Aachi, GRB. Bambino and other brands too.
dry jamun with mtr mix

Dry Gulab jamun recipe with ready mix


Gulab jamun recipe with instant mixHow to make Gulab jamun using readymade mix, Instant, store bought MTR mix
Cuisine:Indian
Category:Sweet
Serves:20 nos
Prep time:30 Minutes
Cook time:15 Minutes
Total time:45 Minutes
1 cup - 250ml
  • Gulab jamun mix - 150gms/ 1.5 cups
  • Boiled Milk at room temperature - 1/4 cup + 2 tbsp ( + 1 tsp)
  • Cooking oil - to deep fry
For sugar syrup
  • Sugar - 3 cups
  • Water - 3 cups
  • Cardamom powder or rose essence - 1 tsp
  • Saffron threads – few
  • Chopped nuts – to garnish

Please watch this video for clear understanding !

METHOD

  • Read the instructions given on the pack. In MTR mix, its mentioned to add 1 part of water for 4 parts of mix. 400gms of sugar for 150 gms mix packet. So i followed the recipe accordingly.
  • Take sugar and water in a wide bowl and mix well. Keep aside, let it dissolve. In the mean time, take the gulab jamun mix in a wide plate. I used my thambalam/ big round plate. Usually I make chapati dough and other dough in my thambalam as its spacious and convenient to mix well. If the mix has more lumps, sieve it once.  Break the lumps with your fingers while sieving. Do not discard the residue. Add it to the ready mix and mix well again. I got around 1.5 cups of powder. If you are using ORKAY mix, do not sieve the mix. Just break the lumps with your hands.
    Gulab jamun recipe with mix
  • Now add the milk or water little by little and gather all the flour with your fingers. The mixture will become wet and very sticky. Do not worry. Gulab jamun will come out soft if the dough is sticky. I used 1/4 cup + 2 tbsp + 1 tsp milk. So add milk carefully at the end. If you add more milk, jamun will flatten and break. Do not knead the dough using your palm.Mixing should be done only with your fingers. Cover the dough with a plate or invert a bowl. Let it rest for 15 minutes to 1 hour.

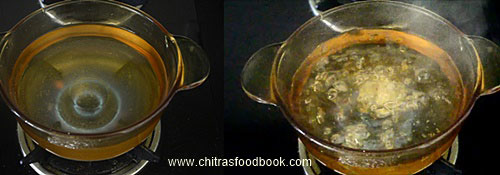
  • In the mean time, heat sugar + water and melt it. Add saffron threads, cardamom or rose essence. Boil the syrup for 10 minutes in medium flame till the syrup turns slightly sticky to touch, glossy & resembles oil in consistency. Keep aside. Let the syrup becomes warm.
    Gulab jamun recipe with mtr mix
  • After 30 minutes, take the dough.It will be soft to touch.Do not knead it. Grease your palm with ghee. Make a big gooseberry sized ball by rolling the dough between your palm. Give gentle pressure and roll it continuously for 30 seconds to make it smooth and crack free. As the dough is sticky, jamun balls will not get cracks. If you feel there are cracks, just roll it tight. Cracks will disappear. I made around 20 balls.
    Gulab jamun recipe with mix
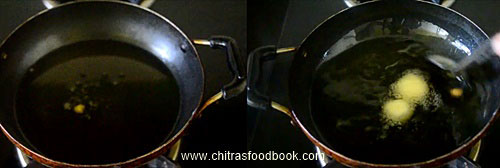
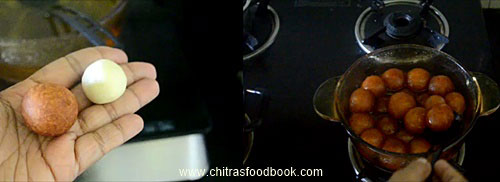
  • Heat oil in a kadai and when it gets heated , put a pinch of dough in the oil. If it rises to the top slowly, oil heat is perfect. Now stir the oil with a ladle in the corners. When the oil starts to rotate, drop the jamun balls. I cooked 4 per batch. Stir the oil continuously without touching the gulab jamun. You will find jamun rotate with oil and turns bigger in size. The color of jamun balls change slowly and it cooks uniformly. Once it turns golden brown, remove it in a tissue paper. Do not fry for long time. Jamun will become hard and it will not absorb the syrup. After frying, open & check if its cooked well. Leave the cooked jamun for 2-3 minutes in tissue paper and then drop in the sugar syrup. (If you feel difficult to stir the oil, just keep the flame low, add the balls, flip every now and then till jamun turns golden. Then remove it).
    Gulab jamun recipe with mix
  • If the sugar syrup becomes cold, heat till it becomes medium hot. i.e vapor should start to come from the syrup slightly. Deep fry all the balls in batches, drain in the tissue and drop in the syrup. Let the balls soak in syrup for one hour. It will soak well and almost double in size. Remove and arrange in a bowl. You can serve it as such or coat the balls in dry coconut powder or sugar powder. I felt sugar coating is tastier. Transfer the gulab jamun to a box and store it for 2 to 3 days.No need to refrigerate.
    Gulab jamun recipe with mix
Enjoy !
Tips
  • Adding milk for making the dough helps to give soft jamun. You can use water as well. My friend Swarna adds just a tsp of milk in the beginning and add then water to make the dough.
  • Dough should be really sticky to get soft Gulab jamun. If you have added more milk by mistake, don’t panic. Just cover the dough with a lid and let it rest for an hour.Grease your hands and make smooth balls.If it comes out without cracks, then proceed and deep fry only one ball for a trial. If it disperses in oil, then add a tsp of maida, mix well and make another ball. Test it and proceed further.  But adding more milk flatten the jamun. So please be careful while adding milk.
  • Jamun balls should be crack free. Roll it for 30 seconds continuously.This helps to seal the cracks while rolling. Do not press it too hard while rolling, but give gentle pressure.
  • Deep fry the balls only at low temperature else balls will get browned quickly without cooking inside.
  • Gulab jamun balls will disperse in oil  or cracks more if the oil temperature is too low. So Check the temperature before you drop the balls.
  • Similarly cracks will form if the jamun balls become dry.so keep it covered all the time till you finish the procedure.
  • Sugar syrup should not be too hot while you drop the jamun. It should be medium hot or warm. Similarly Gulab jamun should not be too cold. 
  • Gulab jamun will flatten if you add more milk. It will also flatten if the sugar syrup is less. Make sure the sugar syrup is enough for all the balls to absorb and dunk in completely.
  • If the quantity of sugar syrup is less, then jamun will not turn soft and double in size.
Try this easy, mildly sweet dry jamun for a change. You will love it !
Dry gulab jamun with ready mix


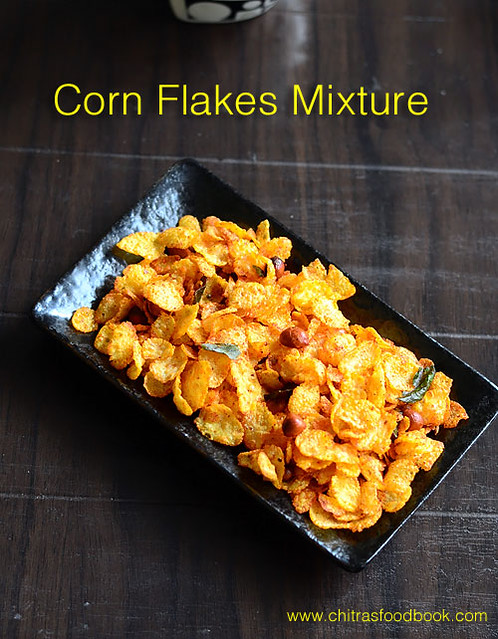
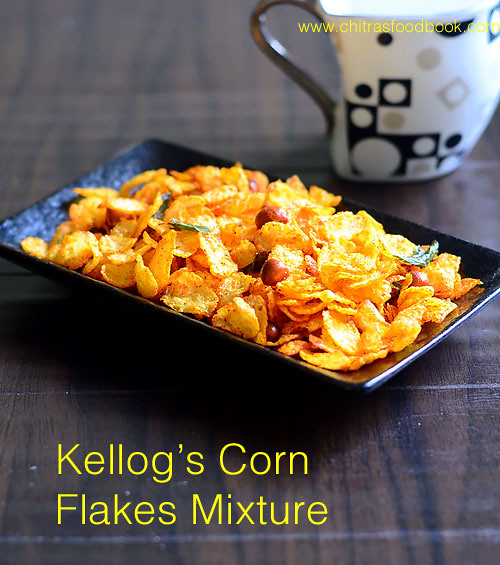
Corn Flakes Mixture Without Oil – Kellog’s Corn Flakes Chivda – Low Calorie Snacks

$
0
0
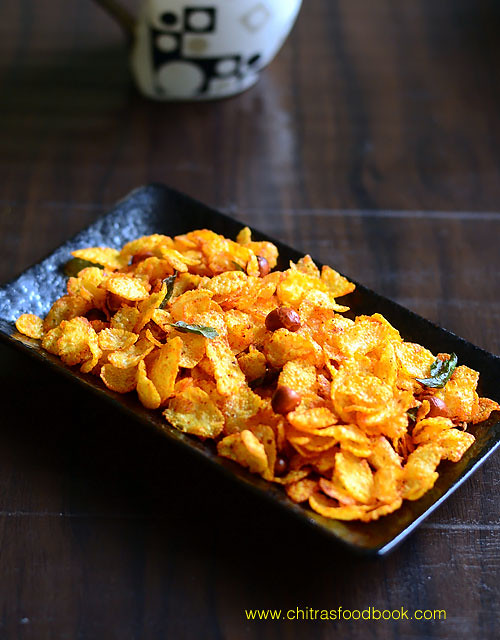
Corn flakes mixture using Kellog’s corn flakes. It is made without deep frying in oil. Recently my daughter Raksha tasted this corn flakes chivda in her friend’s house. She told me to try it for Diwali. I asked her friend’s mom for the recipe and tried it today. Its a very easy, quick and healthy snack as it has very less oil. Kids & adults would love this for sure.Its quiet additive !
Many of us have corn flakes cereals ( Kellog’s or Kwality brand) at home. If you have it now, you can make this corn flakes mixture in the next 10 minutes. You can pack this for your kids snack box or for their teatime after coming back from school. It can be stored for 2 to 3 days without losing its crispness. Friends, diwali is incomplete without mixture recipe. If you have not done any mixture recipe, you can try it now. Try this easy, low calorie Kellog’s corn flakes mixture at home and surprise your family.

Cornflakes mixture


Cornflakes mixtureLow calorie cornflakes mixture recipe with less oil!
Cuisine:Indian
Category:Snacks
Serves:4.5 cups
Prep time:5 Minutes
Cook time:5 Minutes
Total time:10 Minutes


INGREDIENTS

  • Kellog's corn flakes - 2 cups (Original, plain flavor)
  • Roasted peanuts – 2 tbsp
  • Curry leaves - few
  • Cashew nuts - 2 tbsp (broken, optional)

To temper
  • Cooking oil - 1 tbsp
  • Mustard seeds - 1/2 tsp
  • Cumin seeds - 1 /2 tsp
  • Urad dal - 1/2 tsp
  • Red chilli powder - 1 tsp ( add 1.5 tsp for more spiciness)
  • Turmeric powder - 1/8 tsp
  • Salt - as needed
  • Chat masala – 1/4 tsp(optional)
  • Sugar – 1/4 tsp
  • Dry grapes/Raisins – 1 tbsp (optional, add if your kids like it)
METHOD

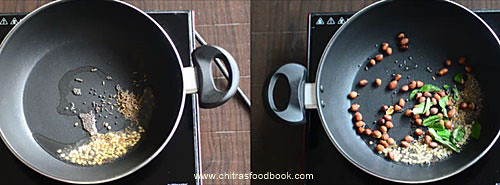
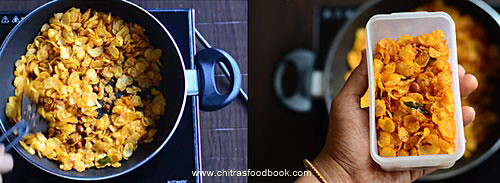
  • In a kadai, heat oil and splutter mustard seeds, urad dal and cumin seeds. Add roasted peanuts, curry leaves and mix well.
corn flakes mixture step1
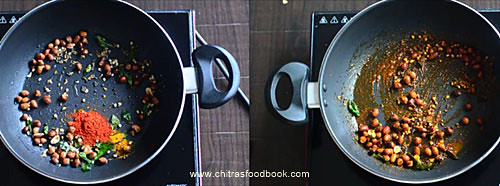
  • Lower the flame completely and add turmeric powder, red chilli powder, salt and sugar. Mix well.
Corn flakes mixture
  • Lastly add the corn flakes and mix well in low flame till its coated with chilli ppowder. Check for taste and add 1/2 tsp more chilli powder at this stage, mix well and switch off the flame.
corn flakes mixture step2
  • Store in a box after the mixture cools down. Stays crispy and good for 2-3 days when stored in an air tight box.

    Note
    • Do not use raw corn flakes for this recipe. You should deep fry it or microwave before making mixture.
    • I used Kellog’s brand corn flakes cereals,original flavor. 
    • Adjust the quantity of chilli powder as per taste. But keep the flame low while adding chilli powder else it will burn.
    • For variations, you can add raisins and cashews. Saute raisins till it bulges. I din’t use as my daughter doesn’t like it.
    • You can also add little chaat masala for more flavor.
    Try this easy, yummy, low calorie corn flakes mixture for this Diwali & kids lunch box. !
    Kellog's corn flakes mixture

    Rasam Powder Recipe – Tamilnadu Style Homemade Rasam Podi

    $
    0
    0
    Tamil nadu style rasam powder / rasam podi recipe with step by step pictures and video. This is one of the best rasam powder I have ever made at home. I am a not a regular buyer of store bought rasam podi as I love to grind it with fresh ingredients & make rasam with it. I have already posted my aachi’s rasam powder recipe for small quantity in my South Indian rasam recipe post. It smells and tastes awesome. I have also shared my Dad’s style rasam recipe using a 2 ingredient, instant rasam powder and easy bachelors style rasam. But some of my readers who tried my homemade sambar powder asked me to share authentic, traditional, Tamil people style homemade rasam powder recipe to grind & store for one month use.
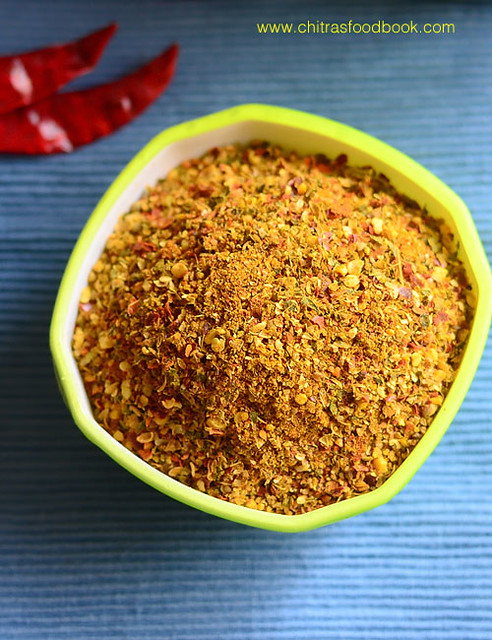
    Rasam powder Tamilnadu
    When I told this to my MIL, she immediately suggested a recipe she read long back in a magazine. She made a trial batch and passed it to me. I loved its flavor and taste. Last month when my MIL came to Bangalore, I told her to make rasam podi & idli podi and took video for my reference. The quantity I have mentioned in this recipe comes for 1 month use if you prepare rasam regularly. Its flavor and spiciness remains the same if stored in an airtight box. You can grind it easily at home using your Indian mixer. Use it within a month to enjoy its best taste & flavor. Ok, lets see how to make Tamil nadu style homemade rasam powder recipe !
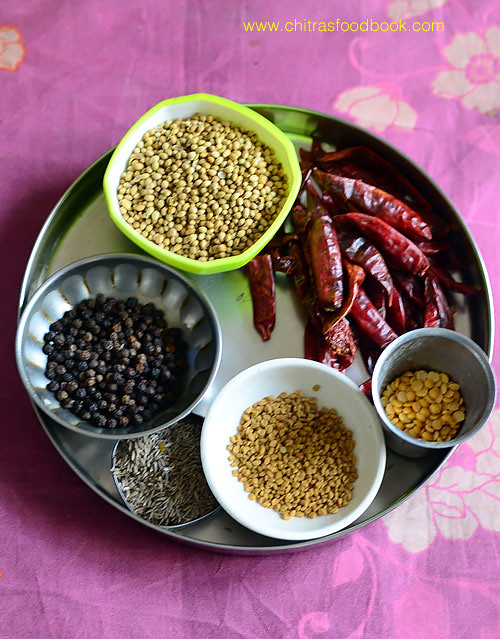
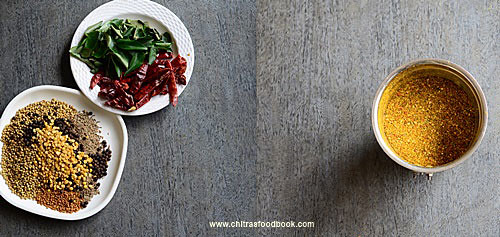
    Rasam powder ingredients

    Rasam Powder Recipe - Tamil nadu Style Rasam Podi


    Rasam Powder Recipe - Tamil nadu Style Rasam Podi

    Tamil nadu style, homemade rasam powder recipe with easily available ingredients


    Cuisine:South Indian
    Category:Rasam Recipe
    Serves:1 cup
    Prep time:5 Minutes
    Cook time:10 Minutes
    Total time:15 Minutes
    1 cup - 250ml
    • Dhania / Coriander seeds - 1/2 cup
    • Pepper - 1/4 cup
    • Cumin seeds / Jeera - 2 tbsp
    • Toor Dal - 2 tbsp
    • Methi seeds - 3/4 tbsp
    • Red chilli - 25 nos
    • Curry leaves - A fistful
    • Turmeric powder – 1/2 tbsp

    HOW TO MAKE RASAM POWDER

    1. Measure & Take all the ingredients required for rasam powder.
    2. Sun dry or dry roast one by one.
    3. Cool & Grind to coarse powder.
    4. Store for a month & make rasam with it.

    RASAM POWDER RECIPE - STEP BY STEP PICTURES

    Measure all the ingredients given for rasam powder. Sun dry them for one day till it gets heated. Then grind to a coarse powder and store for months.
    Alternatively you can dry roast all the ingredients one by one carefully without burning them
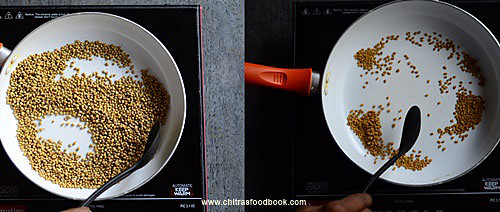
    Heat a kadai and dry roast coriander seeds till it gives nice aroma.Remove in a plate.
    Then roast the methi seeds and roast till golden brown.Remove in the plate.
    rasam powder recipe
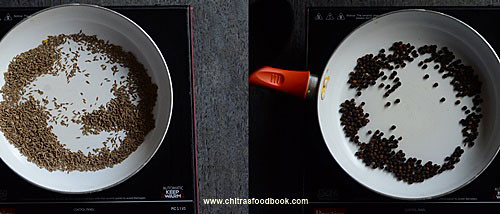
    Dry roast cumin seeds and then pepper corns till its heated.
    rasam powder recipe
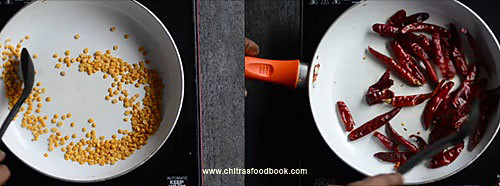
    Now roast toor dal till it gets heated.Collect them in the plate.Then roast the red chillies in medium flame till it becomes crispy, keep it in a separate plate.

    rasam powder recipe
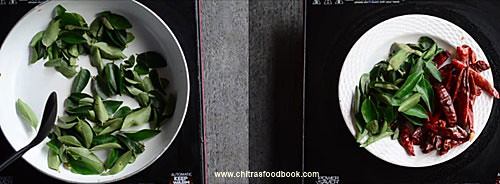
    Lastly roast the curry leaves. Switch off the flame and let it be in the hot kadai till it turns crispy. Transfer it to the red chilli plate.

    rasam powder recipe
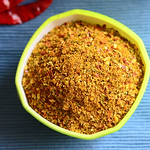
    After it cools down, transfer to a mixie jar. Add turmeric powder and grind everything to a  slightly coarse powder. Grinding coarsely helps to retain the flavor for long time. Store in an air tight box once the powder cools down completely.

    rasam powder recipe
    You can add 1 tbsp of this rasam powder for making rasam for 3 people.
    This rasam powder stays good for 1 to 2 months.Use a clean spoon for handling.

    Note

    • I have used more red chillies which helps to retain the flavor and spiciness for more days. If you reduce the quantity of chillies, powder will become bland in taste after few days. 
    • You can skip curry leaves if you don’t like.You can add some fresh curry leaves while making rasam. 
    • Toor dal helps to give some thickness to the rasam.So adding cooked dal water is optional. 
    • Use fresh ingredients and grind it whenever needed.

    Try this yummy, flavorful homemade rasam powder and make rasam with it. You will love its taste !
    Rasam podi

    Peas Kurma For Chapathi, Poori – Pattani Kurma Recipe

    $
    0
    0
    Peas kurma for chapathi 
    Peas kurma recipe / Green peas kurma (Pachai Pattani kurma in Tamil) for chapathi, poori, idli& dosa.I love to try varieties of South Indian kurma recipes at home. Recently I prepared this green peas kurma as a side dish for chapathi. I adapted this recipe from Jeyashri’s kitchen and made few changes as per my taste. It came out really well. I used dry peas in this recipe. You can also make this yummy peas gravy with fresh,frozen peas. We relished it with chapathi and had the same kurma with idli,dosa the next day. Myself & Raksha liked this combination very much. Basically I love to have kurma type of side dish for idli & dosa. My mom makes varieties of kuruma kulambu for idli,dosa. This pattani kurma is one of its kind. I am happy that I got an easy, yummy green peas kurma that goes well not only for chapathi, poori but also for idli,dosa. I hope this kurma tastes well with mild pulao and rice varieties too. For variations, you can also add boiled potato along with peas. Do try this delicious Pattani kurma for chapathi and share your feedback with me.  Ok, lets see how to make peas kurma with step by step pictures.
    Check out my potato kurma for poori and Saravana bhavan style veg kurma recipes too !
    Pattani kurma

    Peas kurma recipe / Pattani kurma


    Peas kurma recipe / Pattani kurma

    Peas kurma recipe - A delicious South Indian gravy for chapathi, poori, idli and dosa !


    Cuisine:Indian
    Category:Side dish for chapathi
    Serves:Serves 3-4
    Prep time:10 Minutes
    Cook time:20 Minutes
    Total time:30 Minutes
    1 cup - 250ml
    • Dry peas or fresh peas - 1 cup
    • Tomato - 2 nos
    • Big onion - 1 no
    • Ginger-Garlic paste - 1 tsp
    • Fennel seeds - 1/2 tsp
    • Turmeric powder - 1/4 tsp
    • Red chilli powder - 1 tsp
    • Dhania powder – 1 tsp
    • Garam masala powder - 1/2 tsp
    • Cashew nuts - 5 nos
    • Grated coconut - 2 tbsp
    • Salt & water - as needed
    • Cooking oil – 2 tbsp + 1 tbsp
    • Coriander leaves - to garnish (Optional)

    HOW TO MAKE PEAS KURMA

    1. Wash and soak dry peas overnight or 8 hours.
    2. Pressure cook in low flame for 2 whistles.
    3. Saute onion, tomato, g&g paste and spice powders.Grind to paste adding coconut.
    4. Saute this ground paste in oil and add the cooked peas.
    5. Boil till oil floats on top. Serve with poori, chapathi, idli & dosa.

    METHOD - STEP BY STEP PICTURES

    • Wash and soak dry peas in enough water overnight or for 8 hours. Pressure cook in low flame for 2 whistles adding 1 cup of water and salt.
      Peas kurma recipe
    • Heat cooking oil and saute onion, fennel seeds, tomato, gg paste, turmeric powder, red chilli powder, Dhania powder and garam masala powder.
      Peas kurma recipe
    • Lastly add coconut, cashew nuts and saute for a minute.Grind to a smooth paste adding required water.
      Peas kurma recipe
    • Heat oil in a kadai and when it gets heated , add the ground paste. Add salt, sugar and saute till thick. If using fresh peas or frozen peas, add at this stage and boil till it cooks well.  Add cooked peas, 1 cup of water and boil for 5 minutes till nice aroma arises.
      Peas kurma recipe
    • Adjust the consistency of the gravy by adding more water if needed. This gravy thickens quickly when it cools down.So add more water, check for salt and serve with poori, chapathi, idli and dosa.
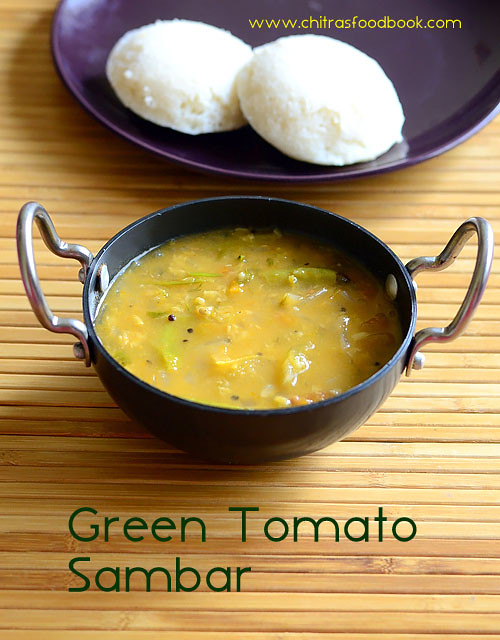
      Peas kurma recipe
    • Enjoy !

    Note

    • For variations, you can skip garam masala powder and try it. But I would recommend to use it.  
    • You can also add boiled potato cubes if you have less peas in hand.
    • You can grind the masala ingredients without sauting in oil but it gives a different flavor and taste to this kurma.
    • Adjust the consistency of this kurma as you like.I like mine to be semi solid in consistency as you see in the picture below.  
    • If using fresh peas or frozen peas, you can add it along with ground paste.No need of pre cooking.

    Try this easy, yummy Peas kurma and enjoy with poori,chapathi, idli or dosa !
    Peas kurma recipe

    Tomato Chutney Recipe Without Onion,Garlic,Coconut–No Onion No Garlic Chutney

    $
    0
    0
     Tomato chutney without onion
    Tomato Chutney Recipe without onion, garlic and coconut. I have posted varieties of tomato chutney recipes(Thakkali chutney in Tamil) in my website but not even one chutney without onion and garlic. This morning, I prepared Kambu idli,dosa(Pearl millet idli/Bajra idli) for our breakfast and prepared this South Indian style tomato chutney recipe without adding onion, garlic and coconut. This recipe is very similar to my tomato chana dal chutney but I have used urad dal, coriander seeds as well. It tasted yummy when drizzled with sesame oil. I have already shared an easy tomato thokku recipe without onion and garlic but I never thought to try a chutney recipeBatting Eyelashes. I am happy that I tried this no onion no garlic tomato chutney recipe. I am sure this chutney would help people looking for No onion no garlic recipes during festival season or under fasting. Its a good side dish for idli and dosa. Hope you will try this recipe and like it. Ok, lets see how to make tomato chutney recipe without onion, garlic and coconut. 

    Do check out my 50 chutney recipesif interested.
    Tomato chutney - No onion no garlic

    Tomato chutney without onion, garlic and coconut


    Tomato chutney without onion, garlic and coconut

    Thakkali chutney / Tomato chutney recipe without onion, garlic and coconut


    Cuisine:South Indian
    Category:Chutney Recipes
    Serves:Serves 3
    Prep time:5 Minutes
    Cook time:10 Minutes
    Total time:15 Minutes
    To saute in oil
    • Ripe tomato - 2 nos (Medium sized)
    • Urad dal - 1.5 tsp
    • Chana dal - 1.5 tsp
    • Coriander seeds/Dhania - 1/2 tsp
    • Red chilli - 4 nos ( I used 2 Kashmiri chillies, 2 long chillies)
    • Curry leaves – 5 leaves
    • Hing /Asafetida – 2 pinches
    • Tamarind - A pinch
    • Cooking oil - 1.5 tbsp
    • Salt & Water – as needed
    To Temper
    • Cooking oil - 1 tsp
    • Mustard seeds - 1/2 tsp
    • Urad dal - 1/2 tsp

    HOW TO MAKE TOMATO CHUTNEY

    1. Wash and chop tomato into small pieces, set aside.
    2. Heat oil in a kadai and roast the dals, hing, dhania and chilli.
    3. Add tomato, salt,tamarind, curry leaves. Saute till mushy.
    4. Grind to a smooth chutney and temper with mustard, urad dal.

    METHOD - STEP BY STEP PICTURES

    • Wash and chop tomato into small pieces, set aside. Heat 1.5 tbsp oil in a kadai and roast the urad dal. chana dal, dhania, hing and red chillies. Saute till dals turn golden.
      Tomato chutney without onion and garlic
    • Add chopped tomato, pinch of tamarind, hing, salt and curry leaves. Saute till tomato becomes mushy.
      Tomato chutney without onion and garlic
    • Let the mixture cool down. Then grind to a smooth paste adding required water.Transfer to a bowl.
      Tomato chutney without onion and garlic
    • Heat 1tsp oil in a small kadai, temper mustard seeds, urad dal.Add to the chutney, mix well and serve with idli,dosa !

    • Enjoy !

    Note

    • I have used 2 Kashmiri chillies/Byadgi chilli for bright red color and 2 long chillies for spiciness.
    • You can replace Kashmiri chillies with one or two spicy chilli if you like.
    • Addition of Coriander seeds is optional but it gives a  nice flavor. Do not add more than the mentioned quantity.
    • Curry leaves is also for flavor. You can skip if you don’t like it. You can use 1 tbsp of coriander leaves instead.
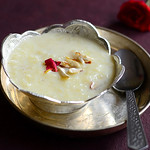
    • Do not add more curry leaves. Chutney smells raw.
    • As this chutney is without onion and garlic, tempering is a must to enhance its flavor. So don’t skip it.

    Try this easy, yummy, no onion no garlic tomato chutney for idli & dosa. You will love it !
    No onion no garlic tomato chutney

    Kambu Idli Dosai–Pearl Millet Idli-Bajra Idli Dosa Recipe

    $
    0
    0
    Pearl millet idli, dosa recipe without rice ( Kambu idli dosai in Tamil, Bajra Idli dosa in Hindi, Sajjalu Idli dosa in Telugu, Sajje idli dosa in Kannada, Kambam in Malayalam) with step by step pictures and video. After a long time, I am happy to share a millet recipe in my website.I love to consume millets in the form of idli, dosa, adai or upma at least once in week either for breakfast or dinner. But I haven’t blogged many of the recipes I make in my kitchen. So I thought of sharing them one by one from this week.
    KAMBU IDLI RECIPE

    This is not going to be a millet series. I will try to post the Indian style millet recipes whenever I can. To begin with here is a healthy, super soft pearl millet idli without using rice. Pearl millet is one of the wonder grain millets that helps to control diabetes, reduces cholesterol and aids for weight loss. I adapted my Mixie idli,dosa batter recipe and prepared this idli using bajra/kambu. We can grind this kambu idli batter easily using Indian mixie. It came out very well and I am completely satisfied with the results. I made soft idli on the first day with the fermented batter and crispy dosa for the next day dinner. Both were good in taste when consumed hot. But idli looks grey in color and smells like millet as it has no rice. Tomato chutney or coconut chutney is a good side dish for this Kambu idli and dosai. Do try this healthy bajra idli at home and share your feedback with me. Ok, lets check how to make Kambu idli/ Pearl millet idli with step by step pictures. I will upload the video tomorrow.
    Do check out my other MILLET RECIPES too !
    Pearl millet idli

    Kambu idli dosai recipe - Bajra idli / Pearl millet idli dosa recipe


    Kambu idli dosai recipe - Bajra idli / Pearl millet idli dosa recipe

    Healthy Pearl millet idli and dosa recipe without using rice


    Cuisine:Indian
    Category:Millet recipes
    Serves:20 nos
    Prep time:5 Minutes
    Cook time:10 Minutes
    Total time:15 Minutes
    1 cup - 250ml
    • Pearl millet / Kambu / Bajra - 2 cups
    • White,round urad dal - 1/2 cup
    • Poha / Aval / rice flakes - 1/4 cup ( I used thick poha)
    • Methi seeds / Fenugreek seeds - 1/2 tsp (Optional)
    • Salt & Water - As needed

    HOW TO MAKE PEARL MILLET IDLI

    1. Wash and soak pearl millet, methi seeds and poha together for 5 hours.
    2. Wash and soak urad dal separately in another bowl for 2 hours.
    3. Grind urad dal to a smooth paste adding the soaked water.
    4. Collect in a bowl and then grind millet + Poha mixture to a smooth paste adding enough water.
    5. Mix both the batter with hands and let it ferment overnight. The next day, mix the batter well and make idli.
    6. Enjoy with tomato chutney or coconut chutney !

    METHOD - STEP BY STEP PICTURES

    • Wash the pearl millet twice to remove the debris , add poha, methi seeds, wash again and soak it in enough water for 5 to 6 hours. Wash and soak urad dal separately in another bowl for 2 hours.
      Kambu idli
    • First grind urad dal in a mixie to a thick, smooth batter adding enough water. I used the soaked water for grinding. You can also use ice cold water. Then grind the soaked pearl millet + Poha to a smooth batter adding required water. Do not make the batter watery.

    • Mix both the batter well with your hands and allow it to ferment overnight or 12 hours based on the weather in your place. The next morning, batter would have raised well. Its consistency should be like regular idli batter.
      Kambu idli
    • Mix well and make idli in a greased idli plate. Steam it for 10 to 15 minutes. Remove after it becomes warm. It tastes super soft when hot with the flavor of pearl millet. Serve hot to enjoy its best taste !
      Kambu idli
      Kambu idli

      Enjoy !

    Note

    • Do not grind the batter too watery. Add only the required water.
    • Urad dal should be soaked and grind separately to get soft idli.
    • If you soak them together, you need to add more urad dal and poha. You may have to use 3:1 ratio of millet and dal if soaking them together.
    • You can also use Kuthiravali/ barnyard millet or Thinai/Foxtail millet instead of pearl millet.
    Try this healthy Kambu idli & dosai with your favorite chutney or sambar !
    Kambu dosai
    Viewing all 967 articles
    Browse latest View live