Quantcast
Channel: Chitra's Food Book
Viewing all 967 articles
Browse latest View live

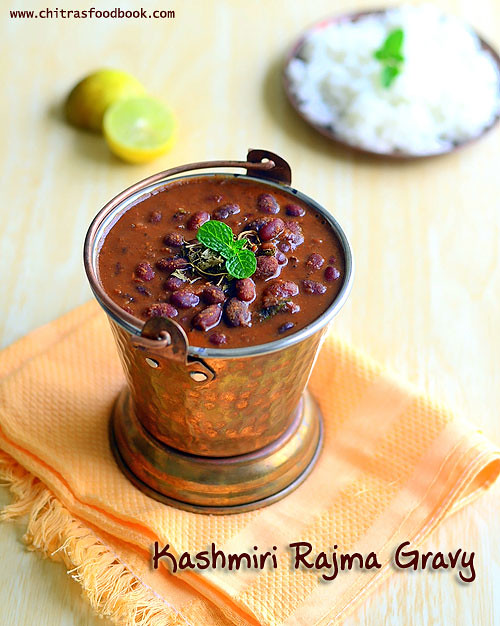
Kashmiri Rajma Gravy – Red Kidney Beans Gravy For Rice,Chapathi

$
0
0
Kashmiri Rajma masala  

Recently I bought a pack of Rajma ( Red kidney beans in English,Karamani or Karamani Payir in Tamil , Rajma in Punjabi,Hindi , Capparadavare in Kannada, Chikkuduginjalu / Nallachikkudu in Telugu ) to try some gravy/masala for rice.I have heard a lot about Rajma Chawal,a popular North Indian Dish.So I wanted to try that but then I found the pack had Kashmiri Rajma which was smaller in size than the usual rajma.So I browsed for some Kashmiri rajma masala gravy that can pair with rice and chapathi as well. I found one in Divine taste using freshly ground garam masala powder. It was a no onion no garlic Jain recipe too.I became double happy and tried it for our lunch with slight modifications in the original recipe.It came out very well.We had the same for our dinner as a side dish for Chapathi/Roti. It tasted yum and we were happy to have a healthy,protein rich gravy for our lunch & dinner.Ok,Lets see how to make Kashmiri Rajma masala for rice and chapathi.

Check out my Rajma Sundal& Rajma Biryani recipes too.


Kashmiri Rajma gravy recipe

Kashmiri Rajma gravy for rice,chapathi


Kashmiri Rajma grvay for rice,chapathiKashmiri rajma gravy - A no onion no garlic recipe for rice & roti
Cuisine:Indian
Category:Side dish
Serves:Serves 4
Prep time:5 Hours
Cook time:20 Minutes
Total time:5H 20Minutes
INGREDIENTS
1 cup = 200ml
  • Rajma/Red kidney beans - 1.5 cups
  • Bay leaf - 1 no
  • Water - 4 nos
To saute
  • Cooking oil or mustard oil - 2 tbsp
  • Cumin seeds/Jeera - 1 tsp
  • Ginger - 2 inch piece ( chopped finely or grated)
  • Asafetida/Hing - 1/4 tsp
  • Turmeric powder – 1/8 tsp
  • Dhania powder/coriander powder - 4 tsp
  • Red chilli powder – 1.5 tsp ( Add 1 tsp for less spice)
  • Sugar – 1/4 tsp
  • Salt - as needed
  • Crushed Kasoori methi - 1/2 tsp
  • Coriander leaves - to garnish
For spice powder
  • Cinnamon - 1 inch piece
  • Cloves - 3 nos
  • Cardamom -3 nos
  • Pepper corns -1/2 tsp
OR
To grind
  • Tomato - 4 nos ( small,Use 3 if big)
METHOD

  • Wash and soak the kidney beans/Rajma for 5 hours.Pressure cook it adding 5 cups of water and a bay leaf. Cook for three whistles in very low flame.Open the cooker,take out 1/4 cup of cooked rajma and reserve it for later use.
Kashmiri Rajma gravy recipe
  • Grind 4 tomatoes into puree. Dry grind the spices given under “For spice powder” to a fine powder.Freshly ground garam masala powder is ready.Set aside.
Kashmiri Rajma gravy recipe
  • In a kadai,heat oil and splutter cumin seeds , ginger and hing.Add the tomato puree and mix well.
Kashmiri Rajma gravy recipe
  • Let the tomato puree boil well till it thickens.Take care,it splutters.Now add the turmeric powder, red chilli powder, dhania powder,sugar,salt and mix well.Boil till the oil floats on top.
Kashmiri Rajma gravy recipe
  • Grind the reserved 1/4 cup of rajma to a coarse paste and add it to the gravy.Add the remaining cooked rajma along with its water & bay leaf.
Kashmiri Rajma gravy recipe
  • Boil till the gravy reaches the desired consistency.Switch off the flame and add freshly ground garam masala powder, crushed kasoori methi,mix well. Garnish with coriander leaves and serve with hot rice & chapathi.
Kashmiri Rajma gravy recipe
Enjoy !
Check out my Rajma Sundal& Rajma Biryani recipes too.

Note
  • Adjust the quantity of red chilli powder and dhania powder as per your taste.
  • If you want to add onions & garlic,add finely chopped onions,garlic and saute in oil after adding cumin seeds,ginger and hing.

Enjoy this healthy,spicy Rajma gravy for rice and chapathi !
Kashmiri Rajma gravy

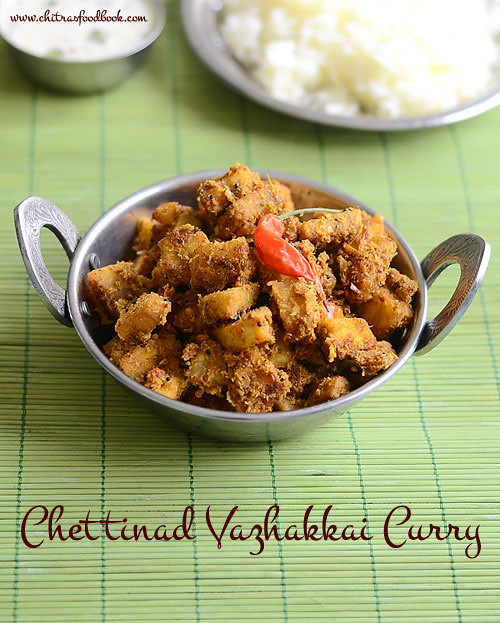
Vazhakkai Curry – Chettinad Raw Banana Fry Recipe

$
0
0
Chettinad Vazhakkai curry
Raw banana/Vazhakkai is our family favorite vegetable. So I keep trying varieties of curry/fry recipes with it. Recently I came across this Chettinad style vazhakkai masala curry recipe in this blog. As it had fennel seeds/soambu, i got tempted to try it. I made it as a side dish for mor kuzhambu. It was a yummy combo.We all loved it. Though I made it less spicy,it was very flavorful and tasty with rice. I have included this curry in my routine lunch menu too.Sure,its a welcome change from my Raw banana poriyal. Next I am eyeing on Vazhakkai varuval/roast without coconut, but I don’t know when am i going to try itSilly . Lets see how to make Chettinad Vazhakkai curry recipe for rice with step by step pictures.Check out my other raw banana recipes
  1. Raw banana chips
  2. Raw banana bajji/fritters
  3. Raw banana kootu
Chettinad Vazhakkai curry

Chettinad Vazhakkai Curry Recipe


Chettinad Vazhakkai Curry RecipeChettinad style raw banana fry recipe using freshly ground masala
Cuisine:Indian
Category:Side dish
Serves:Serves 2
Prep time:10 Minutes
Cook time:20 Minutes
Total time:30 Minutes
INGREDIENTS

  • Raw banana / Vazhakkai - 1 no
  • Big onion - 1 no ( chopped finely)
  • Tomato - 1 no
  • Green chilli - 1 no ( slitted)
  • Garlic cloves - 4 nos ( chopped)
  • Turmeric powder - 1/4 tsp
  • Red chilli powder - 1/2 tsp ( i used Kashmiri chilli pwd)
  • Salt - as needed
To temper
  • Cooking oil - 1.5 tbsp
  • Mustard seeds - 1/2 tsp
  • Curry leaves - few
To grind
  • Grated coconut - 1/4 cup
  • Fennel seeds/soambu - 1 tsp
  • Coriander leaves - to garnish
METHOD

  • Wash & peel the skin of raw banana. Chop into cubes & keep inside water to avoid discoloration.Grind the coconut + fennel seeds to a smooth paste adding enough water.
Chettinad vazhakkai curry
  • In a kadai,heat oil and splutter mustard seeds,curry leaves. Saute onions,green chilli & garlic pieces until  onion becomes transparent. Add chopped tomato pieces and saute till mushy.
Chettinad vazhakkai curry
  • Add turmeric powder,red chilli powder and required salt.Mix well and add the raw banana cubes.Mix well.Add some water & cover cook till the raw banana is cooked well.Make sure it is not mushy.It should be firm.
  • Now add the ground coconut masala and mix well. Keep the flame medium and saute until you get a nice masala smell and raw banana gets coated with masala.Switch off the flame and garnish with coriander leaves.
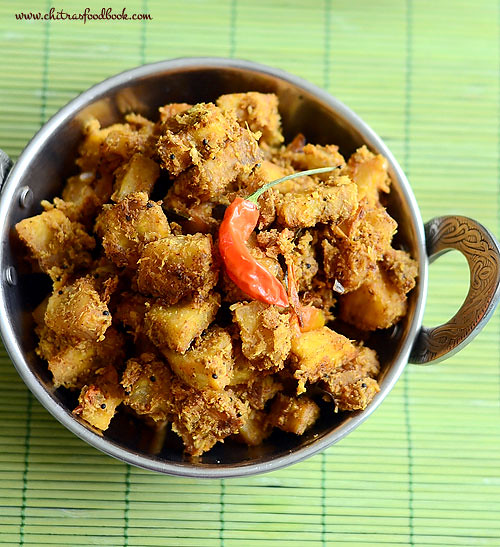
    Enjoy ! Chettinad vazhakkai curry

Chettinad vazhakkai curry
Check out my other raw banana recipes
  1. Raw banana chips
  2. Raw banana bajji/fritters
  3. Raw banana kootu


Note
  • Original recipe called for using 2 green chillies.But i used only one to make it less spicy.So add more for spicy fry.
  • You can also add more red chilli powder instead.
  • You can replace raw banana with arbi/Seppankizhangu but you should cook the arbi before adding in masala.
Enjoy this yummy,flavorful vazhakkai curry with rice,kuzhambu and papad !
Raw banana curry

Orange Mocktail Recipe – Summer Drinks Recipes

$
0
0
I make juices & milk shakes with fruits very rarely as we love to eat whole fruits. Recently I had this Orange mocktail in a juice corner. Raksha & myself loved it a lot. She told me to pack it for her school morning break time.So I browsed for mocktail recipes without alcohol and found it from Sharmi’s blog. The combination of Orange juice and lemon juice was perfect. Raksha gave a big thumbs up after drinking it and she told me to make it very often too. I usually make Eggless Orange cake during this fruit season.I am happy that I got yet another interesting recipe using orange fruit. Lets see how to make this non–alcoholic cocktail recipe - Orange Mock tail at home easily.

Orange Mocktail recipe


Orange Mocktail recipeEasy orange mocktail recipe - Non-alcoholic version.
Cuisine:Indian
Category:Drinks
Serves:Serves 1
Prep time:5 Minutes
Cook time: 2 Minutes
Total time: 7 Minutes
INGREDIENTS

  • Orange - 2 nos
  • Lemon - 1/2 - 1 no ( adjust)
  • Sugar - 2-3 tbsp
  • Water - as needed
  • Soda water - optional
METHOD

  • Extract the juice from Oranges.Add lemon juice and mix well.Strain the juice and add required sugar and water.Mix well and check for taste.Add more sugar or water if needed. Serve immediately.
how to make orange mocktail without alcohol
Enjoy !
Enjoy this easy,delicious healthy mocktail at home Happy

Wheat Flour Veg Momos Recipe

$
0
0
How to make wheat flour momos

Its been years since I posted Vegetable momo recipe in my blog. Generally momos are made using maida/All purpose flour.But my MIL makes it using whole wheat flour as it is more healthy.So I too started making the same following my MIL.I have heard wheat flour momos are very popular in Delhi.Here I have shared the steamed version.You can try deep fried version too.According to me,there is no major difference in taste between maida & wheat momo except its color.One more thing,this momo has to be eaten really hot to enjoy its best taste else it will become slightly chewy. But when compared with maida momo,this is a healthy option indeed.I have used cabbage alone for stuffing.You can use finely chopped mixed vegetables if you are allergic of cabbage.Recently I got a request from my reader cum cute sister Dhivya to prepare wheat flour momos and post here.So here it is Dhivya,just for youLove Struck .Friends,Do try this healthy momos & share your feedback.Ok, Lets see how to make whole wheat flour momos at home with step by step pictures & a Video.


Check out my Maida momos recipe for wrapping momo in different shapes.Here is my Chilli garlic sauce/Momos chutney recipe.Do check it.
I will make a separate video for wrapping momos in different shapes.
wheat flour veg momos recipe

Wheat flour veg momos recipe


Wheat flour veg momos recipeHow to make Vegetable momos using whole wheat flour
Cuisine:Indian
Category:snacks
Serves:20nos ( small)
Prep time:15 Minutes
Cook time:10 Minutes
Total time:25 Minutes


INGREDIENTS
For outer covering : 1 cup = 250ml
  • Wheat flour - 1 cup
  • Cooking oil or sesame oil - 2 tsp
  • Salt & water - as needed
For stuffing
  • Cooking oil - 2 tbsp
  • Grated cabbage - 2 cups
  • Big onion - 1 no ( chopped finely)
  • Garlic cloves - 5 nos ( -do-)
  • Spring onion - 2 sprigs ( chop finely)
  • Soya sauce - 1/4 tsp
  • Pepper powder - 1 tsp
  • Sugar - 1/2 tsp
  • Salt - as needed
Cooking oil – 1 tsp to add in idli pot water.
METHOD

  • Take the wheat flour,salt,cooking oil and mix well.Then add water little by little and make a soft,non-sticky dough.Knead well for 5 minutes.Cover & Let the dough rest for 30 minutes.
wheat flour veg momos recipe

  • In the mean time make the stuffing.Grate the cabbage finely( u can replace with mixed vegetables like carrot,beans,potato and capsicum).Finely chop the garlic cloves,big onion and spring onions. Heat oil in a kadai and saute garlic,onion till it turns transparent. Add the spring onions,cabbage,salt ,sugar and saute well. Cover & cook till its done in low flame.Sprinkle water if needed.Add soya sauce and pepper powder.Mix well and keep the stuffing ready.
wheat flour veg momos recipe
  • Now take the dough and make small balls of 10gms size.Dust in wheat flour and roll it thinly.Make sure the corners are thinner than the center.Keep 1 tbsp of stuffing in the middle of circle and wrap them in different shapes.Please CLICK this post for wrapping methods.
wheat flour veg momos recipe
  • Make all the momos and arrange them in a greased idli plate.Boil water in the idli plate adding a tsp of cooking oil.When the water starts to roll boil,keep the idli plate and steam the momos for 10 minutes.Switch off the flame and let it rest for 2 minutes.Remove the momos and serve with chilli garlic chutney !!
wheat flour veg momos recipe

Enjoy !

Note
  • Adding oil in wheat flour while making the dough is to make a soft outer covering.
  • Roll the dough ball thinly to get a thin covering & to make the momos soft to eat.
  • Wheat flour momos become slightly chewy after it cools down.So eat it hot.Reheating is not recommended.
  • Replace wheat flour with maida or use maida & wheat flour in equal quantities for variations.
  • Replace cabbage with mixed vegetables for stuffing.
  • Adding a tsp of oil in the idli pot while steaming momos helps the momo to remain soft n shiny.
Enjoy this easy,delicious wheat flour Veg momo with chilli garlic sauce/momo chutney !
wheat flour veg momos recipe

Podi Uthappam Recipe – Podi Dosa – Dosa Varieties

$
0
0
Podi uthappam
Podi uthappam is one of the favorite uthappam varieties for myself and Raksha. We love it more than Onion uttapam.I can have it for breakfast,dinner or just as an evening snack with hot coffee or tea. I pack this dosa for her lunch box at least once in a week.Whenever I prepare fresh Idli Podi(Gun powder in English),Raksha demands this Podi dosa. I make crispy podi roast dosa adding ghee if she wants to have at home and thick mini uthappam if carrying for school. In hotels,you could find the same with onions and served as onion podi dosa. For variations, check out my Tomato Onion uttappam and Kadai onion uthappam recipes. As I have not updated my old idli podi post, I have shared the recipe for spicy Idli powder using Garlic in the recipe section.It is my mom’s signature recipe which she has been doing for ages.You can also use Idli podi with sesame seeds/Ellu podi if you like.It tastes great with bothDrooling.Try it and enjoy making Podi dosa or smear it over piping hot idli Winking . Lets check how to make Podi uthappam recipe adding Garlic Idli Podi recipe.
Check out my Mini Cheesy Uthappam for Kids and Oats onion uthappam for people under dietWinking
How to make Podi uthappam

Podi Uthappam Recipe


Podi Uthappam RecipeHow to make Podi Uthappam recipe using Garlic flavored Idli Podi/Gun powder.
Cuisine:South Indian
Category:Breakfast
Serves:Serves 3
Prep time:15 Minutes
Cook time:5 Minutes
Total time:20 Minutes


INGREDIENTS
For Idli Podi/Gun powder : 1 cup = 200ml
  • Round,white urad dal - 1/2 cup
  • Chana dal - 1/4 cup
  • Red chillies - 12-15 nos ( I used 8 spicy chillies + 6 Byadgi chillies for color)
  • Garlic cloves - 8-10 nos ( Chopped roughly)
  • Curry leaves - 1 sprig ( 8-10 leaves)
  • Hing/Asafetida - 1/8 tsp
  • Salt - as needed
  • Cooking oil – 1 tsp
For Podi uthappam
  • Easy Dosa Batter - 2 cups
  • Idli Podi - As needed
  • Sesame oil/Gingely oil OR Ghee - As needed
  • Onion & tomato pieces - optional ( Add them for variations)
METHOD

  • Heat 1 tsp of oil in a kadai and roast the dals,chillies,curry leaves separately OR roast everything together in low to medium flame by mixing constantly to avoid burning. My mom roast everything separately and grind them together.But I roast them together.Both procedure takes the same time.So do it as per your wish.After the dals cool down,grind them in a mixie jar coarsely.Lastly add the salt and roughly chopped garlic cloves.Grind it to a slightly coarse powder.Mix well and store in an air tight box to retain the aroma of garlic.

  • For making Podi dosa,take the dosa batter and add 1/4 cup of water if the batter is too thick.Heat dosa pan and pour a ladleful of batter.Do not spread it.It will automatically spread by itself to some extent.Make it thick and spongy.
Podi uthappam recipe
  • Drizzle a tsp of oil and cook in medium flame for few seconds.You can also cover cook it.After the dosa is 3/4 th cooked on top,sprinkle idli podi all over the dosa.Add more or less depending on your taste.Drizzle one more tsp of oil over the podi and flip the dosa.Cook it for few seconds and remove it.Serve hot with your favorite chutney or enjoy as it is ! Enjoy !
Podi uthappam recipe
For variations,you can sprinkle finely chopped onions ( tomatoes too) after the dosa is half cooked and then sprinkle idli podi.Cook till onion turns golden brown and remove.Use sesame seeds Idli podi/Ellu podi in place of Garlic Idli Podi.
Soft,thick and spicy Podi uthappam is ready for breakfast/dinner or just as after school evening snack !! Enjoy !
Podi uthappam recipe

Kanda Poha Recipe – Maharashtrian Onion Poha Recipe

$
0
0
Kanda poha recipe
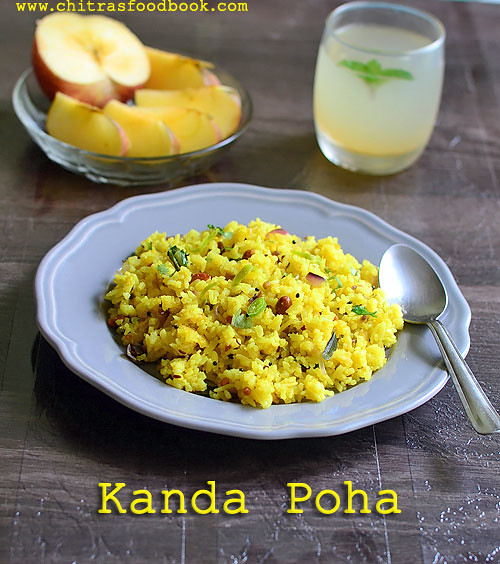
Kanda Poha is a very popular Maharashtrian breakfast & teatime snacks recipe which is most likely served for their guests.Kanda Pohe literally means Flattened rice prepared with onions in English.Other variants on the recipe include batata pohe (where diced potatoes are used instead of onion shreds). Other famous recipes made with Pohe (flattened rice) are dadpe pohe, a mixture of raw Pohe with shredded fresh coconut, green chillies, ginger and lemon juice and kachche pohe, raw pohe with minimal embellishments of oil, red chili powder, salt and unsautéed onion shreds ( source: wiki).In Tamil nadu,we call this as Aval Upma whereas in Karnataka it is most popularly known as Chitranna. Of course there are mild variations in the recipes of aval upma, chitranna and this North Indian style Kanda poha. But overall its a super quick,easy to make breakfast recipe for working women and Bachelors to prepare in the busy morning schedule.During festival/Vrat days,you can make the same without onion and by adding boiled potato cubes. For this recipe,I referred Sanjeev Kapoor’s video and made with my own variations.Lets see how to make the most popular Maharashtrian Kanda Poha with step by step pictures.
Check out my Karnataka style Chitranna& Tamilnadu Lemon Aval upma, Milagu Jeeraga Aval recipes too.
Kanda poha recipe Maharashtrian

Kanda Poha Recipe


Kanda Poha RecipeKanda Poha Recipe - Maharashtrian Breakfast & Teatime snacks recipe
Cuisine:North Indian
Category:Breakfast
Serves:Serves 2
Prep time:10 Minutes
Cook time:10 Minutes
Total time:20 Minutes
INGREDIENTS
1 cup = 250ml
  • Aval/Poha/Flattened Rice - 1 cup ( Thick variety)
  • Big onion - 1 no
  • Green chillies - 2 nos ( Finely chopped)
  • Roasted peanuts - 2 tbsp
  • Turmeric powder – 1/4 tsp
  • Sugar - 1/2 tsp
  • Salt - as needed
To temper
  • Cooking oil - 2 tbsp
  • Mustard seeds - 1/2 tsp
  • Urad dal - 1/2 tsp
  • Hing/Asafetida - few pinches
  • Curry leaves - few
  • Coriander leaves - to garnish
  • Lemon juice – few drops
METHOD

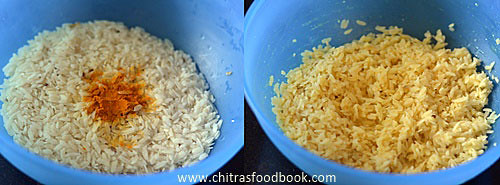
  • Wash the Poha twice.Add turmeric powder and required salt.Mix well and add water just to cover the poha.Let it soak for 5-10 minutes.Now all the water would be absorbed by the poha.
Kanda poha
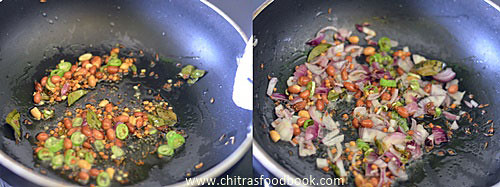
  • Heat oil in a wide kadai and season mustard seeds,urad dal,peanuts,curry leaves and hing.Add roughly chopped onions and finely chopped green chillies.Saute until onions turn transparent.
Kanda poha recipe
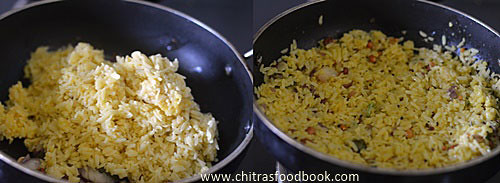
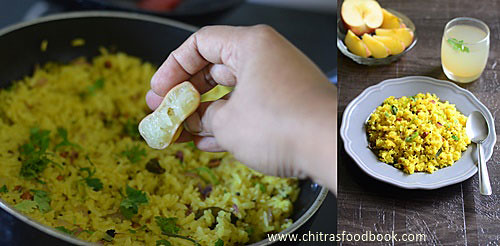
  • Now add the soaked poha & mix well.Keep the flame low & cook it for few minutes.After the poha turns soft and hot,check for taste.Add more salt if needed.Lastly add some lemon juice & garnish with coriander leaves and serve hot with tea.Enjoy !
Kanda poha recipe
Kanda poha recipe


Note
  • Use thick variety poha for best taste.
  • Adding sugar gives a mild sweet taste with a North Indian touch to the dish.So don’t skip it.
  • Add more chillies if you like spicy poha.
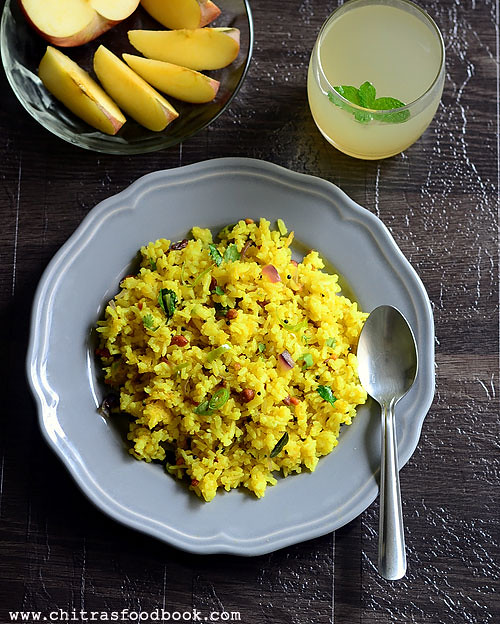
Enjoy this easy n quick Kanda Poha recipe for teatime snack or breakfast. I served it for breakfast along with sliced apples & Shikanji Happy
Kanda poha recipe

Avarekalu Sagu / Mochai Kurma Recipe - Side dish for Poori,Chapathi

$
0
0
Avarekalu sagu
In Karnataka hotels,Poori is usually served with Sagu. Sagu is nothing but a masala gravy/kurma made with freshly ground coconut + spices. Vegetable sagu is the most popular side dish for poori & chapathi here. But during avarekalu season, is used instead of mixed vegetables.Last weekend I tried Avarekalu Sagu ( Lilva beans/Field beans in English, Pachai Mochai in Tamil) for the first time following the recipes from my hand written cook book & this blog. It came out really well and tasted yummy with poori. I served the same with dosa for my daughter. I was happy that I made a healthy,protein rich gravy for our breakfast.Now Avarekalu season has almost come to an end. Sorry for this late posting. I hope this recipe would be useful to you all at least for the next season. If you wish to try this masala sagu, just replace avarekalu with potato, cauliflower or mixed vegetables like carrot,beans & peas. The ingredients I have used for grinding masala is the highlight of this recipe more than the vegetables. Do try it and leave your feedback here. Lets see how to make this yummy Karnataka style Avarekalu sagu/Kurma for Chapathi & poori.
Check out myHitikida bele avarekalu saaru , Avarekalu Huli& Avarekalu Biryani recipes too.
Avarekalu sagu recipe

Avarekalu sagu recipe


Avarekalu sagu recipeHow to make avarekalu sagu/Kurma for chapathi,poori
Cuisine:Indian
Category:Side dish for chapathi/poori
Serves:Serves 3
Prep time:10 Minutes
Cook time:20 Minutes
Total time:30 Minutes
INGREDIENTS
1 cup = 200ml
  • Avarekalu / field beans - 1 cup
  • Big onion – 1 no
  • Tomato – 1 no
  • Potato – 1 no
  • Mint + coriander leaves – 1 tbsp
  • Sugar – a pinch
  • Water & salt - as needed
To grind
  • Grated coconut - 1/4 cup
  • Khus khus - 1 tsp ( optional)
  • Big onion – 1/2 no 
  • Garlic cloves – 4 nos ( small)
  • Dhania/coriander seeds - 1 tsp
  • Green chillies - 3-4 nos
  • Cardamom - 1 no
  • Cloves – 3 nos
  • Cinnamon - 2 inch piece
  • Dalia/Pottukadalai/fried gram dal – 1 tbsp
To temper
  • Cooking oil – 2 tbsp
  • Mustard seeds – 1/2 tsp
  • Curry leaves - few
METHOD

  • Remove the outer covering of avarekalu and wash them.No need to peel its skin.Grind the ingredients given under “ to grind” to a smooth thick paste.
  • Heat oil in a pressure cooker base and temper mustard seeds,curry leaves.Add onions,tomato pieces. Saute until tomato turns mushy.Now add turmeric powder, avarekalu,potato pieces and ground masala.Mix till raw smell goes off. Add the finely chopped mint+coriander leaves, required water and salt.Check for taste and add some red chilli powder if its less spicy.
  • Pressure cook in low flame for 2-3 whistles.Remove the lid and serve hot with poori or chapathi.
    Enjoy !

Note
  • Add more or less chillies based on your taste.You can replace green chillies with red chilli powder too.
  • Add 1/4 tsp of garam masala powder at the end for more flavor.
  • Adding mint+coriander leaves is optional.
  • Sprinkle some lemon juice at the end if needed
Yummy,flavorful Side dish for Poori & Chapathi,enjoy !!
Avarekalu kurma


Instant Sambar For Idli – Pottukadalai Sambar Recipe

$
0
0
pottukadalai sambar for idli
Its my long time wish to make sambar recipe for idli dosa without dal. Recently my reader Suchi Vasan shared an Instant Pottukadalai sambar for idli. Its a very simple & quick sambar recipe that can be made without toor dal, moong dal or coconut. Tomato, onion, sambar powder& fried gram dal( pottukadalai in Tamil) is enough to make this side dish. I won’t say its a good side dish for Pongal or rice but it tastes great with Idli, dosa. Do try it during busy morning hours & make your job simple. Lets see how to prepare Instant Idli sambar using pottukadalai.
Check out my other Idli sambar recipes HERE
Pottukadalai sambar

Instant sambar recipe for idli dosa


Instant sambar recipe for idli dosaHow to make quick & easy sambar for idli.
Cuisine:Indian
Category:Side dish
Serves:Serves 3
Prep time:5 Minutes
Cook time:10 Minutes
Total time:15 Minutes
INGREDIENTS

  • Ripe tomato - 2 nos ( big)
  • Big onion or small onion - 2 nos/15 nos
  • Red chillies - 4 nos ( I used byadgi chillies)
  • Fried gram dal/Pottukadalai - 2 tbsp
  • Dhania powder - 1/2 tsp
  • Sambar powder - 1/2 tsp
  • Salt & water - as needed
To temper
  • Cooking oil - 1 tbsp + 1/2 tbsp
  • Mustard seeds - 1/2 tsp
  • Urad dal - 1 tsp
  • Curry leaves - few
  • Asafetida/Hing - 2 pinches
  • Coriander leaves - to garnish
METHOD

  • Wash & chop the tomato & onions.Heat 1tbsp of oil in a kadai and saute red chillies, onions, tomato pieces & pottukadalai/fried gram dal. Saute until tomato turns pulpy.Let the mixture cools down. Grind to a smooth paste adding required water.
instant pottukadalai sambar recipe
  • In a kadai,heat oil.Temper mustard seeds,urad dal,hing & curry leaves. Add onion & saute until transparent if using. I din’t use onions. Add the ground tomato paste.Add 1 cup of water & mix well.Add salt,turmeric powder,sambar powder & dhania powder. Let the sambar boil well for few minutes.Add more water based on the consistency you need. Garnish with coriander leaves. Easy,Instant Idli sambar is ready.Enjoy !
Instant pottukadalai sambar


Note
  • Add more chillies while roasting if you want spicy sambar.
  • Add ghee for more flavor at the end.
Enjoy this easy,tasty sambar with idli & dosa !
Instant tiffin sambar


Easy Vegetarian Tacos Recipe With Baked Beans

$
0
0
Vegetarian tacos recipe
A taco is a traditional Mexican dish composed of a corn or wheat tortilla folded or rolled around a filling. It can be made with a variety of fillings including beef, pork, chicken, seafood, vegetables,Baked beans or cooked kidney beans and cheese, allowing for great versatility and variety. A taco is generally eaten without utensils and is often accompanied by garnishes such as salsa or chili pepper,avocado or guacamole, cilantro (coriander), tomatoes, sour cream, onions and lettuce(source : Wiki)
Recently I tasted Crunchy Taco at Taco bell in Gopalan Innovation mall,Bangalore. I just loved its filling & toppings.Inspired by that, I bought some readymade Taco shells & a tin of baked beans in tomato sauce( SIL brand) from Big basket,Online( This is not a promotional post). As I am not aware of the availability of Taco shells & baked beans in Bangalore,I ordered them online.I guess it must be available in Nilgiris, Total mall & Spar. Friends,please leave a comment of where we get these ingredients in Bangalore. It would help others.TIAHappy

Easy tacos recipe vegetarian
This morning,I tried this easy & simple Vegetarian Tacos Recipe using Baked beans mixed with sauce, onions, tomato, spring onions and cheese.It is a no cooking, no fire recipe made with easily available ingredients in our pantry. Sendhil & myself loved it a lot. I became very happy that I could make an International breakfast recipe and that too a Mexican special dish at home after a long time. I watched Sanjeev kapoor’s YouTube video for reference. But I have not made them in a pure Mexican method.I tweaked the recipe a bit and made it with Indian touch. All you should do is to buy taco shells & baked beans from the market. If you have them in hand,your breakfast /dinner would be ready in the next 10 minutes. Its just a mixing & assembling job. I am sure kids would also enjoy it. Ok,enough of my stories,lets move on and see how to make easy Vegetarian tacos recipe at homeHappy.
Easy tacos recipe vegetarian

Easy Vegetarian Tacos Recipe


Easy Vegetarian Tacos RecipeHow to make veg tacos at home with baked beans easily
Cuisine:Mexican
Category:Breakfast
Serves:Serves 2( makes 4 nos)
Prep time:5 Minutes
Cook time:5 Minutes
Total time:10 Minutes


INGREDIENTS

For filling
  • Baked beans in tomato sauce - 1 cup ( 250 ml cup)
  • Red chilli sauce or green chilli sauce - 1/2 tsp
  • Finely chopped onion - 3 tbsp
  • Finely chopped coriander leaves or spring onion - 2 tbsp
  • Pepper powder - 1/2 tsp
  • Oregano or dried mixed herbs seasoning – 1/2 tsp( optional)
  • Salt - as needed
For topping
  • Grated cheese - 1/4 cup ( I used mozzarella, Mixed cheese would be better)
  • Finely chopped cherry tomato - as needed ( I used regular tomato)
  • Finely chopped onion + spring onion - 2 tbsp
  • Sour cream - as needed ( I used Mayonnaise)
METHOD
  • Take the taco shells and heat it in convection oven at 100c for 5 minutes. Please refer your pack for instructions & proceed.Arrange the shells with equal gaps in a microwave safe plate & keep the cardboard box in place as shown in the picture below.As per my packet, it was given to heat in convection mode 125c for 2-3 minutes.But I kept it in 100c for 5 minutes. It should become hot and crispy. You can also microwave in 700w for 30-40 seconds but make sure you don't burn the shells.
Vegetarian tacos recipe
  • Shred the lettuce leaves. Chop tomato,onions,spring onions or coriander leaves finely.Grate the cheese and keep it ready.
Vegetarian tacos recipe
  • In a wide bowl,take 1 cup of baked beans and add red chilli sauce,salt,pepper powder and finely chopped onions,coriander leaves or spring onions.Mix everything well and check for taste. Add more spices or salt. If you wish, you can add oregano or mixed herbs seasoning.
Vegetarian tacos recipe
  • Take the hot taco and keep the shredded lettuce leaves. Above that add 2 –3 tbsp of baked beans mixture. If you wish you can top it with sour cream or mayonnaise. Top it with finely chopped onions, tomato & coriander leaves.Finally top it with grated cheese. Garnish with coriander & chopped tomato piece.Serve immediately. Enjoy !!
    Vegetarian tacos recipe
    Vegetarian tacos recipe


Note

  • If you want to avoid cheese,just fill the taco with lettuce,baked beans mixture and top it mayonnaise,tomato,onions,coriander leaves. I made it like this for me.Refer the picture below.
  • Adjust the quantity of red chilli sauce & pepper powder as per your taste. If you don’t have red chilli sauce,replace it with red chilli powder or red chilli flakes.
Vegetarian tacos recipe
Enjoy this easy,yummy Veg tacos at home for your breakfast or dinner !!
Vegetarian tacos recipe

How To Celebrate Maha Shivaratri – Celebration Procedures

$
0
0
Image source : Up-Rising in flickr 
Maha Shivratri is a Hindu festival celebrated every year in reverence of Lord Shiva. It is also known as Padmarajarathri. It is celebrated all over South India(In Tamil nadu, Karnataka) and North India. Shivaratri literally means the great night of Shiva or the night of Shiva. It is celebrated every year on the 13th night/14th day of the Maagha or Phalguna month of the Hindu calendar. This year 2016, it falls on March 7th. Vrat time is from Sunrise on March 7 to sunrise on March 8. On shivaratri day, fasting involves refraining from eating any food and not sleeping through out the night.  Followers visit Shiv temples and bath the idol of Lord Shiva and follow rituals to please the lord. Devotees begin the day by worshipping the Lingam of Lord Shiva in temples.
According to Shiv Purana, the following items are a must: Shiva Linga must be bathed with water, milk and honey. Also, bilva patra must be offered to the lord as it purifies the soul. Vermilion ( a reddish orange paste) must be applied over Shiva Linga after bathing, it represents virtue. Symbolizing longevity, different kinds of fruits are offered to the Linga for the fulfillment of wishes.The worship is then concluded with Lord Shiva’s Aarti. The day is considered auspicious for women. They fast and pray to the Lord to get blessed with blissful married life, while unmarried woman would pray for an ideal husband like Shiva.People chant “Om Nama Shivaya” all through the day.
There are different stories based on different puranas on why we celebrate Maha Shivratri. Some of these stories are mentioned here.
  • According to a few books, Maha Shivratri is the night when Lord Shiva performed the Tandava.
  • Based on a few other puranas, it is believed that Lord Shiva drank “halahal” or poison on this day, and was known as Neela kantha then after.
  • Some believe that Lord Shiva married Goddess Parvati on this auspicious day.

Tradition of Drinking Thandai

Since Lord Shiva is regarded as an ascetic god, Maha Shivratri is very popular with ascetics. Thandai, a drink made with bhang (cannabis), almonds, and milk, is essentially drunk by the devout on the day as cannabis is said to have been very dear to Shiva.

Food and Fasting

People fast for the whole day on Maha Shivratri. They start the day by worshiping the lingam of Lord Shiva. People eat satvik food such as sabudana khichdi and thandai (bhang). Devotees also wear Rudraksh beads on this day. According to mythological stories, rudraksh beads are believed to have been originated from Lord Shiva’s tears.
It is believed that simply by worshipping the lingam after a bath helps devotees achieve the blessings of Lord Shiva and moksha. All sins are forgiven and spirituality is awakened. So, with a clear heart and soul, worship Lord Shiva on this Maha Shivratri and be blessed all your life.
Source : http://womenpla.net/celebrating-mahashivratri/ 
 http://www.mahashivratri.org/shivaratri-celebrations.html

 Chariot kolam for Shivaratri

Ingredients required For Pooja

Visit my In-laws blog “Learn Kolam” to view Kolams for Maha shivaratri.
  • Flowers for decorating Lord Shiva
  • Lamp
  • If you wish to perform abishekam, keep some milk, honey, ghee, curd and water.
  • Bilva ( Bael) patra leaves/ Vilvam in Tamil
  • Coconut, Betel leaves, Nuts & fruits
  • Incense stick
  • Camphor

How do we celebrate Maha Shivratri

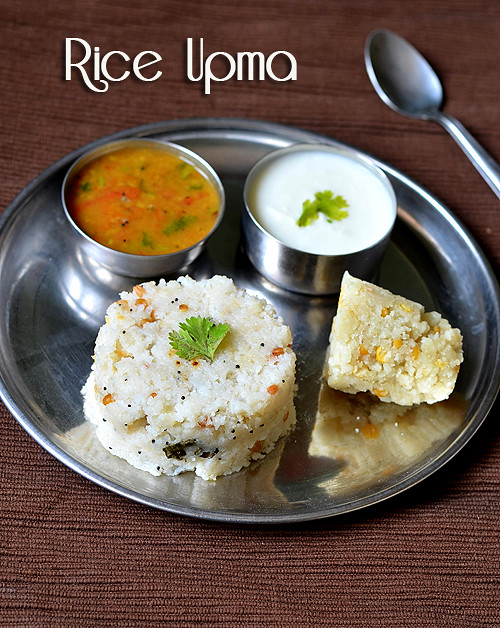
In my family, On Shivratri day, we take bath in early morning, draw Rangoliin the entrance & in front of Pooja room ( I usually draw Chariot kolam). We decorate the Lord with flowers especially Bilva Patra/Vilvam and perform pooja by chanting “ Om Nama Shivaya” for 1008 times.We fast from morning to evening. In the evening around 4pm , we take bath again and make neivedyam for Lord shiva. Around 6 pm, we offer Sweet puttu/ Rice Jaggery puttu / Arisi vella puttu in Tamil, Boiled Sweet potato and field beans ( based on their availability in market) for Lord Shiva, do the pooja and finish with Mangala Aarti. Along with this, we make a no onion no garlic rice upma, Sambar and buttermilk. We have the same for dinner around 7 pm. We don’t have the practice of being awake the whole night. If you wish to perform Abishekam, you should not sleep through out the night. Abishekam should be performed every three hours. ie First three hours with milk, Second three hours with Curd , third with ghee and fourth with honey( Overall 12 hours). After abishekam decorate with Bilva leaves. Lord Shive will be more happy when decorated with Bilva leaves more than jewels. The next day morning, we cook & eat a No onion No garlic meal and finish our fasting. We are not supposed to have Tiffin items as the Vrat won’t be fulfilled without having this menu.
In North India, People offer varieties of recipes like Thandai , Sabudana Kichdi , Sabudana vada, Lauki halwa, Kuttu ki poori, Sabudana Kheer, Motichoor ladoo and Kachori.

It is believed that simply by worshipping the lingam after a bath helps devotees achieve the blessings of Lord Shiva and moksha. All sins are forgiven and spirituality is awakened. So, with a clear heart and soul, worship Lord Shiva on this Maha Shivratri and be blessed all your life.


Neivedyam Recipes

Arisi Vella Puttu / Sweet puttu
Thandai
Sabudana vada
Sabudana Kheer / 18 Payasam varieties collection
Rice upma
Sambar ( Skip onions in this recipe )
Neer mor/ Spiced buttermilk
No Onion No Garlic Lunch Menu


Disclaimer : I have shared the procedures based on our tradition.Please take the as a reference,consult the elders of your family and do the pooja as per your practice.Beginners can follow this if you don’t have any specific procedure at home.

Kitchen Appliances List For Home

$
0
0

Last year I shared an Indian monthly grocery list for 2 persons. Many of my readers got benefitted by that list and sent me so many appreciation mails & commentsHappy. I am very happy that my list is useful to all. Readers who used my grocery list have requested me to share the list of most needed Kitchen appliances & utensils ( If possible with brand names,recommendations, price & pictures) for setting up a new house or while replacing the essentials. I got those requests especially from guys & girls who are about to be married. Usually our elders in home would guide on all these things. Being a successful housewife for the past ten years, I thought of sharing my knowledge about the basic kitchen electronic & electrical appliances necessary for a new kitchen. I have also suggested the brand names for each equipment based on my usage & my friends opinion.A very special thanks to my friends in School group “ SSV Buds” and "School moms" group in WhatsApp and my dear friend Shalini for sharing all the details promptly & patiently. Based on all their feedbacks, I have given suggestions for brand names. I have also given brand recommendations for people in USA. Friends,please take this as an advice, do a complete research on  product reviews from genuine review sites before buying any product.
Experienced people, do share your feedback on the appliance you use and tips for their maintenance. It would be a great help for all of us.
I have segmented the appliances under various categories like major appliances, counter top appliances and accessories. I will make a separate post on Kitchen utensils tomorrow. I will share the entire list in a downloadable PDF format in that post. I hope this list would be useful for girls & guys who wants to know what kitchen appliances you need to set up your own kitchen Winking.This list can also come in very handy when looking for wedding, anniversary gift suggestions. For a bachelor, all these equipments may not be needed. Pressure cooker, Mixie and some utensils would do for a minimal cooking.
Friends, I have given all these ideas as per my personal experience and friends recommendations. Feel free to tailor it based on your requirements and budget. 
Affiliate link disclosure
In this post,I have used Amazon affiliate links. This means that if you make a purchase through one of these links, Chitra’s food book would receive a small percentage of the sale price. Thanks for your support!

Kitchen Appliances


Click on the appliances to view various brands & their prices.Click HERE to know the best sellers of Kitchen appliances. For US amazon, click THIS LINK.

Major Appliances
Countertop Appliances & Accessories
Apart from this list, there are many useful kitchen tools and accessories available in the market. Buy them based on your need. What i have covered here is just the essential ones.

Stove or cooking Range

I am using Faber 4 burner glass top stove with chimney for the past 2 years and its working well without any complaints.Most of my friends also use the same for more than 5 years in a good working condition.Earlier I used Prestige 2 burner gas stove with stainless steel top. I have given my Faber model from Amazon. Some of my friends usePrestige glass top stove with good feedback. So decide it based on your likings and budget.


Table top Grinder

I am using a local brand grinder named Bagyalakshmi which I bought in Salem. It is working fine for 10 years without any major problems. But most of my friends suggested and opted Ultra & butterfly table top grinders.I have given the link below.Click on the images.
People in US can buy Ultra & Premier brands 110v grinders. 

India


USA


Mixie – Stand Mixer
I am using Preethi Spice with 3 jars for two years. Its working good but I don’t recommend my model. When I asked my friends, everybody recommended Preethi Mixie but different models like Chef pro plus, Blue leaf. But all of them have complained about the jar & blades.Actually the lifetime of Mixie & its jar depends purely on our maintenance. I came to know this from a Mixie Service guy. He told to grind in batches( in small quantity depending on the size of jar) and it should not be operated continuously. Do not over load the mixie.Do not put hot ingredients for grinding. The contents may splash. Make sure the jar or the body of mixie is not heated while grinding. Clean the jar & body of mixie regularly. Keep these points in mind while using mixie. If you follow this, you can use any mixie for years. Overall, Preethi is the most recommended brand by most of my friends. Next to Preethi, I would recommend National Panasonic & Maharaja Whiteline. My MIL is using National Panasonic for more than 15 years. Still its looking newHappy. I am trying to follow her Tongue.
My Friends in US are using Preethi mixie & Magic bullet mixer.For short term use, Magic bullet mixer is a good purchase.But grinding idli batter would a tough job. For long term use, you can consider buying Preethi Mixer or Indian grinder.


For US residents


Food Proccessor
Many people wish to buy food processor as it has multiple functionality.Depending on the placement and type of attachment or blade, these functions normally consist of:
  • Slicing/chopping vegetables
  • Grinding items such as nuts, seeds (e.g. spices), meat, or dried fruit
  • Shredding or grating cheese or vegetables
  • Pureeing
  • Coconut scrapping
  • Mixing and kneading doughs
So its basically your choice of buying either a food processor or a mixie.My friend Shalini is using Philips food processor for 7 years. Please find the model below.


Fridge

I am using Samsung double door fridge with separate refrigerator & freezor compartments. Its age is nearly 11 years. Its an awesome purchase and worth for money. I am very happy with my fridge till today. So I would blindly recommend this brand to anyone. Other than this, you can consider LG. Check for its power saving & other specifications before you buy. Its better to buy a voltage stabilizeralong with it, hope you know the power fluctuations in India very well ;)


Microwave Oven or Convection Oven Or OTG
My advise is to buy a convection oven instead of buying a microwave. Microwave oven can be used only for cooking & reheating. But baking cakes & cookies cannot be done. Of course microwave cakes can be made. But you will have limitations whereas a convection oven does the job of microwave and OTG as well. So I always suggest buying a convection oven. I have been using Samsung Convection oven for the past 5 years without any complaints. I am using it for reheating, baking cakes & cookies. Even though it has microwave, Convection, grill modes, I have used Grill option very rarely. Any oven works fine when you understand the equipment thoroughly by reading the manual. If you follow the instruction manual, you will get good results in baking. I learnt this through my experience. So the first thing you should do after buying an oven is to read the manual completely. If you prefer to have a small sized oven based on the size of your kitchen countertop, then OTG is the best choice. You cannot reheat anything using OTG like microwave but cakes & cookies can be very well done like in bakeries. I heard Morphy richards OTG is good through my friends. But its bit costlier. For medium budget, you can consider Prestige or bajaj OTG.


Water Purifier

In India, most of the people use Aquaguard water purifier.Many of my friends use the same. My parents are using Pureit. Choose any based on your requirement. I heard Kent is also widely used nowadays. But before buying, check for warranty, service and maintanence.


 Electric Rice Cooker

Electric Rice cooker is not mandatory to buy if you have a pressure cooker at home. But Rice cooker has its own benefits like it keep the food warm for hours. It would be more useful for bachelors and working women. I got Panasonic Rice cooker as my marriage gift from my Uncle. I used it for the past ten years. Recently I changed it as I broke the lidSad I would suggest Panasonic & Prestige rice cookers if you are in India.


Toaster & Grill Sandwich Maker

I have a NOVA toaster & NOVA Grill sandwich maker. I wanted to buy some low priced brands as its usage in my home is less. So depending on the usage, you can decide the brand. Some of my friends are using Philips, Prestige. But most of my friends suggested Morphy richards. But remember its costlier when compared with other brands.


Induction Stove

I don’t have an Induction stove. But my mom used it for more than 2 years when she was in Hyderabad. She used Pigeon induction stove. Some of my friends are using Prestige & Butterfly.


Air fryer
Nowadays Air fryer is becoming very popular and mostly diet conscious people go for buying it. If you wish to make deep fried stuffs with less oil,you can go for it. An air fryer works similar to a convection oven. I won Bajaj airfryer as a prize for cooking contest. I have tried making cutlet, spring rolls and samosa with it. It comes out well and crispy but definitely you cannot match its taste with the deep fried ones. But we have the satisfaction of eating junks atleast with less oil :)


OTHER ACCESSORIES

Coffe maker, Electric kettle, Roti maker, Juicer, Hand blender and Vegetable Chopper are not the much needed appliances for a kitchen. But you can buy them based on your requirements. If you have elderly people and babies at home, you can purchase Electric kettle, coffee maker and juicer. More than our personal use, I feel all these accessories are perfect for gifting.
I do have a Philips juicer, Philips hand blender + Chopper and Philips Hand mixer. I got all these as gifts from my relatives for my marriage & house warming :)


Friends, I have given all these ideas as per my personal experience and friends recommendations. Feel free to tailor it based on your requirements and budget. 

Technorati Tags: ,,,,,,,,,,,,,,,,,,,,

Kitchen Utensils & Tools List For Home With PDF

$
0
0
Kitchen-utensils-list

In my previous post, I have shared the list of essential kitchen appliances needed for a home. In this post, you can find the list of Kitchen utensils required for setting up a new Indian kitchen.In this post, I have discussed the uses of utensils & kitchen tools and shared the list of all possible kitchen utensils & tools. I have segmented them under different categories namely Cookware, Storages,Serve ware, Bakeware and tools. But I have not recommended any brands. As I promised in my previous post, I have also shared a PDF of Kitchen appliances & utensils list.Please click on the link and download it, Its free. Do the changes as per your need. All the utensils I have given here are not purchased in one day. You don’t need everything at the beginning of cooking too. It could be accumulated in months, years based on your requirement & usage. I referred this& this post for making the list. I hope this list would help beginners to arrange their new kitchen. Wishing you all the very best. Happy cooking !!
Click HEREto view & download the PDF.
I have given affiliate links for all the utensils from Amazon with links and pictures.
Here is my routine dialogue : Friends, take this list as a guidance and buy the utensils which is of use to you. Even I don’t have many of the tools & utensils listed hereWinking. Its just the collection of all possible kitchen utensils & tools.If you feel anything important is missed here, please share it in comments section. I will update it. Thanks for visiting this page.Leave your feedback about this list. It would make me even more happy.Happy
Click HEREto view & download the PDF.


USES OF UTENSILS
  • A kadai/Skillet is used for stir frying, sauting, cooking and boiling. You can use stainless steel or Non-stick or ceramic kadai. But an iron kadai is recommended for deep frying. So better buy a small sized or medium sized iron kadai too.Also try to buy the ones with sturdy handles and a transparent lid.
  • Tadka pan/ Mini kadai is used for seasoning Indian dishes.
  • Stock Pots, Saucepans and Stainless steel cooking pots can be used for boiling gravies, soups,stews,Cooking vegetables and greens. It would be better if its with transparent lid.
  • Thick bottomed milk pan  or Milk cooker – I prefer stainless steel ones.
  • Pressure cooker – For cooking rice,steaming vegetables. To me its the heart of utensils. I can cook any number of dishes if I have two cookers in handHappy
  • Stackable stainless steel cooking pots in various sizes – Its mainly used for serving gravies,chutney & curries.
  • Cassorle/ Hot pack – To keep roti, idli, rice & gravies warm for hours.
  • Idli pot & Dosa pan for making idli & dosa
  • Appam pan/Paniyaram pan/ uthappam pan – For making appam, Paniyaram, Utappam
  • Glass bowls – If you have microwave, you can use it for reheating and cooking.
  • Big Stainless steel bowls or plastic bowls for making chapathi/bread dough, for rinsing vegetables.
  • Plates – For serving & covering the food
  • Ladles & spoon – For cooking & serving gravies,curries etc
  • Cups/Coffee cups/Water glass/Tumblers – For serving liquids
  • Tea pot / Flask – To keep coffee or tea
  • Measurement cups & spoons – Mainly needed for baking & sweets making.
  • Rice server and idli scooper – To serve rice & to remove idli.
  • Rolling pin & board - For making roti,Poori etc
  • Knives & scissors – To chop & cut ( Invest in good quality ones)
  • Peeler & grater – To peel the skin of vegetables , grater for grating cheese,vegetables
  • Scrapper – mainly used for coconut scrapping
  • Perforated frying spoon/skimmer/strainer for deep frying  [Hindi: jhaara/zara]
  • Tongs/Idukki in Tamil –Its mainly used for removing roti & papad from hot oil.
  • Locking tongs – For holding hot vessels
  • Whisk & churner – For mixing batter without lumps, whip curd and for mixing cake batter.
  • Big sized Storage containers for storing groceries & Dosa batter
  • Medium & Small sized containers for storing pickles, spice powders etc
  • Spice box/Anjarai petti – For storing whole spices
  • Masher – For mashing boiled potato, kichadi and other dishes.
  • Wire mesh – It is used to puff up roti, roast papad, brinjals etc

COOKWARE
 
SERVEWARE
 
STORAGES


BAKEWARE
 
KITCHEN TOOLS
 
MISCELLANEOUS
FLOOR CARE & CLEANING ITEMS


Click HEREto view & download the PDF.


Paneer 65 Recipe – Dry Paneer Fry

$
0
0
Paneer 65 recipe
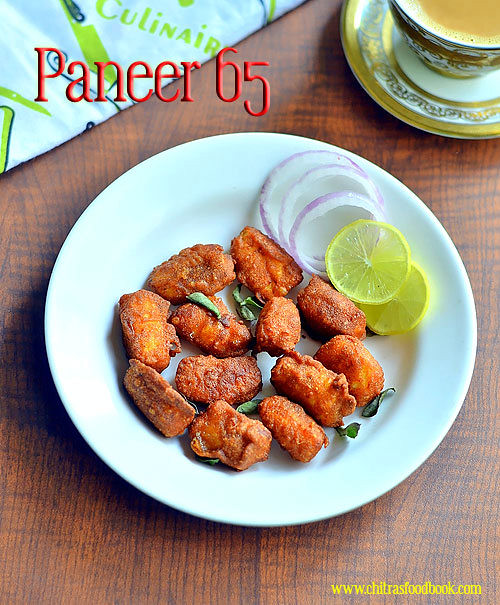
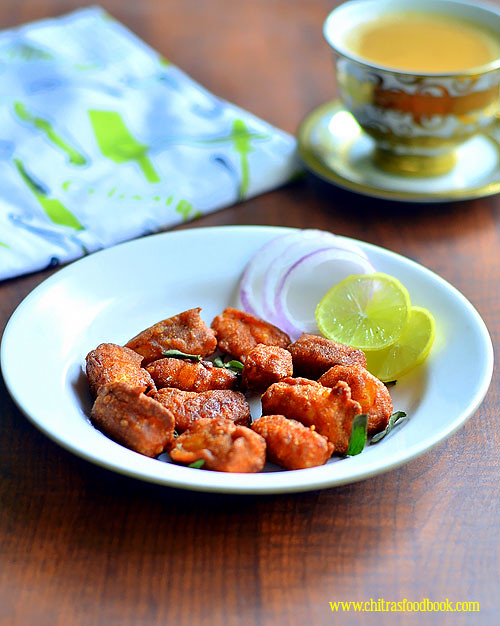
I am planning to share a collection of Paneer recipes from my blog. But before that, I wanted to post some more yummy and interesting paneer recipes which are in my try list for long time. Recently I tasted paneer 65 in a restaurant buffet lunch under starters. Raksha & myself loved it so much. So I tried to recreate the same at home after watching few YouTube videos.Actually Paneer 65 ( Dry Paneer fry) can be made in Chinese or Indian style.Here I followed Indian version and added masala powders. If you want to make in Chinese style, add tomato sauce, soya sauce, chilli sauce and pepper powder. As I wished, It came out with super crispy exterior and soft interior. As a general rule, this deep fried starter recipe should be eaten hot to enjoy its best taste. Summer vacation is going to start in another 2 weeks in India. Kids would demand varieties of snacks recipes from their moms. So friends, make this yummy, kids friendly Paneer snacks for them.Serve it with a fresh juice.They are going to enjoy it for sure. You too can enjoy a plate of paneer 65 with a cup of hot tea/coffee as I did. Lets see how to make this crispy, homemade Paneer 65 for evening snack or as a starter for lunch/dinner.
Do check out my Gobi 65, Baby corn fry, Chilli Idli fry
Paneer 65 recipe

Paneer 65 recipe


Paneer 65 recipeHow to make paneer 65 at home - Kids friendly evening snack !!
Cuisine:Indian
Category:Snacks
Serves:Serves 2
Prep time:30 Minutes
Cook time:10 Minutes
Total time:40 Minutes
INGREDIENTS

For marination
  • All purpose flour/Maida - 3 tbsp
  • Rice flour - 2 tbsp
  • Corn flour - 2 tbsp
  • Curd – 1/2 tbsp or lemon juice – 1 tsp
  • Ginger & garlic paste - 1/2 tsp
  • Dhania powder - 1 tsp
  • Red chilli powder - 1 tsp ( Use Kashmiri chilli powder to get the same color)
  • Garam masala powder - 1/2 tsp
  • Salt, water - as needed
METHOD

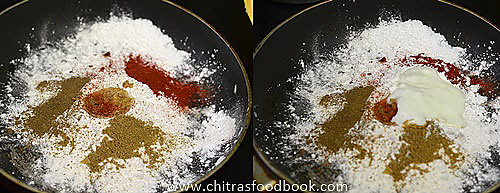
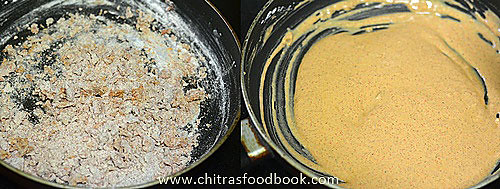
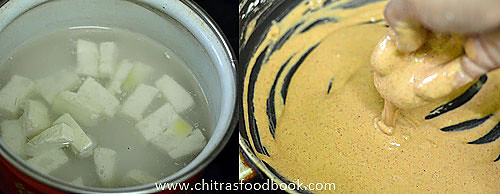
  • Take the paneer block and cut into strips of 2 inches length. Boil water till it starts to bubble. Add the paneer pieces to hot water and set aside.In a wide bowl, take the flours, red chilli powder, dhania powder, garam masala powder, G&G paste, curd & salt. Mix well without adding water.
Paneer 65
  • Then add the required water and make a batter similar to dosa batter. Check the consistency in the picture below.
Paneer 65
Paneer 65
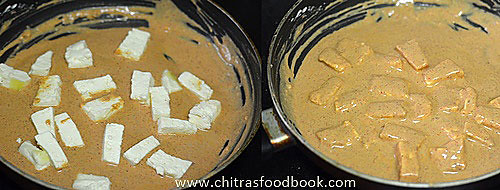
  • Now remove the paneer pieces from the hot water and squeeze the excess water gently.Do not squeeze too hard. Add the paneer pieces to the batter and coat it well.
Paneer 65
  • Let it marinate for 15 minutes.Do not marinate for more than an hour. Batter will become sour.It spoils the taste of dish. ( If you want to marinate for long time, refrigerate the marinated mixture till you fry them)
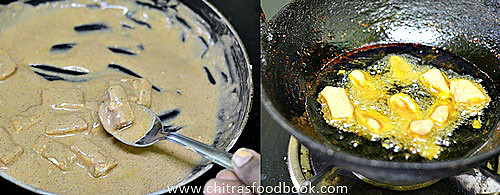
  • Heat oil to deep fry. Drop a pinch of batter and if it raises to the top immediately, oil temperature is just right. Now keep the flame low to medium and take the paneer pieces using a spoon. If you take it using your fingers, the coating may go off. So take it with a spoon and make sure the paneer piece is completely coated with the batter.
Paneer 65 recipe
  • Drop the paneer pieces and cook in batches. Do not crowd the oil. After dropping the paneer pieces, let it cook for few seconds. Then try to move the pieces with a slotted ladle else they will stick to the bottom of kadai. Keep moving them in between. Cook for a minute in medium flame and turn the pieces upside down. Cook the other side for a minute and remove when the bubbles start to cease and paneer pieces turn golden brown.Do not wait for all the bubbles to stop.If you over fry, paneer will become chewy. So remove at the right time.
Paneer 65 recipe
  • Remove in a tissue paper. Enjoy serving & eating hot !!

Note
  • If you don’t have corn flour in hand, use 4 tbsp of rice flour alone.
  • You can replace curd with a tsp of lemon juice.
  • Marination gives a nice crispy exterior and soft interior. If you are in a hurry, you can make it immediately too. If you want to keep the marinated paneer for long time, its better to refrigerate the batter till you deep fry.
  • Do not over fry the paneer pieces, it would turn chewy & hard.
  • Its better to use low fat paneer cubes to avoid becoming too soft or crumbly.
  • Frying in low to medium heat is important. If the oil is too hot n smoky, paneer 65 would turn dark brown in color.
  • Use Kashmiri chilli powder to get this color. I have not used any coloring agent here.
Enjoy this crispy, yummy snack/starter recipe at home with tea/coffee/Juice!!
Paneer 65 dry

Karadaiyan Nombu Pooja Procedure

$
0
0
Karadaiyan nombu procedure
Karadaiyan Nombu/Nonbu is a traditional festival of fasting observed in remembrance of the Satyavan – Savitri legend.As it an important festival of India, I thought of sharing its pooja procedure/Pooja vidhi for beginners and wanted to keep a record of all our festival celebrations in my blog for my future reference.There is a story/Katha behind this festival. I have shared it in detail below.Click this link for nonbu adai recipe for neivedyam. A princess, Savitri through her unparalleled devotion saved her husband, Satyavan, from the clutches of death.So this festival is also known as Savitri vratam in Tamil / Savitri Vrat in Hindi. On this day, Women observe fasting and pray for the wellness and long life of their husbands. This nonbu/vrat should be done exactly in the time when Tamil month 'Masi' ends and the next month 'Panguni' starts.Fast is observed from the sunrise on the supposed transition day and ends with the Puja.Women break the fast by eating the Karadai (Made of Rice & dal) preparation with unmelted butter by chanting a slokha.
In short, the reason why this fasting is carried out is that “ Savithri fought with yema (the God of Death) to save her husbands (Satyavan) life", the same way the married women should fast on this auspicious day for long life of their husbands. Unmarried woman also observe Karadaiyan Nombu and pray to Goddess to get good men as their husband.Prayers are offered to Gowri Devi and women meditate on Savitiri and wear a yellow thread round their neck as they chant the following slokha/slokam.
Throram Krishhnami subhake saharitham
Dharami aham bharthu
Ayushya Sidhartham supreethabhava sarvadha

The following is the Tamil chant

Urukaadha Venneyum oradaiyam naan nootren
Orukkalum en kanavar ennai vittu pririyadhirukka vendum

which means I offer butter and the rice made out of kaar arisi.Bless me that I live happily with my husband for long.
Karadaiyan nonbu adai

Story of Karadayan Nombu

Savithri was born as the daughter of King Asrapathi. Savitri was a princess of a rich kingdom in ancient India and was the only child of her parents. When she reached marriageable age, she told her father that she would herself search for a suitable husband for her and she wished to marry Sathyavan who lived in the forest.Despite being warned by the palace astrologer that he would die within a year of marriage,she married Sathyavan.Days passed and the last day of Satyavan's life as per the prediction dawned.On that day, Satyavan made Savitri sit under a tree and went to fetch fruits and logs for fuel. After sometime, he returned feeling very tired. Savitri made him lie in a bed made of fresh green leaves keeping his head in her lap. As Satyavan started closing his eyes, there appeared in front of Savitri, a huge figure with a bison for his vahana. Savitri with her dedication and devotion could immediately recognize the figure as that of Yama, the God of death.
She immediately saluted him and asked him the purpose of his visit. Yama replied that as destined Satyavan's life span was over and he had come to take his life to the other world. Saying this Yama started walking away with Satyavan's soul. Savitri left the body of the lifeless Satyavan under the tree and started following Yama. Yama forbade her from following him, saying she could not follow him to the other world, as Yama loka was inaccessible to living beings. Only souls of dead beings are taken there. Savitri insisted on following her husband’s soul. Yama could not stop her from following him. At last, Yama agreed to grant her three wishes on condition that she would go back. She agreed. She asked as the first boon, that her in-laws get back their lost kingdom which Yama granted readily. For the second wish she asked that, as she was the only child of her parents, they get more children. This was also granted by Yama immediately. As the last wish, she asked that she be granted the wish of having many children which also was granted by Yama in his eagerness to get rid of her. Only after granting this wish, did Yama realize that he had been tricked into granting Satyavan life, as a pious and pathivratha (chaste) woman like Savitri cannot have children if Satyavan were to be dead. Yama had to accept his defeat and restore the life of Satyavan. Savitri came back to the tree where she had left the lifeless body of Satyavan. By the blessings of Yama, Satyavan woke up as if from his sleep and Savitri narrated the happenings to him. To offer her gratitude to the Gods, Savitri immediately made a simple neivedyam with available things on hand, Rice & dals and tied the mangala sutra once again as her husband had got back his life.Her offerings were durwa grass and peepal leaves.She performed neivedhyam with wild rice and toor dal. That is kaar arisi and thuvaram paruppu.The preparation is known as Karadai nombu adai - the festival takes its name from the unique Kara Adai dish. It is believed that Savitri cooked such a dish and offered it to Lord Yama along with unmelted butter as a sort of thanksgiving for sparing her husband’s life.

Source: http://jaishreesblog.blogspot.in/2008/03/karadayan-nombu.html

Nombu Timings

In 2016, the date of Karadaiyan Nonbu is March 14 and the time to break the fast is at between 10:00 AM and 10:40 AM (Indian Standard Time). In United States it is on March 13. Australia Time is on March 14 at 3:48 PM.Singapore and Malaysia Time is 1:48 PM on March 14.
  • The USA timings are - Panguni Masam begins at 12:48 AM on March 14, 2016 Eastern Standard Time in USA
  • begins at 11:48 PM on March 13, 2016 Central Standard Time in USA
  • begins at 9:48 PM on March 13, 2016 Pacific Standard Time in USA
  • begins at 10:48 PM  on March 13, 2016 Mountain Standard Time in USA
Please note that the exact time of Maasi ending and Panguni starting varies from country to country. So the apt and ideal choice is to consult your temple priest or check with elders or refer your regional Panchangam. The time I have given below is based on Indian calendars and Panchangam. I referred The Hindu blog and asked my in-laws to confirm these timings. In USA,in some places, month starts at mid night. So if you are not able to do the pooja at that time, you can perform it the next day morning in an auspicious time.

Karadaiyan nonbu kolam

Ingredients required for Pooja
  • Rice flour paste (for drawing rangoli) – Refer my in-laws blog for kolam ideas
  • Lamps
  • Flowers
  • Betel leaves, nuts, coconut, banana
  • Rice,Legumes ( black eyed peas – We keep a mix of 9 grains) and Unmelted butter
  • Jaggery,cardamom, chilli,Ginger and seasoning ingredients for making sweet & spicy adai.
  • Camphor,Incense stick
  • Yellow rope tied with a flower in the center.
How to perform pooja

For pre preparatory work,sweep the house.Wash the lamps and keep kumkum dots on the eve of festival. Prepare the homemade rice flour, roast and keep it ready for the next day use.
On the festival day morning, we wake up early and take head bath. Draw Rangoli/Padi kolam in the entrance using rice flour paste(Maakolam) and in front of the pooja room. Roast the black eyed peas and pressure cook for one whistle.Prepare sweet adai by mixing rice flour and cooked peas in jaggery syrup.Similarly prepare salt adai too.Steam both the adai in an idli pot and set aside.After finishing the neivedyam works, decorate the pooja room. Make yellow thread by greasing a thread with turmeric powder.Tie a flower in the center of rope. The number of threads should be equal to the number of woman+girls at home along with one for Goddess Lakshmi. After decorating the pooja room, light the lamps.At the time of pooja, wear a silk saree. Keep the Nombu adai with umelted butter on top of adai in a plate. In another plate, keep the broken coconut, betel leaves,nuts and banana.In the same plate, keep the yellow ropes too.Do the neivedyam, show the dhoop & dheep. Perform Mangala aarti by chanting the slokha.
After finishing the pooja, sit in the same place and tie the yellow rope for Goddess Lakshmi and then tie a rope around your neck and around the wrist for unmarried girls.i.e Married women should tie the thread around the neck and unmarried girls should tie it around the wrist. After tying the rope, take one adai along with unmelted butter and eat it.Ladies should eat this adai and break the fasting.Then it should be distributed to the members of family.If you wish, you can fall at the feet of your husband and get his blessingsHappy. This is how Karadaiyan Nonbu is performed in our house. This procedure may differ as per places. Consult the elders about your family practice and do the pooja.
NOTE : The thread you tied around the Lakshmi Idol can be removed after few days once its worn out and tied to a plant or dispersed in river water. The thread tied around the women can be tied to the mangal sutra if you wish OR tie it for a plant or branch of a tree. Women who are not able to perform this pooja on Nombu day can do this pooja on the following Tuesday or Friday in Panguni month.

Click this link for Karadaiyan nombu Sweet adai & salt adai recipes using homemade rice flour  in detail with step by step pictures.
I hope beginners would find this post useful for performing this pooja. Have a blessed day !
Thanks for visiting this page.


Drumstick Masala – Murungakkai Masala Poriyal Recipe

$
0
0
drumstick masala
Usually I make drumstick poricha kuzhambu or sambar( Murungakkai in Tamil, Mulakada in Telugu, Nuggekai in Kannada, Muringakka in Malayalam ) whenever I buy this vegetable. But this time I bought drumstick to try some different recipes with it. When I was browsing, I found this South Indian style drumstick masala curry recipe here. Basically I love fry/poriyal recipes made using whole garam masala. So I tried this recipe for our lunch yesterday along with brinjal kara kuzhambu without any second thought. It came out very well. We loved it a lot and got thumbs up from Sendhil. It was a good side dish for dal rice & curd rice. If you like, you can have it with chapathi too. Do try this masala for a change and share your feedback with meHappy.Lets see how to prepare this yummy drumstick masala for rice.
Murungakkai masala

Drumstick/Murungakkai masala recipe


Drumstick/Murungakkai masala recipeDrumstick/Murungakkai masala recipe for rice
Cuisine:South Indian
Category:Side dish for rice
Serves:Serves 2
Prep time:10 Minutes
Cook time:20 Minutes
Total time:30 Minutes


INGREDIENTS

  • Drumstick/Murungakkai - 1 no
  • Big onion - 1 no ( chop finely)
  • Garlic cloves - 4 nos (-do-)
  • Tomato - 1 no (-do-)
  • G&G paste - 1/4 tsp
  • Red chilli powder - 1 tsp
  • Dhania powder - 1 tsp
  • Turmeric powder - 1/4 tsp
  • Salt & water - as needed
  • Sugar or jaggery – a pinch
To saute
  • Cooking oil - 1 tbsp
  • Cinnamon - 1 inch piece
  • Cloves - 2 nos
  • Cumin seeds - 1/2 tsp
  • Curry leaves - few
To grind
  • Grated coconut - 1/4 cup
  • Fennel seeds - 1 tsp
  • Water – as needed
METHOD

  • Wash & chop the drumstick into finger size pieces. Slit it half way till the center.Grind coconut, fennel seeds to a smooth paste adding required water.In a kadai, heat oil & saute cinnamon, cloves, cumin seeds. Add onions, curry leaves, g&g paste. Saute until its raw smell goes off. Now add the finely chopped tomato pieces and saute until mushy. Add the drumstick pieces now. Mix well.
Drumstick masala
  • Add red chilli powder, dhania powder, turmeric powder and salt.Saute for a minute and add the required water. Cover & cook the drumstick till its done.
Drumstick masala
Drumstick masala
  • After the drumstick is cooked well, add the ground coconut paste and saute until the masala thickens.Switch off the flame and serve hot with rice!!
Drumstick masala
Drumstick masala
Enjoy !

Note
  • Adjust the quantity of red chilli powder & dhania powder as per your taste.
  • If you like to have it as a gravy, add more water and adjust its consistency. I made it thick like a curry/poriyal.

Try this yummy drumstick masala for rice. It tastes yum !! I served it with Brinjal Kara kuzhambu : ))
Murungakkai masala poriyal

Mango Sambar Recipe – Raw Mango Recipes

$
0
0
Raw mango sambar
Last year I wanted to start my mango recipes with this yummy raw mango sambar. But I couldn’t. This year at least let this sambar be my first mango recipe as its my most favorite. I learnt this recipe from my MIL. My mom & MIL never fails to make this sambar during mango season.We call it as “Manga sambar” in Tamil. My Mom makes mango sambar along with drumstick. So its more like drumstick mango sambar. Her recipe is Tirunelveli based version. I will try to make a separate post for that. This is my MIL’s version which is very easy to make without any grinding job. Its like my basic onion sambar recipe but there are slight variations in the quantity of tamarind and spices as we use sour raw mango here. Whenever my MIL make this sambar, she reserves 2 big mango pieces for meLove Struck as I love to eat those soft,spicy and juicy cooked mangoes the mostDrooling.When i was making this sambar, all these nostalgic memories were running behind my mind :)..Ok. Lets see how to prepare this yummy raw mango sambar recipe !


Raw mango sambar

Mango sambar recipe


Mango sambar recipeHow to make raw mango sambar recipe for rice
Cuisine:Indian
Category:Gravies
Serves:Serves 3
Prep time:10 Minutes
Cook time:20 Minutes
Total time:30 Minutes


INGREDIENTS
1 cup = 250ml
To pressure cook
  • Toor dal - 1/3 cup
  • Turmeric powder - 1/8 tsp
  • Hing – a pinch
  • Water - 2 cups
  • Cooking oil - few drops
To boil in tamarind extract
  • Raw mango - 1/2 no ( 6 pieces)
  • Tamarind - A small gooseberry size
  • Big onion - 1 no ( cube cut)
  • Green chilli - 1 no ( slitted)
  • Curry leaves - few
  • Hing/Asafetida - 1/8 tsp
  • Turmeric powder - 1/8 tsp
  • Sambar powder - 1.5 tsp
  • Salt & water - as needed
To temper
  • Cooking oil - 1 tbsp
  • Mustard seeds - 1/2 tsp
  • Methi seeds - 1/4 tsp
  • Cumin seeds - 1/2 tsp
  • Red chilli - 1 no ( pinched into 2)
Coriander leaves – few ( to garnish)
METHOD

  • In a pressure cooker base, take the toor dal, turmeric powder,water, hing and few drops of cooking oil. Pressure cook in low flame for one whistle. Open the cooker after the steam is released and mash the dal well.Wash and cut the mango into two vertical pieces.Remove the seed in the center. Cut the mango into big pieces as shown in the picture.
mango sambar recipe
mango sambar recipe
  • In a kadai, heat oil and splutter methi seeds, mustard seeds,red chilli and curry leaves. Add onions and green chilli. Saute until onion turns transparent. Add the tamarind extract, salt, turmeric powder,sambar powder,hing and few raw curry leaves. Let the tamarind extract boil for sometime. Now add the raw mango pieces and 1/2 cup of water.
mango sambar recipe
mango sambar recipe
  • Let the mango pieces cook well in tamarind extract.It takes 7-8 minutes to cook well. Stay nearby and keep an eye on the mango pieces. Usually raw mango pieces cook quickly. Take a piece in a ladle and touch the flesh part. If its soft, mango is cooked well. Mango should retain its shape.Make sure its not mushy.
  • Now add the boiled and mashed dal. Mix well and give a roll boil.Switch off the flame and garnish with coriander leaves.Serve hot with rice adding few drops of ghee! Enjoy !
mango sambar recipe


Note
Adjust the quantity of tamarind and sambar powder according to the sourness of mango.
You can also use toor dal & moong dal in equal quantity to make this sambar.
If you feel the mango is over cooked, remove the pieces after the sambar is done. Add the pieces just before serving so that mango will retain its shape while serving.
Enjoy this yummy mango sambar for your lunch ! I had with rice & broad beans poriyal Happy
mango sambar

Gujiya Recipe – Holi Recipes

$
0
0
Gujiya recipe
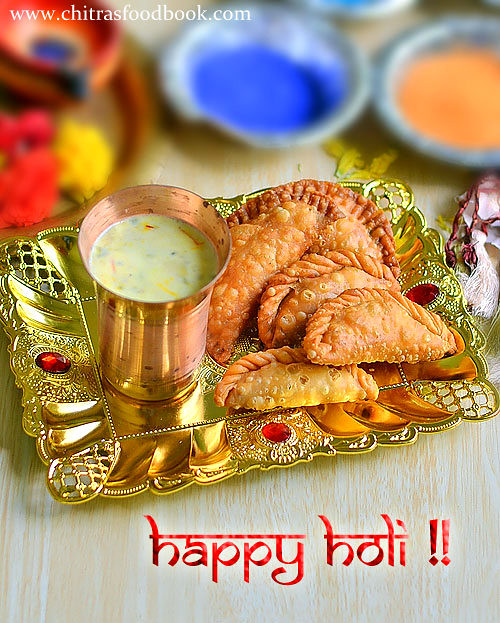
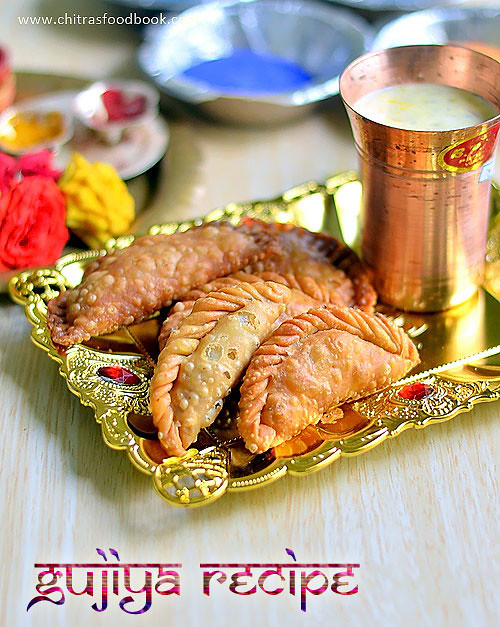
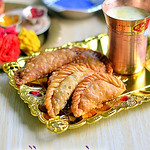
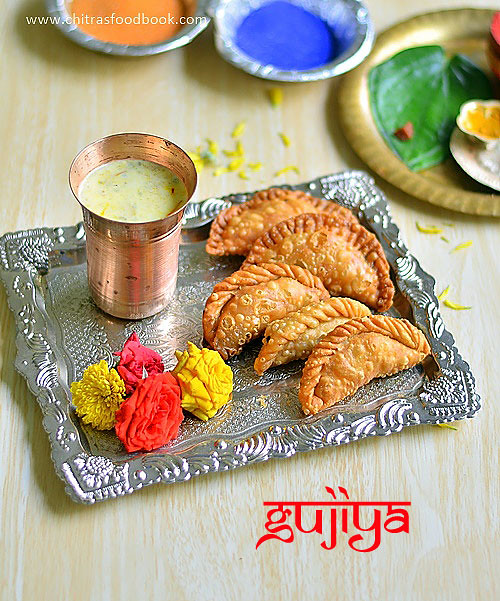
Holi festival is around the corner.When I was looking for Holi special recipes, I found Gujiya is a must to do recipe for this festival. When I browsed for the recipe, I found it was very similar to Sweet samosa/Karanji , Chandrakala and Suryakala sweet recipes. Of course there are some slight variations between each of them. So this time I tried an Authentic North Indian style Gujiya following the recipe shared by Sandhya Soni, a member of Facebook’s Chef at large group.Here is the link. It came out very well. I was very happy & satisfied with the result. Sendhil & Raksha loved it too. So I thought of sharing this wonderful recipe as my contribution to Holi festival recipes. I used khoya/mawa for gujiya filling as mentioned in the original recipe. If you wish to try without khoya, you can replace it with dessicated coconut and powdered nuts.Please refer my Sweet samosa recipe to know its procedure. Try it and share with your friends and relatives on HOLIday !! Have a colorful celebration.Lets see how to make Gujiya recipe with mawa fillingHappy
Gujiya recipe

Gujiya recipe


Gujiya recipeHow to make gujiya with khoya/mawa filling - Holi festival recipes
Cuisine:Indian
Category:Sweet
Serves: Yields 8-10 
Prep time: 30 Minutes
Cook time:20 Minutes
Total time: 50 Minutes


INGREDIENTS
1 cup = 200ml
  • Maida - 1 cup
  • Melted ghee - 1.5 tbsp ( at room temp)
  • Water - as needed
For filling
  • Unsweetened khoya - 1/2 cup  ( I used Amul)
  • Powdered sugar - 1/2 - 3/4 cup ( based on taste)
  • Chopped nuts - 2 tbsp ( badam, cashew,pista)
  • Roasted sooji - 2 tbsp
  • Cardamom powder - 1/8 tsp
  • Cooking oil - to deep fry
METHOD

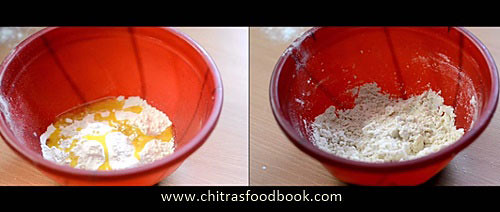
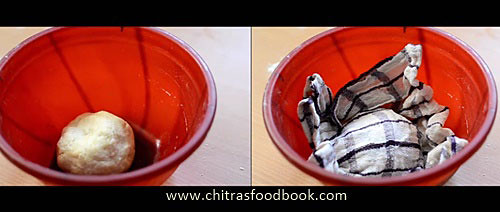
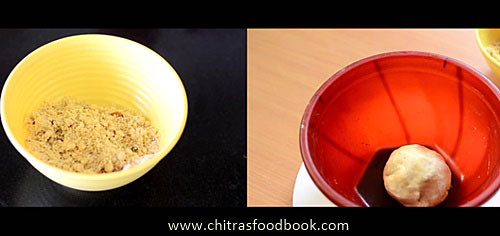
  • Take a wide bowl and add the flour.Add the melted ghee at room temperature and mix the flour.After the ghee is well mixed with the flour, add water little by little and make a smooth dough. Knead the dough for 5 minutes and rest it for 30 minutes. Cover the dough with a wet cloth.
Gujiya recipe
Gujiya recipe
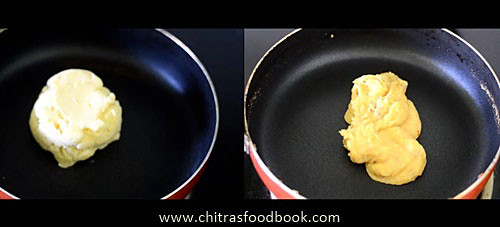
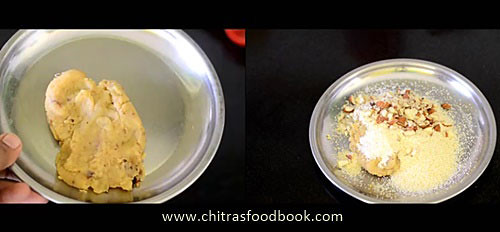
  • In the mean time,make the filling. Take the unsweetened khoya in a non-stick kadai. Heat the khoya in medium flame and mix until it leaves the pan and starts to rotate with the ladle. The color of khoya will turn golden brown. This process takes around 10 minutes or more. So do it patiently in low to medium flame.Remove in a plate. Dry roast the sooji well. Collect in another plate.
  • Gujiya recipe
  • Let the cooked khoya  & roasted rava cool down completely. Now mix the finely chopped nuts, powdered sugar, khoya and rava very well till the mixture looks crumbly.Add cardamom powder,mix well. Stuffing is ready.
Gujiya recipe
Gujiya recipe
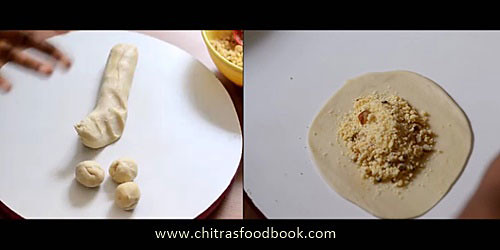
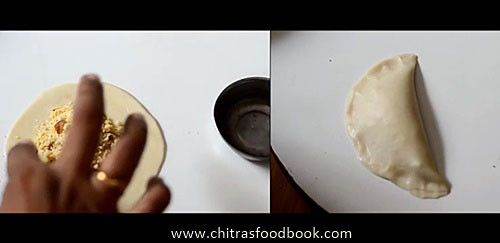
  • Now take the dough and roll it to a cylinder.Make balls of equal size.Roll the ball into small poori and keep a tbsp of stuffing in the center.Apply water on the corners and fold the poori into a half moon shape. Now fold the edges as shown in the pic OR press the corners with a fork.
Gujiya recipe
Gujiya recipe
Gujiya recipe
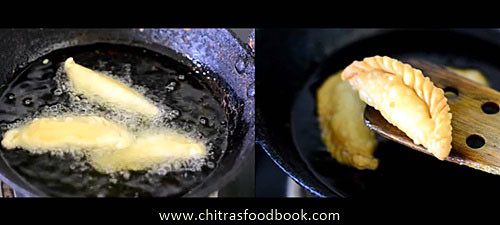
  • Heat oil and drop a pinch of batter. If it rises to the top and does not brown, oil heat is just right. Now keep the flame low to medium and drop the gujiya.Deep frying the gujiya patiently in low to medium flame give you really crispy gujiyas. So do not  hurry up while frying. Do not over crowd the kadai. Fry 2-3 gujiyas based on the size of kadai. Deep fry them in batches.
Gujiya recipe
  • Cook the gujiya patiently on both sides by flipping now and then. Once the bubbles cease and gujiya turn golden brown, remove them in a tissue. Drain the excess oil and serve hot OR store them in an air tight box after it comes to room temperature.It stays good for a week !! But to enjoy its best taste, eat it on the same day of preparation.Enjoy !
Gujiya recipe


Note

  • Adjust the quantity of powdered sugar based on your taste buds.
  • Deep frying in medium flame for long time gives a crispy gujiya.
  • For best taste, serve gujiya as soon as you prepare them.
  • Another important point is “Rolling” .Roll the dough like a thick poori. It should be thick in the centre and slightly thin in the corners. If u make it very thin , stuffing will ooze out in the oil while deep frying and the oil becomes a waste . Please be careful .I had experienced thisSad . If u make it too thick , it takes more time to cook and spiral corners may not be cooked properly.To avoid this disaster , first make one , deep fry in little oil. If u get it right , proceed making the remaining ones.Else adjust the rolling and try again.This will surely help.
  • Suppose if the stuffing ooze out in oil , immediately switch off the stove and remove the sweet. Strain the oil and reuse it.
Enjoy these yummy Gujiya & Thandaion HOLI Day and have a great celebration !
Gujiya recipe

Easy Carrot Beans Poriyal / Curry Recipe

$
0
0
Carrot beans poriyal
This is the first poriyal ( Palya in Kannada, Curry in Hindi, Thoran in Malayalam, Poriyal in Tamil) recipe I learnt from my MIL after marriage. I have been making this poriyal for years but somehow I missed making this post in my blogHappy.Today being HOLI Festival, I din’t have mood to post any recipes but its more than 2 days since I sat in my blog. So I thought of sharing this colorful Poriyal/curry recipe to suit the festivalWinking.Earlier I used to follow my MIL’s method. But nowadays I make this poriyal in a pressure cooker in one go. I make it mostly in busy morning hours usingmy small 1.5ltr PC.It gets ready in just 10 minutes apart from chopping. Its a very easy & healthy stir fry that can be made with or without coconut and onion. Most of the time I avoid using both of them. So its purely a bachelors style recipe. Its a good side dish for Sambar, Rasamandcurd rice. Thanks to my MIL for teaching me this yummy South Indian poriyal recipe. Ok, lets see how to make Carrot beans poriyal for rice.
Check out my other poriyal recipes HERE.
Carrot beans poriyal

Carrot beans poriyal recipe


Carrot beans poriyal recipeCarrot beans poriyal - How to make carrot bean stir fry using a pressure cooker - Side dish for rice
Cuisine:Indian
Category:Side dish
Serves:Serves 2
Prep time:10 Minutes
Cook time:10 Minutes
Total time:20 Minutes


INGREDIENTS

  • Carrot - 2 nos
  • Beans - 15 nos
  • Moong dal – 1 tbsp
  • Sambar powder - 1 tsp
  • Turmeric powder – 1/8 tsp
  • Sugar – a pinch
  • Salt - as needed
  • Water - 1/3 cup ( add 1/2 cup max)
To temper
  • Cooking oil - 1 tbsp
  • Mustard seeds - 1/2 tsp
  • Urad dal - 1 tsp
  • Cumin seeds/Jeera - 1/2 tsp
  • Big onion - 1 no ( optional)
  • Curry leaves - few
Grated coconut - 3 tbsp ( optional)
METHOD

  • Wash and chop the carrot, beans and set aside. Heat a pressure cooker bottom with oil. Temper mustard seeds, urad dal, cumin seeds, curry leaves. Saute chopped onions if using.
Carrot beans poriyal
  • Then add the chopped carrot, beans. Mix well for a minute.Add moong dal, give a stir.
Carrot beans poriyal
  • Add sambar powder,turmeric powder,sugar, salt( use 1/2 tsp of sambar powder if its more spicy).Give a quick mix.
    • Add 1/4 cup of water.Mix well. Pressure cook in high flame for 2 whistles.Switch off the flame.
Carrot beans poriyal
  • After the steam is released, check if there is any excess water. If so, boil it in high flame for a minute till water is drained off. Now add the grated coconut, mix well and switch off the flame. Serve with sambar, rasam or curd rice.
Carrot beans poriyal
Enjoy !

Note
  • Adding onions & coconut is completely optional.But adding them gives more quantity of poriyal.
  • If you are making this curry for guests, do add onions & more grated coconut. It tastes yummy, looks colorful and rich.
  • Add less water in the pressure cooker.Don’t worry, cooker bottom won’t burn. 
  • As we are cooking in high flame, veggies won’t turn mushy too.
  • Adjust the quantity of sambar powder as per its spiciness. I always use myhomemade sambar powder.
Try this easy, healthy stir fry for your lunch and enjoy with sambar or rasam. I served it with mullangi/Radish sambar Love Struck
Carrot beans poriyal


Paneer Makhani – Paneer Makhanwala Recipe

$
0
0
Paneer Makhani
Paneer Makhani ( Makhani means cream in Hindi) is a rich Punjabi gravy/sabzi made with tomato, onion, Butter and cream.Some people call this as Paneer Makhanwala too. Actually I was thinking Paneer butter masala & Paneer makhani recipes are one and the same as the basic ingredients are similar. But after going through few posts, I came to know there is difference in their cooking procedures. I followed Tarla Dalal’s recipe for this gravy. Its taste was close to the restaurant ones and we loved it with soft chapathi. I packed it for Sendhil & Raksha’s lunch box. This gravy can be made without onion, garlic too because its the butter, cashews & fresh cream that makes magic here. Do try it for Chapathi, Naan or plain kulcha. Tastes yumm. Lets see how to prepare Paneer makhani at home.


Paneer makhani recipe

Paneer Makhani Recipe


Paneer Makhani RecipeHow to make Paneer Makhani - Rich, Yummy gravy for chapathi/Roti, Naan & kulcha
Cuisine:North Indian
Category:side dish for roti
Serves:Serves 2-3
Prep time:10 Minutes
Cook time:20 Minutes
Total time:30 Minutes


INGREDIENTS

  • Paneer/Cottage cheese - 200 gms
  • Tomato - 3 nos
  • Big onion - 1no
  • Cashews - 10 nos
  • Red chilli/Byadgi/Kashmiri chilli - 3 nos
To saute
  • Butter - 2 tbsp
  • Cinnamon - 1 inch
  • Cloves - 2 nos
  • Green cardamom - 2 nos
  • Cumin seeds - 1/2 tsp
  • Red chilli powder - 1/2 tsp
  • Dhania powder - 1 tsp
  • Garam masala powder - 1/2 tsp
  • Turmeric powder - 1/8 tsp
  • Salt - as needed
  • Sugar - 1/4 tsp
  • Kasoori methi - 1/2 tsp ( crushed)
  • Fresh curd - 2 tbsp
  • Fresh cream - as needed ( I added 2 tbsp)
  • Water - as needed
METHOD

  • Cut the paneer into 1 inch strips. Heat water in a bowl and keep the paneer immersed in hot water till use.In a kadai, heat 1 cup of water and boil the chopped tomato, onion, cashews and red chillies. After the tomato, onion is cooked, switch off the flame.Cool down and grind to a smooth paste adding the required water.
  • In a kadai, heat butter.Saute cinnamon, cloves, green cardamom and cumin seeds. Add the ground tomato puree and saute well for a minute.
Paneer makhani recipe
  • It will start to thicken, changes color by leaving some oil. Add turmeric powder, red chilli powder, dhania powder, garam masala powder, sugar, salt. Mix well & saute the gravy until it starts to leave traces of oil.
Paneer makhani recipe
  • Now add curd and mix well.Cook for a minute.Add 1/2 - 1 cup of water and boil well.
Paneer makhani recipe
  • Lastly add paneer cubes and boil well until the gravy comes to a desired consistency. Add the crushed kasoori methi and fresh cream. Mix well. Switch off the flame and serve hot with roti/Chapathi.Enjoy !
Paneer makhani recipe


Note
  • Adjust the quantity of chilli powder as per your taste buds
  • Use kashmiri chilli & Kashmiri chilli powder to get a bright red colored gravy.
  • Adding fresh cream gives a great taste. So do not avoid it. If you don’t have fresh cream in hand, collect the skin/Malai from the the boiled milk and add it.
  • Instead of cashews, you can use almonds too.

Enjoy this rich and creamy paneer makhani with roti or naan ! Tastes yumm !!
Paneer makhani
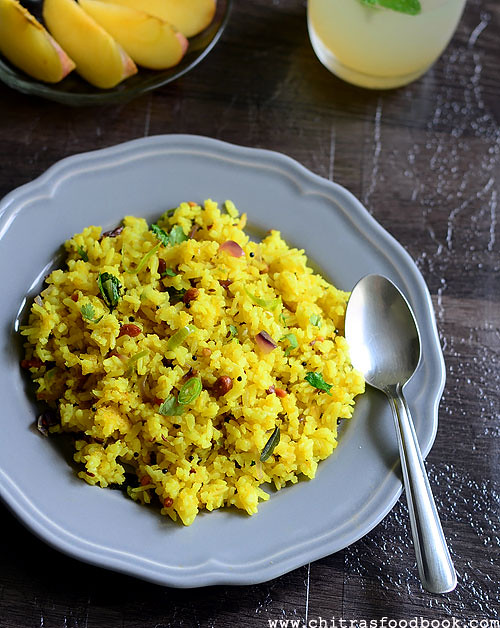
25 Paneer Recipes – Indian Paneer Recipes Collection

$
0
0
 Paneer Recipes
I have never thought that I would make a collection of 25 Paneer Recipes ( Indian Cottage Cheese in English) in my food book. In my family,nobody is a big fan of paneer.Generally Kids love paneer based dishes whereas my daughter Raksha is just the opposite. She hated paneer recipes till she was 6.So paneer makes its appearance very rarely in my kitchen. Even if I make it, I used to try mostly restaurant style paneer gravies as a side dish for roti/Chapathi to make my family eat it without any complaints.Slowly Sendhil started to eat paneer recipes liking its taste & knowing its health benefits. Whereas Raksha began to ask me prepare side dish recipes using paneer by seeing her class mates lunch boxesWinking. Then I started exploring varieties of paneer gravies like Paneer butter masala, Mughlai Paneer kurma, Paneer Makhani, Shahi paneer, No onion no garlic paneer gravies etc , dry paneer recipes/starters like paneer 65, paneer tikka, Chilli paneer, Kadai paneer, kids friendly recipes like Paneer bonda, cutlet, sandwich, Paneer biryani & some sweets recipes with it. And now paneer dishes has become our family favorite. I feel like I have achieved something bigLaughing. Here I have shared a collection of 25 Indian paneer recipes which are super hit among my family members and are easy to make too.I still have a big list to try. I will include them in this list whenever I post it. Lets check out the collection of 25 paneer recipes with step by step pictures.
Check out my Soft Chapathi Recipe, Kulcha, Naan without yeast

25 Indian Paneer Recipes


35 Indian Paneer RecipesA collection of 25 paneer recipes - Gravies, dry starters, snacks & rice varieties
Cuisine:Indian
Category:Paneer Recipes
Serves:Serves 2-3
Prep time:10 Minutes
Cook time:20 Minutes
Total time:30 Minutes
INGREDIENTS

  • Paneer
  • Potato
  • Bread
  • Rice
  • Masala powders
  • Whole garam masala
  • Onion
  • Tomato
  • Capsicum
  • Fresh cream
  • Butter/Oil
  • Milk
  • Coconut
  • Salt & water
COLLECTION
    Home made Paneer Recipe

    Paneer Makhani   Matar paneer

    White kurma Shahi Paneer

    Mughlai Paneer korma Palak paneer - Restaurant style

    Paneer Phool makhana gravy Bengali chanar dalna

    Paneer Pasanda  Paneer Butter masala

     Paneer ladoo Paneer Kheer

    Paneer sandwich Paneer paratha

    Paneer cutlet Paneer Tikka

    Paneer Biryani Paneer Dosa

    Paneer 65  Aloo Paneer bonda

    Pot biryani with paneer 

    Kadai paneer  Sindhi style Palak Paneer
Choose your favorite & enjoy making these yummy paneer recipes at home ! Don’t forget to share your feedback with me Winking

Viewing all 967 articles
Browse latest View live