Quantcast
Channel: Chitra's Food Book
Viewing all 969 articles
Browse latest View live

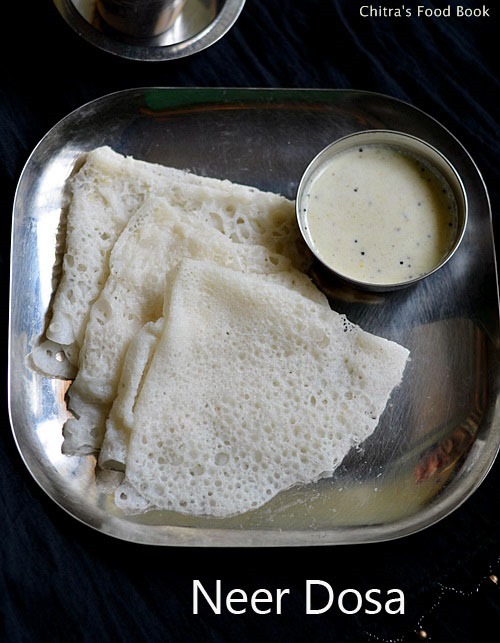
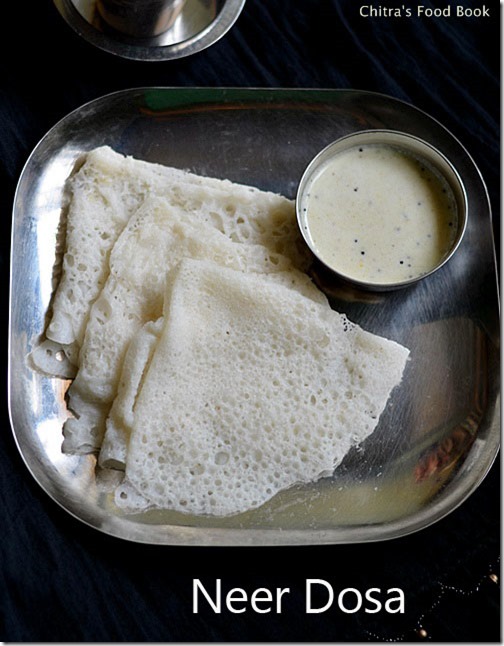
NEER DOSA RECIPE-KARNATAKA BREAKFAST RECIPES

$
0
0

neer dosa

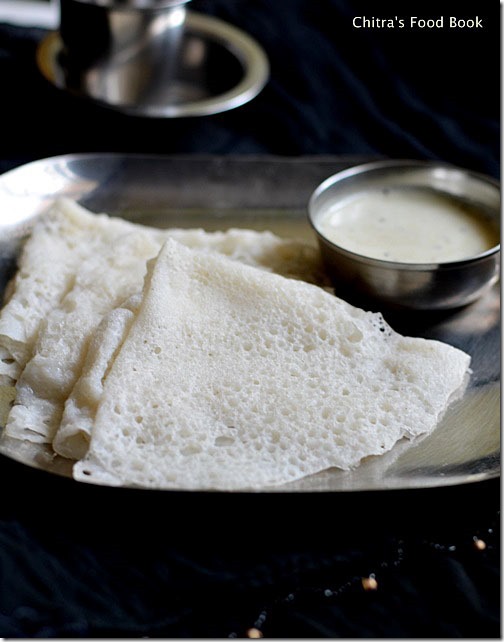
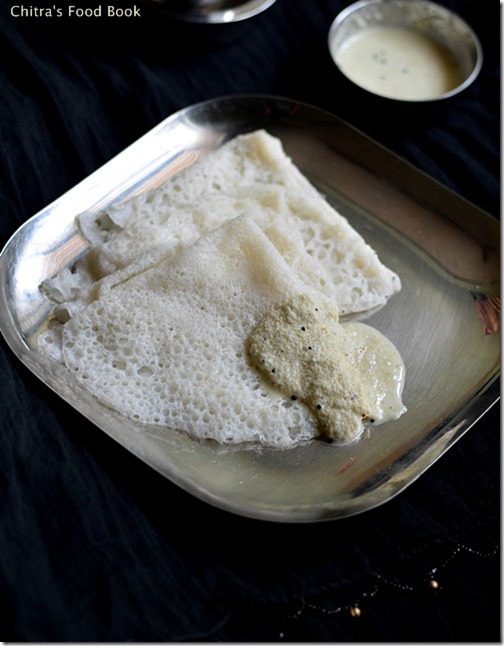
Neer dosa must be familiar to many of you.Literally it means water dosa and is a crepe made out of rice flour & coconut.Its one of the popular dosa varieties of Karnataka.In Tamil nadu,we  prepare a similar one called rice flour dosa(arisi maavu dosa in Tamil) which needs over night fermentation.But this neer dosa can be done immediately after grinding the batter.It was in my try list for long time but i got tempted to try this out when i watched Vijay Tv’s Samayal Samayal with Chef Venkatesh bhat.When he showed this neer dosa paired with onion tomato thokku/chutney,i started drooling like anythingDrooling.I tried tomato onion thokku for idli by watching that show.It came out wonderful.I will share that recipe after two days.But i followed neer dosa recipe from here.This neer dosa is Sendhil’s favourite too.He used to have this dosa with kaju curry in restaurants here when he was new to Bangalore.But i have not tasted this dosa in hotels so far.Recently we went to VV puram’s food street and tasted akki roti,thatte idli,brinjal gravy,kulfi etc from roadside hotels.There i asked in many stalls for neer dosa but it was not there and i came off disappointed.Then Sendhil enquired his colleagues and told me about a small hotel in Malleshwaram which is famous for Neer dosas.I must pay a visit soon.The ones i made yesterday in my kitchen was awesome.It was so lacy and very soft.I tried it for the first time and i was completely satisfied with the result.Sendhil told it tastes the same like hotel ones.What else,this recipe was a grand hit in my houseParty .When i asked my kannadiga friends( school moms) here,they told me an Instant neer dosa recipe which they mentioned as “thideer dosa” using rice flour and coconut.They also suggested coconut chutney and vegetable sagu as the best side dish for neer dosa.I prepared spicy,watery coconut chutney and it was tasting great.But one thing i have to admit is,this dosa won’t be filling even after having 5-6 nos if u are a good eater.So make sagu or any vegetable kurma if u want to have a tummy filling breakfast or dinner.Else make it as brunch or snacks;)
There are certain techniques to be followed to make a perfect neer dosa.Based on my observation and the tips from veggie belly,i have shared some points in my “Note”section.Do read it before making this dosa.U will get it perfect even if you are a first timer Dancing.Lets  see how to make this karnataka style neer dosa !

Neer-dosa-recipe

Neer dosa recipe


Neer dosa recipeNeer dosa recipe - Karnataka's popular breakfast recipe
Cuisine:Indian
Category:Breakfast
Serves:15-20 nos
Prep time:8 Minutes
Cook time:1 Minutes
Total time:9 Minutes


INGREDIENTS

  • Good quality sona masoori Raw rice - 2 cups
  • Grated coconut - 1/3 cup
  • Water & salt - as needed ( i used nearly 4-5 cups of water)
For coconut chutney
  • Grated coconut - 1/2 cup
  • Fried gram dal/Hurikadale/Pottukadalai - 1/4 cup
  • Green chillies - 5-6 nos 
  • Tamarind -a small pinch
  • Salt & water - as needed
To temper
  • Cooking oil – 1 tsp
  • Mustard seeds – 1/2 tsp
  • Urad dal – 1/2 tsp
  • Curry leaves - few
METHOD

  • Wash and soak the raw rice in enough water for 4-6 hours or over night.Drain all the water and grind it along with grated coconut and little salt.This dosa batter takes less salt so add it carefully.If u feel salt is less after grinding,u can add it later.But do not add more salt while grinding.First grind the rice & coconut to a coarse paste without adding water and then add 1 cup of water to  make a smooth paste.Wipe the sides & the jar while grinding.I used my bigger sized mixie jar to grind the batter.Check the batter and grind it again adding required water till u get a very smooth paste without any grits.I used nearly 2 cups of water while grinding.Do not run the mixie for longer time.Give some time gap between successive grinding so that your jar won’t get heated up soon.
Neer dosa step1
  • After grinding the batter smoothly,remove the batter in a bowl and wash the jar with 1/2 cup of clean water .Add this to the batter and check for its smoothness by taking the batter between your thumb finger & fore finger.It should be very smooth without any grits or rice particles.Then add more water( around 1.5-2 cups) to make a watery batter.Its consistency should be like low fat milk or buttermilk. So add water accordingly.Check for salt.
  • To check the right consistency of batter, dip the back of spoon into the batter.If the batter coats very lightly,it is correct.Else add little more water.U can also check its consistency by making a dosa.If dosa comes out very thick and if the batter doesn’t spread on its own,add more water.So u have to adjust the consistency only by some trial & error.After adding all the water,u may get around 6-7 cups of batter i guess.
Neer dosa step2

  • To make dosas,a good conditioned non-stick dosa pan  or frying pan with handle is needed.Heat the dosa pan well.Sprinkle few drops of water and if water droplets go off within few seconds,heat is just right.Then dip a cloth or tissue paper in oil and grease the pan well.Proper heating of pan and good greasing is very important.Keep the flame high.
  • Season/grease the pan and mix the batter thoroughly well every time before making dosa.Don’t forget !
Neer dosa step3
  • Now take 1/2 ladle of batter and pour it from 1/2 feet above the dosa pan.As soon as you pour the dosa batter using your right hand,the batter will spread on its own to some extent.Immediately swirl the dosa pan with your left hand and try to make it round.Fill the holes with little batter if u need.
Neer dosa step4
  • Now simmer the flame completely and close the dosa with a lid.Let it cook for 30 seconds.Then remove the lid and again cook in open pan for another 30 seconds.Sides of the dosa may lift slightly.That’s it.No need to flip the dosa and do not brown the dosa.It should be super white in color.Carefully fold the dosa into half and fold again to make a triangle shape.Serve with chutney or sagu !
Neer dosa step5
Neer dosa step6
  • For the next dosa,before pouring the batter,keep the flame high,grease the pan with oil,mix the batter thoroughly and then make dosa.Repeat this procedure till the end.
  • Do not stack the dosa one above the other when it is hot because they will stick to each other easily.Serve in two plates.

Enjoy !


Points to Note

  • The batter should be ground smooth.So add water accordingly.Choose a bigger sized jar if u are using mixie to grind the batter. U can use little more coconut if u want more flavourful dosa.But i was happy with this quantity.Adding more coconut makes the dosa too soft n it may break.
  • The consistency of batter should be very important.If its thick,dosa will crack.It should be thin like low fat milk or buttermilk.Even if it is slightly thick,u won’t get lacy dosas and your dosas wont be soft too.The batter should spread on its own till half of the pan as soon as u pour the batter.So adjust the consistency.
  • The temperature of dosa pan is very important.Do the water sprinkling test as i mentioned above before pouring the batter.
  • Season/grease the pan and mix the batter thoroughly well every time before making dosa.
  • If the pan is not heated properly, dosas will crack and it won’t spread on its own.So keep the flame high when u pour the batter.Pour the batter from 1/2 feet distant from the pan.Rotate/swirl the pan as soon as u pour the batter and make a round dosa.There will be holes on it.U can fill the bigger holes with batter if needed..
  • Cook the dosa in low flame with a lid for 30 seconds and without lid for 30 seconds.Do not brown the dosa.It should be white.No need to flip the dosa.
  • Do not stack the dosa one above the other when it is hot because they will stick to each other easily.
TO SUM UP
  1. Rice should be soaked well for minimum of 4-6 hours to make a smooth batter.It should be ground well with coconut to a very smooth batter without any grits.
  2. The consistency of batter is very important.It should be watery like milk.
  3. Heat of the dosa pan is also very important here.It should be high but not smoky.Use a non-stick pan.Iron griddle wont be helpful.
  4. Season/grease the pan and mix the batter thoroughly well every time before making dosa.
  5. Do not cook the dosa in high flame,it should be cooked in very low flame for 1 minute to maintain its white color.This dosa cooks super fast.So remove after a minute without browning them.
  6. This dosa tastes great even after it cools down.So u can make it advance before serving.But you should not stack them one above the other when it is hot.They will stick to each other.Hence stack them after they are cooled down completely.

Enjoy this super soft n lacy neer dosas with coconut chutney,onion tomato chutney OR vegetable sagu.Tastes great with anything and everything ! Drooling
Neer dosa recipe


GONGURA THOGAYAL RECIPE/GONGURA PACHADI-ANDHRA STYLE

$
0
0

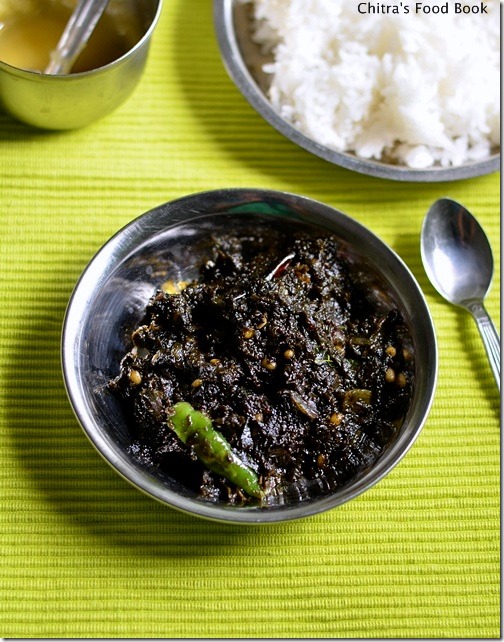
Gongura thogayal recipe

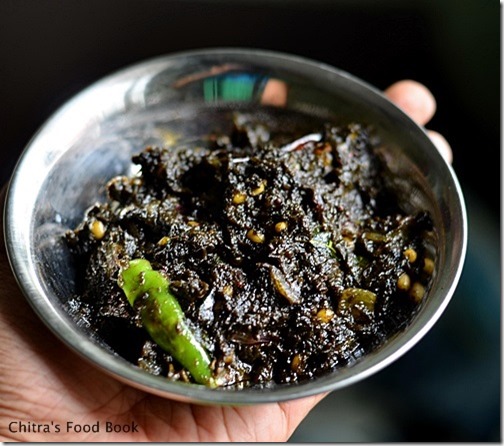
Gongura/Red Sorrel leaves in English,Ambadi in Gujrati,Marathi,Pitwa in Hindi,Pundi in Kannada & Pulichai Keerai in Tamil,Mestapat in bengali and Nalita in other languages is a very famous green variety in Andhra.Most of you would have heard about gongura pickle.But i tried thogayal with it years ago.Yes,this was the first & foremost recipe i tried after marriage from this websiteviagoogle search.Recently a reader asked me to post gongura recipes and especially thogayal recipes.So after a long time,i referred that blog again and made this thogayal yesterday for rice.It was spicy,tangy n yummy when we had with hot rice and ghee.In the original recipe,it was titled as gongura pachadi/gongura chutney but i named it as thogayal because of its thick texture.Its very simple to make and you can store this thogayal for more than a week too.Even bachelor’s can try this and use it for 2-3 days without refrigeration.Soon i will share more gongura recipes like gongura sambar,gongura pappu in my blog and now lets see how to make this yummy Andhra style gongura thogayal for rice.

Gongura thogayal

Gongura thogayal recipe


Gongura thogayal recipeAndhra style gongura thogayal recipe- Tastes yum with hot rice n ghee !
Cuisine:Indian
Category:Thogayal
Serves:Serves 3
Prep time:10 Minutes
Cook time:10 Minutes
Total time:20 Minutes


INGREDIENTS
To pressure cook
  • Gongura leaves - Half bunch ( say 3 handful)
  • Green chillies - 5 nos ( big finger size)
To temper & saute
  • Sesame oil/Gingely oil OR cooking oil - 2 tbsp
  • Mustard seeds - 1/2 tsp
  • Urad dal - 1 tsp
  • Red chillies - 1 no
  • Green chillies - 1 no ( slitted)
  • Curry leaves - few
  • Hing/Asafetida - A big pinch
  • Small onions – 5 nos ( whole)
  • Big onion – 1 no ( small,finely chopped)
METHOD

  • Wash the gongura leaves,drain the water and take in a pressure cooker base.Add green chillies,salt to it along with little water(Leaves will leave some water.So add little water) Pressure cook in high flame for 2 whistles.Open the lid and let it cool.
    gongura-thogayal
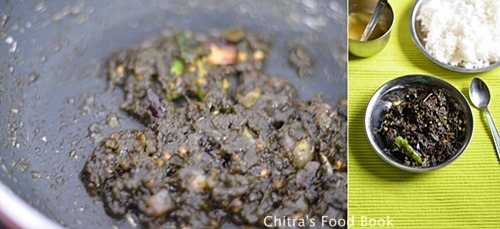
  • Take out 2 green chillies & reserve.Grind the cooked mixture to a smooth paste.Check for taste and add the reserved chillies,grind again. In a kadai,heat oil and splutter mustard seeds,uradl dal,hing,curry leaves,red chillies & green chillies.Add finely chopped big onions and whole,peeled small onions and saute till transparent.
gongura-thogayal-1
  • Then add the ground paste and mix will till the mixture thickens and oil leaves from it.If needed add a tbsp of oil in the middle.Remove and let it cool.Store in a box and refrigerate.
gongura-thogayal-2
  • Mix with hot rice adding few drops of ghee. Enjoy !

Enjoy !


Note

  • Adjust the quantity of green chillies as per your spice level.
  • Add a small piece of jaggery while grinding the leaves.
  • You should saute till oil leaves from the paste and becomes thick.Else this thogayal will spoil soon. 
  • This thogayal stays good for more than a week if stored properly in refrigerator.Use a clean spoon while you handle.


Enjoy mixing this yummy thogayal with plain hot rice adding few drops of ghee !
Gongura-thogayal-recipe


Easy Beetroot Poriyal Recipe-Bachelor’s Recipes

$
0
0

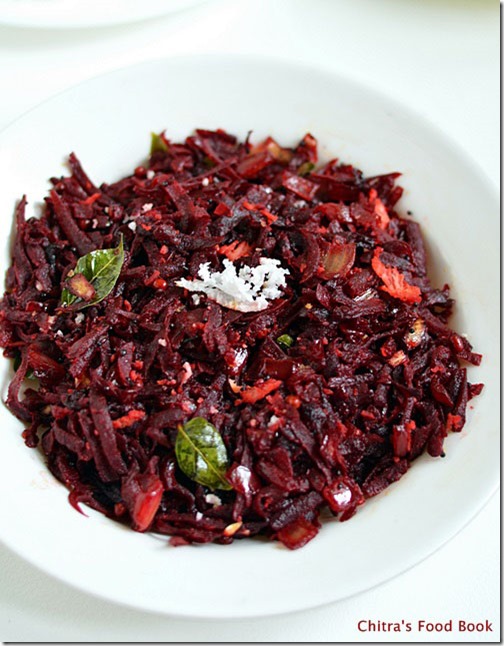
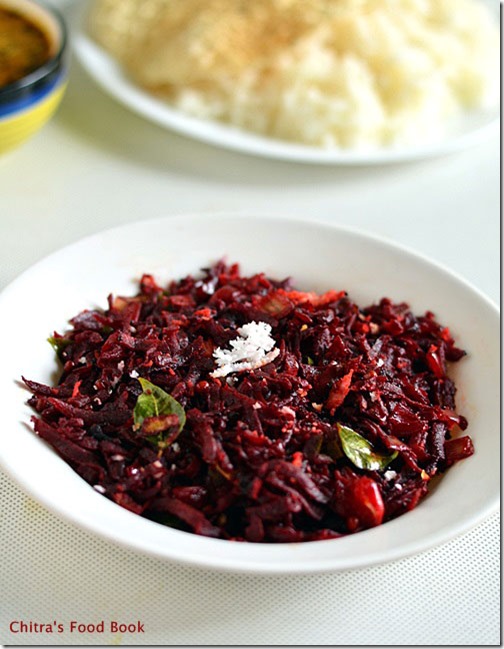
Easy beetroot poriyal
This is one of the easiest poriyal recipes that can be done under 15 minutes during busy morning hours.I learnt this recipe from my MIL but made few changes according to my tastes buds.Usually i makebeetroot poriyal following my mom’s method and it tastes awesome with more kuzhambu and keerai kuzhambu.But this poriyal recipe is much much easier than that version because it doesn’t need pressure cooking & grinding and it tastes equally yummy too.U can make it with or without coconut .So this recipe would be apt for bachelors and working girls/women to pack for their lunch box.You can have this as a side dish for sambar rice,rasam and More kuzhambu.Generally beetroots are very good for health especially for liver problems.So i make sure to use it at least once in a week in the form of poriyal,kootu,salador at least juice.Friends,do try this easy beetroot stir fry recipe and enjoy its health benefits.Soon i will share our beetroot kootu recipe here.Lets see how to make this easy,south indian style beetroot poriyal recipe for rice.

easy beetroot stir fry

Easy beetroot poriyal recipe


Easy beetroot poriyal recipeEasy beetroot poriyal recipe for bachelors and working women - It can be done under 15 minutes.
Cuisine:Indian
Category:Poriyal
Serves:Serves 1-2
Prep time:5 Minutes
Cook time:10 Minutes
Total time:15 Minutes


INGREDIENTS
To grate
  • Beetroot - 2 nos ( Medium sized)
To temper & saute
  • Cooking oil/ Coconut oil - 1 tbsp
  • Mustard seeds - 1/2 tsp
  • Urad dal - 1/2 tsp
  • Chana dal - 1 tsp
  • Hing/asafetida – a pinch
  • Curry leaves - few
  • Big onion - 1 no ( finely chopped)
  • Sambar powder - 3/4 - 1 tsp
  • Turmeric powder - 1/4 tsp
  • Salt & water - as needed
  • Grated coconut - 2 tbsp ( optional)
  • Lemon juice - few drops (optional)
METHOD

  • Wash and peel the skin of beetroots.Grate it using a grater.I used bigger sized grater here.Set aside.Chop the onions finely and keep it aside.
beetroot-stir-fry-step1
  • In a pan,heat oil and temper mustard,urad dal,chana dal,curry leaves and hing.Then add the finely chopped onions and saute till it turns transparent.Stay nearby and do everything in high flame.Then add the grated beetroot and saute for few seconds.
beetroot-stir-fry-step2
  • Add salt,sambar powder & turmeric powder while sauting.After the beetroot starts to shrink & reduced in quantity to a bit,sprinkle some water ( say 3-4 tbsp) and cover cook in low flame for 2-3 minutes.Then remove the lid,mix well and check whether it is cooked else sprinkle little more water and cover cook again.
  • After the beetroot is cooked well n soft,add the grated coconut,mix well for a minute and switch off the flame.Add few drops of lemon juice if u need tangy flavor.
beetroot-stir-fry-step3

Enjoy !


Note

  • You can follow the same procedure & make carrot & cabbage poriyal too.
  • Here i used coconut oil while tempering which renders an additional flavour to this poriyal.Its optional though
  • U can also garnish with coriander leaves in the end if u are not using grated coconut.
  • Add few drops of lemon juice at the end if u need mild tangy taste, else skip it.

You can have this poriyal mixed with plain rice adding a tsp of gingely oil OR as a side dish for sambar,rasam etc.Tastes yum!
beetroot-stir-fry


INSTANT MILLET DOSA USING ENERGY MIX POWDER/SATHU MAAVU DOSA RECIPE

$
0
0
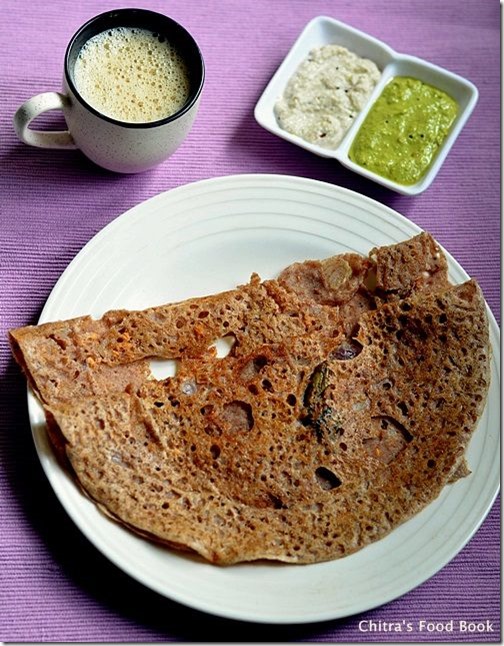
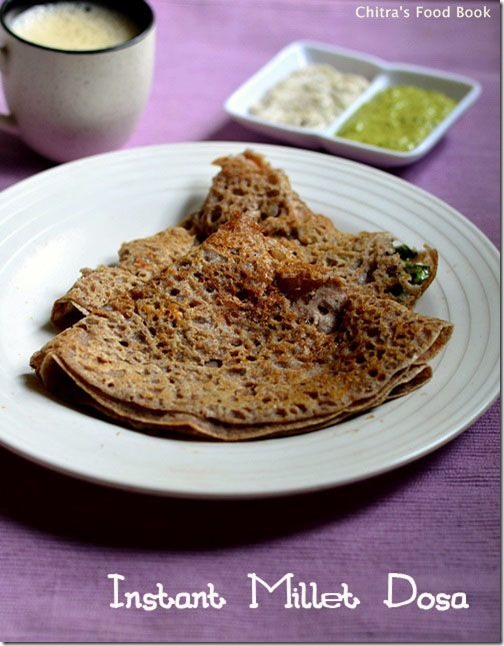
Instant-millet-dosa

Few weeks back i shared  millet energy mix powder/siru thaniya sathu maavu podi.You can find that recipe here.This millet powder is very useful & handy for us.We use this powder for making instant dosa & porrdige for our breakfast and dinner.It comes out very well with awesome flavours of millets.Every month my FIL buys 1/2 kg in each variety of millet & grind in a mill.We store and use that powder for 2-3 months and make dosas regularly and porridge during fasting days.My MIL usually says, instead of searching for different recipes with each millet,she is very much comfortable and happy with this mixed millet powder as it includes health benefits of all the millets in one recipe.Nowadays i too started making this dosa very often in my kitchen.Friends,if you got bored of making idli,dosa,pongal,upma and rice recipes with millets,do try this sathu maavu /health mix powder for a change.You will love it for sure.OK,Lets see how to make this easy,instant mixed millet powder dosa.
Check out my other millet recipes :
About millets
Mixed millet powder ladoo
Little millet sweet pongal
Foxtail millet idli,dosa


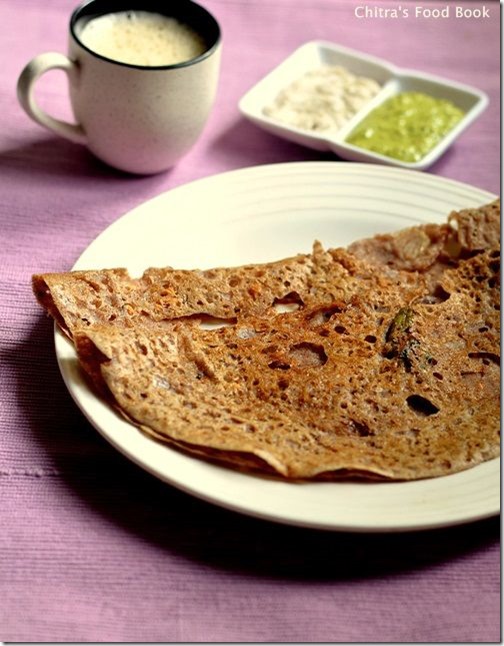
Millet dosa recipe

Millet energy mix powder dosa/Millet sathu maavu dosai


Millet energy mix powder dosa/Millet sathu maavu dosaiInstant millet dosa using millet energy mix powder
Cuisine:Indian
Category:Breakfast
Serves:5nos
Prep time:5 Minutes
Cook time:2 Minutes
Total time:7 Minutes


INGREDIENTS
For batter
  • Millet energy mix powder - 1/2 cup
  • Rice flour - 1 tbsp
  • Curd - 1/2 tbsp
  • Water - around 3/4 cup
  • Salt - as needed
To temper & saute
  • Cooking oil - 1 tsp
  • Mustard seeds - 1/2 tsp
  • Urad dal - 1/2 tsp
  • Cumin seeds/Jeera - 1/2 tsp
  • Big onion - 1 no
  • Green chilli - 1 no ( slit or chop finely)
  • Curry leaves - few
  • Ginger - 1/2 inch piece ( chopped finely)
METHOD

  • Mix all the ingredients given under “ To batter”.Heat oil in a kadai and temper all the ingredients in the same order given under “ To temper”.Saute the onions,chillies till transparent.( Usually i do tempering job in dosa pan itself)
Millet-dosa-step1
  • Add this to the batter and mix well.Check for salt. Batter should be slightly watery.Heat dosa pan and pour the batter in a circular manner starting from outwards towards center.Fill the holes with little batter.
Millet-dosa-step2
  • Drizzle a tsp of oil around the dosa and cook for one side in medium flame till the edges start to lift slightly. Flip the dosa & cook for a minute.Remove in a plate n enjoy with chutney or idli podi
Millet-dosa-step3

Enjoy !


Note

  • Adding rice flour & curd is optional here.Instead u can add a tbsp oof ragi flour for easy removal of dosa.
  • If u want to make thick dosas,add little water & make dosas thick.For thin,lacy dosas,add more water & make the batter watery.But adding too much of water makes the dosa look dry.So take care.
  • Also if u don’t have time to have saute onions,just add pepper corns and jeera to the batter and make dosa.It also tastes equally good.


Enjoy eating this healthy energy mix mixed millet powder dosa for your breakfast/dinner.It is easily digestible too Smile
Millet-recipes

15 THOGAYAL RECIPES/THUVAIYAL VARIETIES FOR RICE

$
0
0

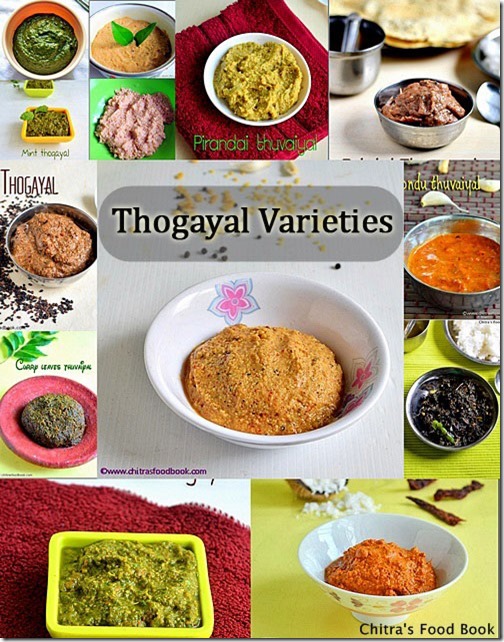
Thogayal-recipes

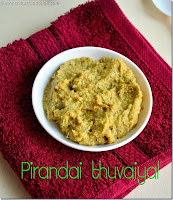
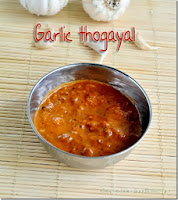
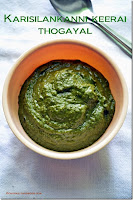
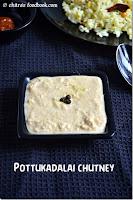
In this collection u can find Paruppu thogayal,Coriander leaves thogayal/Kothamalli thuvaiyal,pudina thogayal/Mint thogayal,Poondu thuvaiyal/Garlic thogayal,curry leaves thogayal/Karuvepilai thuvaiyal,Thengai thogayal/Coconut thuvaiyal,Pirandai thogayal,Karisilankanni thogayal,chow chow thogayal,radish thogayal & banana stem thogayal recipes for rice.
Thogayals are very popular among South Indians especially for Tamil people.Some people likes to mix with plain rice and eat and some loves to have it as a side dish for curd rice & sambar rice.In my family,everybody loves thogayal a lot.Everyday our lunch menu starts with a thogayal recipe.I came to know about varieties of thogayal recipes only after my marriage.Before marriage, my mom used to make thengai thogayal to mix with plain rice & pottukadalai thogayal as side dish for lemon rice and that too she makes it very rarely in weekends.But after marriage,when i tasted few thogayal recipes prepared by my MIL,it was very new and tasted delicious for me.My MIL makes all the thogayals perfectly with well balanced taste.The ratio of tamarind,salt and chillies are very important to make a perfect thogayal otherwise it will taste spicy or tangy.So whenever my MIL visits me,i tell her to make varieties of thogayal recipes like paruppu thogayal,peerkangai/ridge gourd thogayal,coriander thogayal,pudina thogayal,Poondu thuvaiyal,curry leaves thogayal and many more.I refrigerate them in an air tight box and enjoy it for more than a week.As Sendhil loves thogayal sadam a lot,i pack it for his lunch box too along with some stir fry/poriyal recipes.If i have few thogayals in hand,it is a big support for me as it makes the lunch box job much easier.In my blog,i have posted nearly 12 thogayal recipes for rice so far.It includes some healthy thogayal recipes like pirandai thogaya,Karisilankanni keerai thogayal as well.I wanted to have a collection of them in one post for my easy reference and for people who look for varieties of thogayal recipes for their daily lunch. I am yet to post few more like inji thogayal/ginger thogayal & peerkangai thogayal.I will share them in near future and add it here.Most of the recipes are without coconut.So you can grind,saute in oil and store them in refrigerator for more than a week too.I hope these thogayals  would be very handy and useful for bachelors & working women who wants quick lunch or dinner.Do try these thogayal varieties for your lunch & lunch box.It tastes yummy.Do leave your feedback if u try any of these.I would be more happy.Thanks for visiting this page Happy .

Thogayal recipes


Thogayal recipesCollection of thogayal recipes - Varieties of thogayal for rice !
Cuisine:Indian
Category:Thogayal
Serves:2-3
Prep time:10 Minutes
Cook time:15 Minutes
Total time:25 Minutes


INGREDIENTS

  • Coriander leaves/Kothamalli
  • Mint leaves/Pudina
  • Curry leaves
  • Pirandai
  • Karisilankanni leaves
  • Banana stem
  • Chow chow/Chayote
  • Coconut
  • Red chillies
  • Toor dal,Moong dal
  • Urad dal
  • Brinjal
  • Tamarind
  • Jaggery
  • Pepper corns
  • Garlic cloves
  • Cooking oil
  • Mustard seeds


EASY EGGLESS BROWNIE RECIPE IN MICROWAVE-ONE MINUTE RECIPE

$
0
0
eggless-brownie
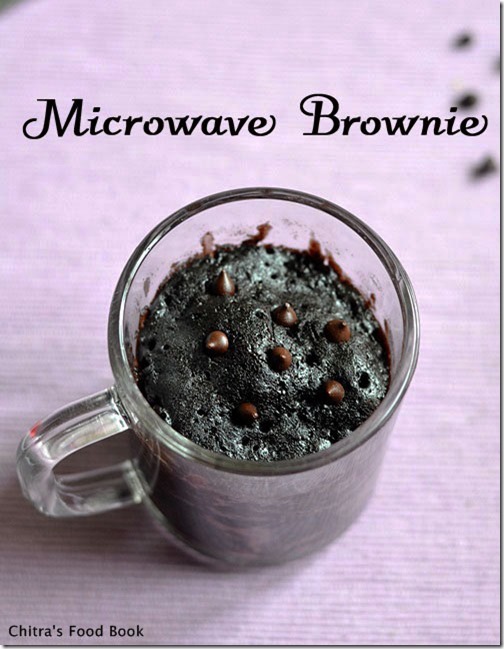
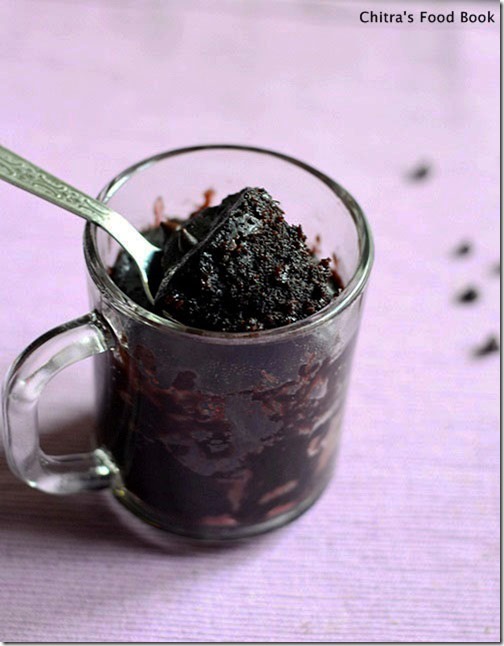
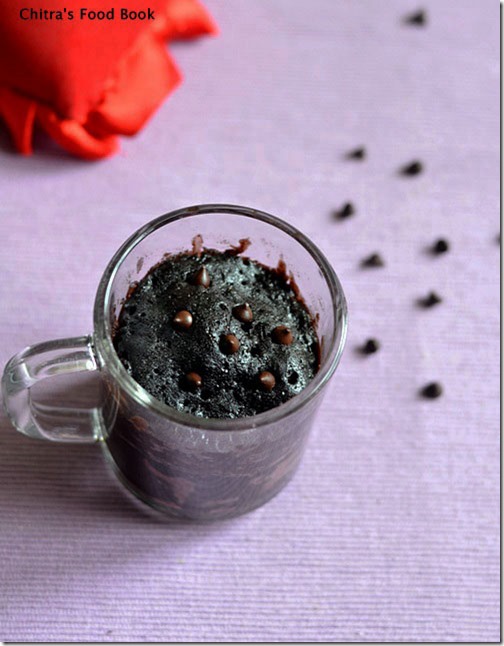
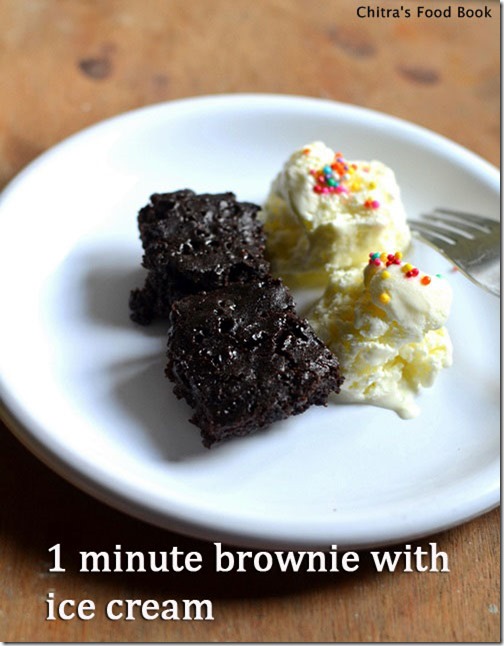
Nowadays i have become crazy to try 1 minute microwave cakes and cookies recipes.After making my one minute microwave mug cake and 5 minutes eggless oreo cakesuccessfully,i have become over confident in trying out recipes under few minutes using microwaveTongue.Somehow my daughter Raksha is also fond of these instant recipes because she loves to help me in making them.Recently we tasted brownie with ice cream in KFC and loved it a lot.Raksha was asking me to prepare the same at home.Basically i was not aware of the difference between a cake and brownie.When i googled for it,i found few differences from here that the texture of cake should be spongy & fluffy.So it needs a leavening agent like baking powder & soda whereas the texture of brownie is dense and chewy.So it doesn’t require all these.Also a brownie tastes more chocolaty than a cake.When i tried this one minute brownie recipe fromhere using cocoa powder,it tasted perfect.As i defined above,it was more chocolaty,mildly sweet,dense and slightly chewy too.I can name it as “perfect brownie in a mug” and that too under 2 minutes.Moreover this brownie tasted the best when we had with vanilla ice cream.You know what my daughter told after tasting this brownie,she told ”mom,this is the world’s best brownie” as if she had tasted all brownies in the worldSilly.But still, as a mom,i was very happy with her feedback.So what are you waiting for,surprise your kids with this perfect brownie & ice cream this evening.I am sure they will be super excited to taste thisrLove Struck.And don’t forget to leave your feedback hereWinking.

brownie-recipe

Microwave eggless brownie in a mug


Microwave eggless brownie in a mugEggless brownie in a mug using microwave under 2 minutes !
Cuisine:Indian
Category:Brownie
Serves:Serves1-2
Prep time:5 Minutes
Cook time:1 Minute
Total time:6 Minutes


INGREDIENTS

  • All purpose flour/maida - 1/4 cup (30g)
  • Sugar - 1/4 cup (50g)
  • Unsweetened cocoa powder - 2 tbsp ( any brand is fine)
  • Melted butter - 2 tbsp
  • Milk at room temperature - 1/4 cup + 1/2 tbsp (60ml)
  • Vanilla essence - 1/4 tsp
METHOD

  • In a wide bowl,take all the dry ingredients.Mix well without lumps.
Eggless-brownie-1
  • Then add the melted butter,milk and vanilla essence.Mix well for a minute in one direction.Sugar should be dissolved in the mixture.The consistency of batter should be slightly thin and not too thick.It should fall like a ribbon.Transfer the mixture to a microwave safe mug or bake in the same bowl if it is microwave safe.
Eggless-brownie-2
Eggless-brownie-3
  • Microwave in high power ( mine is 800w) for one minute.Take it out and check for its texture.If u find any fluid on top,microwave it again for 10 seconds.Now remove and insert a tooth pick or back of a spoon.If it comes out clean,brownie is done.Else keep it for 10 seconds.Mine got done in 1 minute 20 seconds. ( Never over bake.Brownie will become hard.Keep it only for 10 seconds & check it ).Brownies won’t double in size after baking.It will raise slightly as u see in the picture.
Eggless-brownie-4

Serve it warm with your favourite ice cream.
Enjoy !


Note

Color of brownie may slightly vary as per the color of cocoa powder.I used weikfield cocoa powder which was dark in color.
While mixing the dry ingredients,make sure there are no lumps.Add the wet ingredients and mix in one direction always.Never over bake it.Keep it for a minute first.Remove and check its texture.If u find any fluid on top,keep it for 10 seconds again and check.Repeat the same until a toothpick or back of spoon comes out clean.Over baking makes the brownie hard and chewy.


eggless-brownie-recipe


Enjoy this hot one minute brownie with your favorite ice cream.It tastes heavenly !!

brownie with ice cream

KAMBU DOSAI-BAJRA DOSA /PEARL MILLET DOSA RECIPE

$
0
0

Kambu-dosai

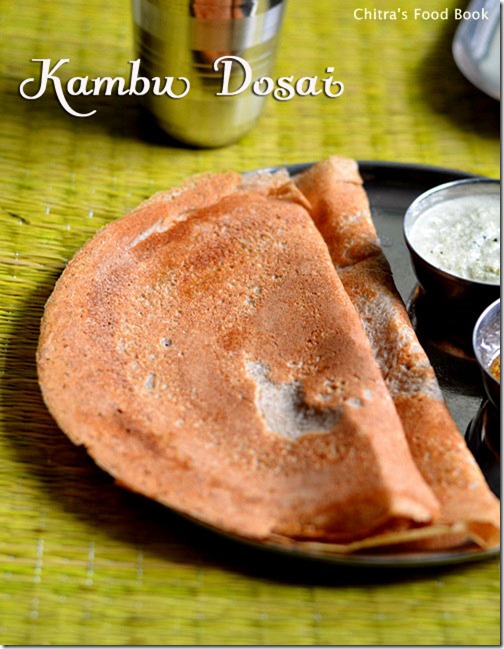
Last week i shared instant millet dosa using mixed millets energy mix powder.Though i make it very often,i wanted to try a dosa recipe with kambu (in tamil)/Pearl millet ( in English)/Bajra(in Hindi) as i got tempted by seeing my fellow bloggers post.Recently my friend Shalini was telling me about kambu dosai which she has been making for her breakfast regularly.So I took this recipe from her and tried today for the first time.She told me to use brown rice and pearl millet but i used raw rice as i din’t have brown rice in stock.So feel free to use brown rice instead of raw rice in this recipe.You will get good results and its a healthier option too.I will try to post kambu adai and kambu koozh recipes soon.Lets see how to prepare this kambu dosai for breakfast/dinner.This dosa tastes the best when it is served hot.It becomes slightly chewy when its cooled down but overall its a very flavorful and healthy breakfast recipe.Check out my other millet recipes below.

Millet energy mix powder

Millet ladoo

Instant millet dosa recipe

Thinai idli,dosa recipe

Saamai sweet pongal/Little millet pongal recipe

Types of millets with health benefits,other names,where to buy etc.


A small update : I made this dosa for dinner withraw onion-garlic chutney as side dish.I felt this combo was awesome than coconut chutney.Even my daughter told the same.This chutney pairs very well for kambu dosa.Try this combo ! U will like it ;)


Kambu dosai

Kambu dosai/Pearl millet dosa


Kambu dosai/Pearl millet dosaPearl millet dosa/Kambu dosai recipe - Healthy millet recipe for breakfast/dinner
Cuisine:Indian
Category:Millet recipe
Serves:15 nos
Prep time:3 Hours
Cook time:2 Minutes
Total time:3H2Min


INGREDIENTS


  • Kambu/Pearl millet - 1.5 cups
  • Raw rice or brown rice - 1/2 cup
  • Round Urad dal - 1/2 cup
  • Methi seeds - 1 tsp
  • Salt & water - as needed
  • Cooking oil – to drizzle ( while making dosa)

  • METHOD


  • Wash and soak the kambu,rice,urad dal and methi seeds together for 2-3 hours.In a big mixie jar,take half of the quantity of soaked grains and grind it adding ice cold water(It helps the mixie jar to prevent heating). Grind it to a smooth paste adding enough water and salt.(I used the soaked water itself).Transfer the batter to a vessel. Kambu-dosai-step1

  • Let the batter ferment over night or for 10-12 hours.The next day morning batter would have raise well.Mix it well and check the consistency.If it is too thick,add little water say 1/4 cup and mix well.Heat dosa pan and pour a ladleful of batter.Spread it well if u want to make thin,lacy dosas OR spread it little if u want thick soft dosas.Make it as per your wish.Drizzle a tsp of oil and cook for a minute.Cover it with a lid and cook the dosa if u want crispy ones.Do not flip the dosa.If u want thick dosas like utappam,flip the dosa and cook for a while.Remove and serve hot. Kambu-dosai-2


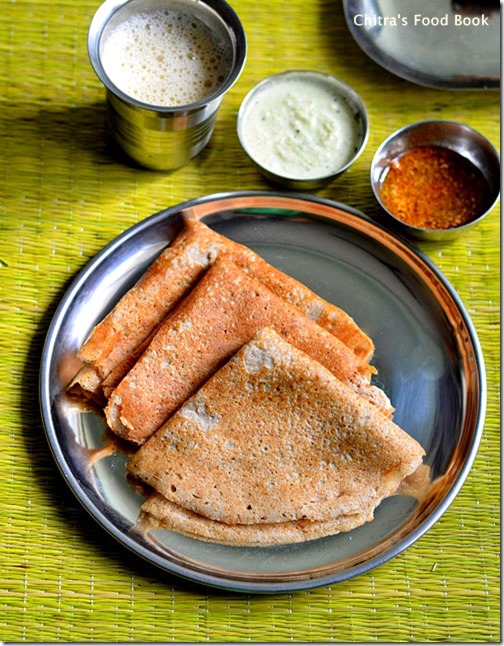
    Enjoy with your favourite chutney.I served it with coconut chutney and idli podi !


  • Note


  • Use enough water while grinding the batter.Batter has to ferment for 10 hours minimum in cold weather.If the climate is hot,this batter will ferment quickly and it will become sour.So keep an eye.
  • Use brown rice instead of raw rice.U can use idli rice too.
  • If u don’t want to use rice at all,just follow 2:1 ratio of kambu & urad dal and grind the batter as mentioned above.
  • This dosa becomes soft when its cooled down.So serve n eat hot !


  • Have this healthy millet dosa for your breakfast/dinner.I enjoyed it with coconut chutney,idli podiand had milk with Lion dates syrupHappy

    A small update : I made this dosa for dinner with raw onion-garlic chutney as side dish.I felt this combo was awesome than coconut chutney.Even my daughter told the same.This chutney pairs very well for kambu dosa.Try this combo ! U will like it ;)

    Kambu-dosai-recipe


    KFC STYLE VEG STRIPS RECIPE-KIDS SNACKS RECIPES

    $
    0
    0

    KFC-Veg-strips-recipe

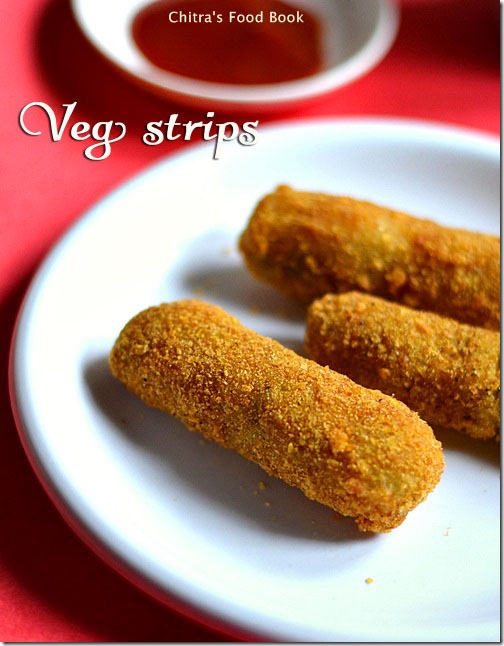
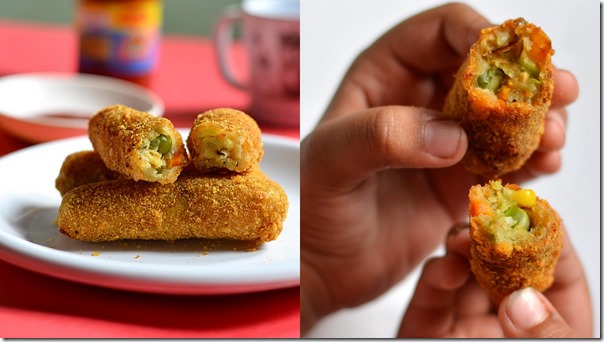
    KFC’s Veg strips with Veg Rice Bowlz & Potato burgers/Krisper is my daughter Raksha’s favourite restaurant food now.Yeah,we have become a regular customer of (Bangalore) Kathriguppe KFC in weekendsDrooling.Thanks to my friendMegha for telling me about the veggie options in KFC.Earlier we were thinking it is only for non-vegetarians.So we have never gone inside it and i was throwing out all the KFC discount coupons i was getting along with sodexo meal passNot talking.Once Megha told me about Veg Rice Bowlz and Veggie burger varieties of KFC and suggested me try once.We went in the same weekend and now we have become an ardent fans of those dishes.More than me Sendhil & Raksha have become crazy for its taste and they are ready to go there anytime of the day.U won’t believe if i say that we have visited KFC nearly 6-7 times in past two monthsWinking.And nowadays Raksha started demanding me to try KFC’s recipes at home too.When i was browsing for the same,i got some ideas from facebook’s Chef at large group posted by some members.I collected all those recipes & googled few more too.Inspired by all the pictures and recipes,i tried veg strips for the first time last week and i was  very happy with the results.It was sooo crispy and Raksha loved it a lot with tomato ketchup.I won’t say its the exact replica of KFC’s original recipe(hope u know its a secret recipe) but i am sure it tastes pretty close and your family will enjoy it for sure.
    Today being children’s day,i wanted to treat my daughter with her favourite finger food.So I made this again along with one minute brownie& kept it for her surprisingly.After coming from the school,when i gave this snacks to her,she showed a big smile and hugged me tightlyBig Hug.She tasted and said “Wow,mummy its awesome” and she had 5 of themLaughing.
    The procedure may seem lengthy but u can make everything well advanced and just deep fry during serving time.So you can try this for your kids birthday party & get together or simply as evening snack.They will enjoy this dish thoroughly.But one thing,serve it hot to enjoy its full flavor,taste & crispness.So don’t forget to serve & eat hot !!
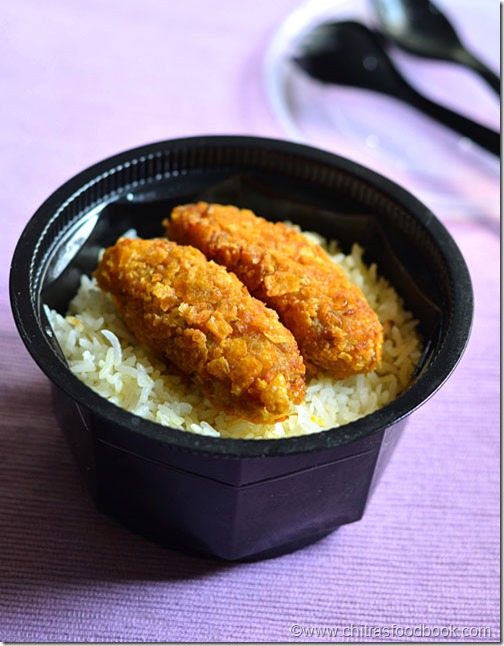
    Here is the picture of KFC Veg Rice bowlz with veg strips i tried on last weekend.Here i used coarsely ground corn flakes to give KFC chicken lookWinking.But today i used finely powdered corn flakes.So make it as per your wish.It tastes Sooo Good in either ways Smile.Soon i will post Veg rice bowlz with curry recipe.

    NOTE: KFC's veg strips tastes less spicy with very mild masala flavour.So i too followed the same here.Please add garam masala powder,aamchur powder or chat masala powder if u want strong masala smell.


    KFC veg rice bowlz recipe

    KFC style Veg strips recipe


    KFC style Veg crispies recipeKFC style veg strips recipe - Perfect starter & evening snack recipe for kids !
    Cuisine:Indian
    Category:Snacks
    Yields:7-8
    Prep time:20 Minutes
    Cook time:10 Minutes
    Total time:30 Minutes


    INGREDIENTS
    To pressure cook
    • Carrot - 1 no ( finely chopped)
    • Peas -  a handful
    • Sweet corn - 1/2 no (small)
    • Potatoes - 2 no ( medium sized)
    To make dough
    • Maida - 4 tbsp
    • Corn flour - 2 tbsp
    • Ginger-garlic paste - 1 tsp
    • Red chilli flakes – 1-2 tsp
    • Mixed herbs - 1 tsp( like parsley,thyme,oregano etc)
    • Salt - as needed
    Paste
    • Maida - 3 tbsp
    • Corn flour - 2 tbsp
    • Water - as needed
    To dip in
    • Bread crumbs - 1 cup ( made from 10 slices of bread)
    • Powdered corn flakes – 1 cup ( powder kellogs corn flakes)
    METHOD

    • Wash n Chop the carrots into small cubes.Wash peas,potato and sweet corn.Pressure cook them together by taking sweet corn and potatoes in the base of cooker with sufficient water.Keep the chopped carrots,peas in a small bowl with little water(few tbsp) and keep it inside the cooker.By doing this way,carrots & peas will be cooked and it would be firm without losing its shape.Pressure cook in low flame for one whistle.Drain all the water completely and set aside.Make sure there is no water in veggies.
    KFC style veg strips recipe - 1
    • To make chilli flakes,dry roast the red chillies till they become crispy.Switch off the flame & let it cool in the kadai.Grind it in a mixie jar coarsely and set aside.
    How to make chilli flakes
    • To make homemade bread crumbs,remove the sides of bread and chop the bread into 4 pieces.Grind it to a powder and spread it in a plate.Bake in convection mode at 200c for 5 –7 minutes till the bread crumbs becomes dry without moisture.Mix it once in the middle.Remove and set aside.
    How to make bread crumbsHow to make bread crumbs-1
    • Mix corn flour and maida in a bowl adding water to make a slightly thin paste and set aside. Powder corn flakes ( use kellogs corn flakes).Here i used raw corn flakes.So i microwaved it in high power(800w) for 1.5 minutes and then powdered it.Keep it in a plate.Take the bread crumbs in a plate and keep it ready.
    KFC style veg strips recipe - 3
    • In a wide plate,mash the potatoes and to the mashed potatoes add all the cooked vegetables and spices along with maida and corn flour.Make it to a dough.
    KFC style veg strips recipe - 2
    • Dough will be slightly sticky.So grease your hands with oil and take a lemon sized ball.Roll it into a cylinder and dip it in maida,corn flour paste.Dip it in bread crumbs.Again dip in maida paste and then in bread crumbs.Yes,u have to make it twice.Lastly coat the strips in maida paste lightly and dip in corn flakes powder.Make everything and arrange in a plate.Keep it ready for deep frying.
    KFC style veg strips recipe - 4
    KFC style veg strips recipe - 5
    • Just before serving,heat oil to deep fry.Add a pinch of batter and if it rises immediately,oil is just right.Simmer the flame completely and drop 2-3 veg strips in the kadai.Deep fry in low-medium flame till they turn crispy & golden brown.Drain in a tissue paper and serve it hot with tomato sauce.
    KFC style veg strips recipe - 6

    Enjoy !


    Note

    • KFC's veg strips tastes less spicy with very mild masala flavour.So i too followed the same here.Please add garam masala powder,aamchur powder or chat masala powder if u want strong masala smell.
    • Adjust the quantity of chilli flakes as per your spice level.I used 1 tsp as my daughter likes less spicy food.
    • U have to dip the veg strips in maida paste,bread crumbs twice before dipping in corn flakes powder.
    • I used raw corn flakes here.I microwaved the raw corn flakes in high power(800w) for 1.5 minutes. Then i ground in mixie to a coarse powder.
    • It stays crispy for just 10-15 minutes.So if u want to reheat & serve,deep fry the strips again for few seconds and serve hot.


    KFC style veg strips

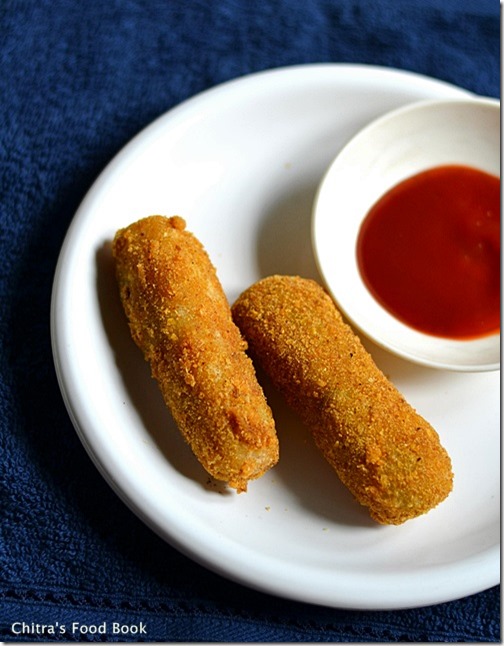
    Enjoy this KFC style hot veg strips with tomato sauce.It tastes sooo good Drooling

    KFC style veg strips


    HOW TO CLEAN VAZHAIPOO/BANANA FLOWER-INDIAN COOKING BASICS

    $
    0
    0

    How-to-clean-vazhaipoo

    Recently one of my friends in abroad told me to make a post on “How to clean & chop vazhaipoo ie Banana flower/Plantain flower.Also I have planned to share vazhaipoo poriyal recipe in the upcoming week.So before posting that recipe,i thought this post would be useful to you all.Cleaning & chopping vazhaipoo is not that difficult as one thinks.Its just a time consuming job,that’s it.Otherwise its very easy to cook & u can make very tasty recipes with it.As u all know its a super healthy vegetable with amazing health benefits.It contains various vitamins like Vitamin A, C, and E. They also contain potassium and fibers. This makes them an excellent health food and a source of healthy nutrients.It helps to reduce menstrual bleeding & pain.Cooked banana flowers along with curd or yogurt increases the progesterone hormone in the body and reduces bleeding.Calculated intake of banana flowers reduces blood sugar levels. It also increases the total haemoglobin levels in the body.So friends,don’t avoid buying vazhaipoo just by thinking about its cleaning process.Listen to your favourite songs or watch some megaaaa serials,this cleaning job will be done within no timeWinking.I follow this usually.If not, at least ask your maid to do this job for you.Try to include vazhaipoo & vazhaithandu in your cooking at least once or twice in a month.Its very very healthy and it makes miracles!Soon i will make a detailed post on how to clean & chop vazhaithandu/Banana stem with its health benefits.In this post,i have also shared some simple tips and tricks for easy chopping and to maintain its color after chopping.Hope it would be useful to all beginners.Thanks for visiting this page.Have a great Sunday !
    Check out some of the delicious vazhaipoo recipes below
    Vazhaipoo kuzhambu
    Vazhaipoo vadai
    Vazhaipoo usili

    Banana flower

    How to clean vazhaipoo


    How to clean vazhaipooHow to clean & chop vazhaipoo/Banana flower.
    Cuisine:Indian
    Category:Cooking basics
    Serves:-
    Prep time:30 Minutes
    Cook time:20 Minutes
    Total time:50 Minutes


    INGREDIENTS

    • Banana flower/Vazhaipoo - 1 no
    METHOD

    • Spread 2-3 newspapers one over the other Or spread a thick sheet on the floor to prevent stains.Grease your hands with gingely oil very well.Cleaning vazhaipoo makes your fingers black.So this will help to avoid blackening of hands and fingers OR wear some thick gloves.
    • Take 1/4 cup of curd and mix with 2 cups of water.Mix it well & make buttermilk with it.Keep it ready.
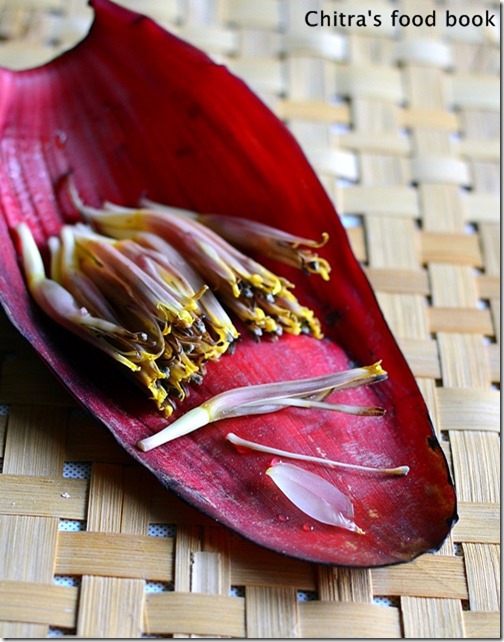
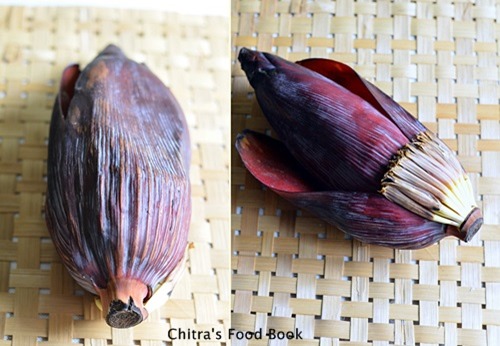
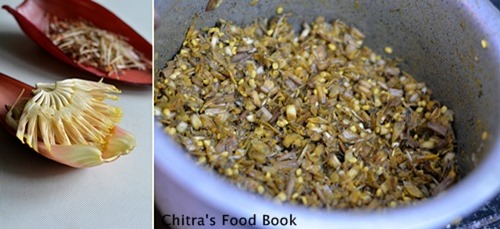
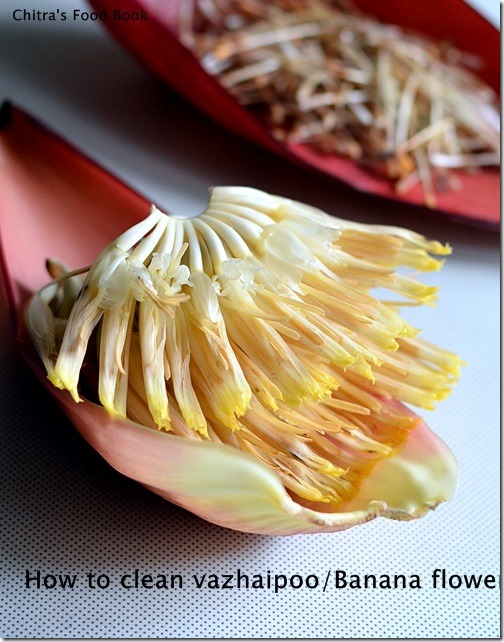
    • Now take the banana flower and when u remove the cover,u will see bunches of flowers.Take out the bunch and place it in the newspaper.Remove all the florets and collect in the newspaper.
    How to clean vazhaipoo-1
    Vazhaipoo kuzhambu step1_thumb[3]
    • Initially u will find big sized florets.But when u keep on removing,u will find very small florets.So keep the big ones and very small ones separately.Don’t forget to eat the cone shaped,blossom part which is very tender and  small in size.Eat it as such.It is very good for stomach ulcers.
    Vazhaipoo kuzhambu step2_thumb[2]
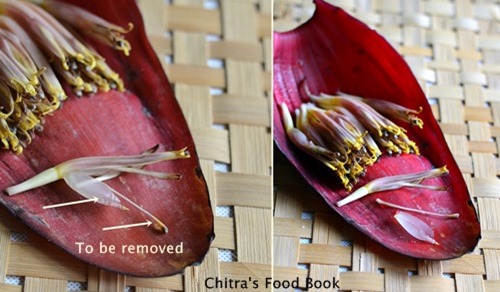
    • Take a big floret and remove the stamen(kaalan) and thin white colored cover portions( some people don’t remove this part.My MIL don't remove but my mom does it).Refer picture below. Repeat the same for all the big florets.No need to remove the stamen part for very small ones.You can chop & use as it is.
    How-to-clean-vazhaipoo-2
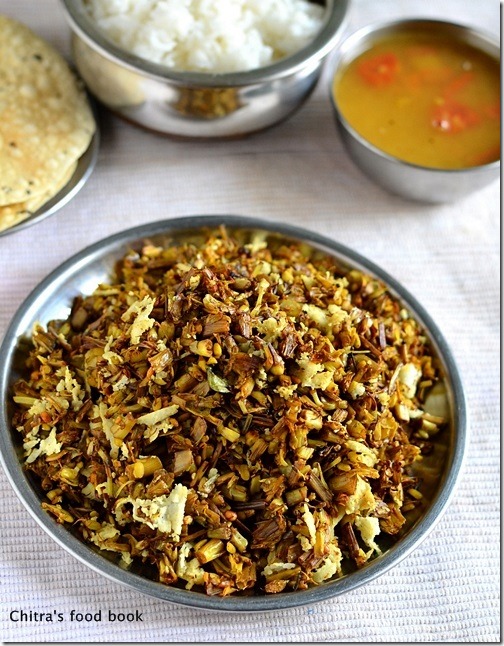
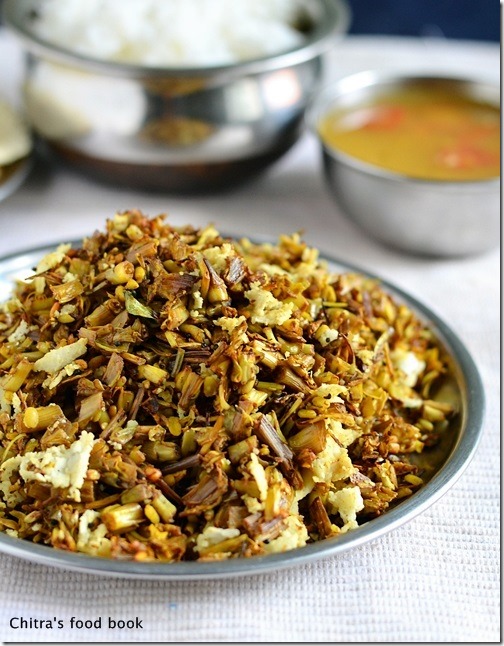
    • Chop the big florets finely using a knife and keep them immersed in buttermilk till use. This helps to prevent blackening of banana flower.Do this with all big florets.Similarly chop the small florets and put it inside the buttermilk.( In the below picture,i have added turmeric powder, moong dal and salt to the chopped vazhaipoo and kept it ready for making poriyal.so the color looks yellow.I will try to update a clear picture soon.
    How-to-clean-vazhaipoo-3
    I usually take a bunch of florets in hand and remove the stamen and cover part & chop it with a knife keeping as a bunch and dip in buttermilk.
    TIPS TIPS
    You can do this cleaning process without chopping in the previous day night and keep it refrigerated in a zip lock bag.If u chopped it,immerse in buttermilk and refrigerate.The next day morning,u can make delicious recipes with it.Suppose if u feel difficult or lazy to chop,here is an easy method of chopping.ie. Take a handful the cleaned banana florets in a big sized mixie jar,run the mixie once or twice for a second.Florets will be coarsely ground.Now take the florets and dip in buttermilk.Repeat the same with all the florets.Refrigerate it overnight and use it the next day.
    Check out some of the vazhaipoo recipes below
    Vazhaipoo kuzhambu
    Vazhaipoo vadai
    Vazhaipoo usili

    Banana flower-1

    ONION TOMATO THOKKU RECIPE-SIDE DISH FOR IDLI DOSA

    $
    0
    0

    Tomato-thokku-recipe

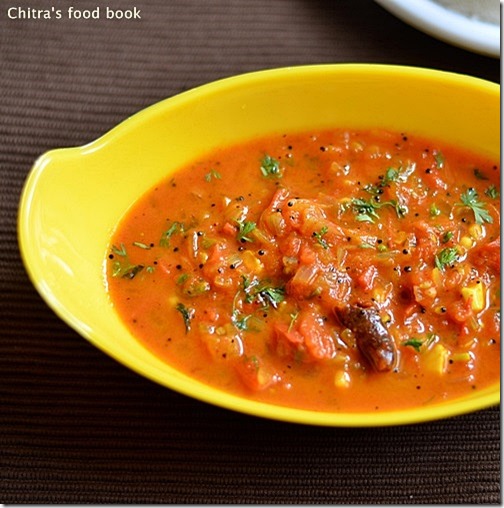
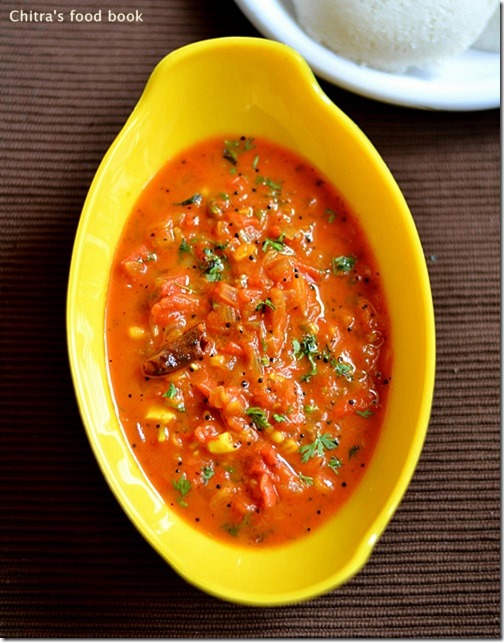
    Is there anyone in your house says NO to this simple yet yummy onion tomato thokku recipe when you make it as a side dish for idli,dosa and chapathi ? No One, right ?? But in my house,both dad & daughter says BIG NOOOOOO when i make this as side dish.Basically i am a great fan of tomato recipes especially tomato thokku.I can have more than 10 idlis when my mom makes this as a side dish.After marriage,i have tried it many times following my mom’s recipe using Bangalore tomatoes.Sendhil & Raksha used to have it by showing odd facesSmug.So i completely stopped preparing it for years.Recently i watched Vijay tv’s samayal samayal with Chef Venkatesh Bhat in which he showed Neer dosa with this chutney (he mentioned this recipe as onion tomato chutney) as side dish.At that time,my in-laws were here in my place & they had brought ripe naatu thakkali ( Tangy tomatoes ) from Salem,Tamilnadu.My MIL told me to try this thokku for breakfast as they love it very much like me.I too tried hopelessly thinking Sendhil & Raksha won’t like it.But to my surprise,they both loved it a lot and Sendhil said “ Its good & tasty” for nearly 4-5 times and had two more idlis tooDancing.I was wondering what made the difference between this version & my mom’s version.Is it the addition of garlic or the tangy Tamilnadu tomatoes,something has made the magic and this recipe was a super hit among my family.Thanks a lot Chef Happy.I have done it thrice so far but only with naatu thakkali( In Bangalore they call it as “Naatti”).Friends do try this recipe using naatu thakkali if u have in hand,even thokku haters would love it for sure.For tomato lovers,Bangalore tomatoes would do !!
    Check out my Easy tomato thokku recipe without onion & garlicif interested !

    Onion tomato thokku recipe

    Onion tomato thokku recipe


    Onion tomato thokku recipeOnion tomato thokku recipe - A very tasty side dish for idli,dosa n chapathi !
    Cuisine:Indian
    Category:Side dishes
    Serves:Serves 3
    Prep time:10 Minutes
    Cook time:15 Minutes
    Total time:25 Minutes


    INGREDIENTS

    • Ripe tomatoes - 3 nos
    • Big onion - 2 nos
    • Garlic cloves - 6 nos
    • Turmeric powder - 1/8 tsp
    • Red chilli powder - 1 - 1.5 tsp
    • Sugar - a pinch
    • Curry leaves - few
    • Hing/Asafetida - a big pinch
    • Salt & water - as needed
    To temper
    • Cooking oil - 2 tbsp
    • Mustard seeds - 1/2 tsp
    • Urad dal -1 tsp
    • Red chillies - 2 nos ( pinch into 2 )
    Coriander leaves – few ( finely chopped to garnish)
    METHOD

    • Wash and chop the tomatoes and onions very finely.Heat oil in a kadai and temper all the ingredients given under “ to temper” in the same order.
    • Add finely chopped garlic cloves and saute for few seconds. Then add finely chopped onions and saute till they turn transparent.Then add finely chopped tomatoes.Saute till tomato turns mushy adding the required salt
    onion-tomato-thokku-step1
    • Add turmeric powder,red chilli powder,hing and sugar.Mix well for a minute. Then add 1/2 cup of water and let the mixture cook well for few minutes.Switch off the flame when the mixture is slightly wet with little water because it will become too dry when it cools down.So switch off  the flame at the right time..Remove and add chopped coriander leaves.
    onion-tomato-thokku-step2
    Enjoy with idli,dosa and chapathi !


    Note

    • Use ripe tomatoes for best results.
    • Adjust the quantity of chilli powder as per your spice level.
    • Adding a pinch of sugar helps to balance all the taste.


    Enjoy my favourite onion tomato thokku with hot idlis,dosa & chapathi.It tastes awesome Happy
    Onion-tomato-thokku

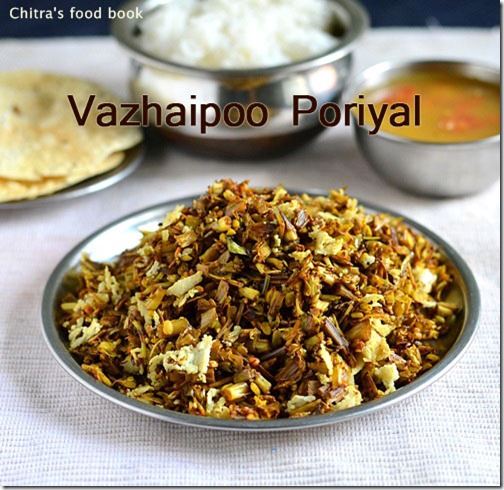
    VAZHAIPOO PORIYAL RECIPE-BANANA FLOWER CURRY/STIR FRY

    $
    0
    0

    Vazhaipoo poriyal recipe

    Vazhaipoo poriyal has become one of our favourite vazhaipoo recipes.It is very easy to make when compared with vazhaipoo usili and super tasty without onion.I learnt this recipe from my MIL.Nowadays i am making this very often in my kitchen next to vazhipoo vadai& vazhaipoo kuzhambu.Check out my post on “How to clean vazhaipoo/Banana flower with stepwise pictures” to know how to clean,chop n store it in advance to make your morning job hassle-free.Lets see how to make this healthy valaipoo poriyal/Banana flower curry recipe at home easily Happy.It tastes the best with sambar sadam and paruppu rasam !

    Vazhaipoo-poriyal

    Vazhaipoo poriyal/Banana flower curry recipe


    Vazhaipoo poriyal/Banana flower curry recipeEasy n delicious vazhaipoo poriyal recipe - Tasty side dish for sambar rice !
    Cuisine:Indian
    Category:Curries
    Serves:Serves 4
    Prep time:15 Minutes
    Cook time:15 Minutes
    Total time:30 Minutes


    INGREDIENTS

    • Chopped banana flower - 2 cups
    • Moong dal - 2 tbsp
    • Turmeric powder - 1/2 tsp
    • Sambar powder - 1 tsp
    • Salt - as needed
    To temper
    • Cooking oil - 1 tbsp
    • Mustard seeds - 1/2 tsp
    • Urad dal - 1 tsp
    • Grated coconut - 1/4 cup
    • Sugar - 1/8 tsp
    METHOD

    • In a wide bowl,take the chopped banana flower,moong dal,salt,turmeric powder and sambar powder.Mix well using your hands and set aside for 15 minutes.It will leave little water.
    vazhaipoo-poriyal-recipe-1
    • In a kadai,heat oil and temper mustard,urad dal and curry leaves. After the dal turns golden brown, add the vazhaipoo mixture and mix well.Keep the flame low and cover cook for sometime.You don’t need to add water because the water in banana flower itself is sufficient.Keep the flame low and cook it with a lid for 10-15 minutes.Toss it once or twice in the middle.
    vazhaipoo-poriyal-recipe-2
    • After the banana flower is completely cooked,add the grated coconut,mix well for a minute.Remove and serve.You can add few drops of lemon juice if u want tanginess.We don’t do it usually.
    vazhaipoo-poriyal-recipe-3
    Enjoy !


    Note

    • Cleaning and chopping banana flower takes more time.So make it the previous day,keep the chopped flowers immersed in buttermilk and use it next day.Squeeze the buttermilk completely and then proceed as mentioned above.

    Stay Connected  -     
     

    I served this vazhaipoo poriyal recipe with rice,paruppu rasam and papad.It was lovely Smile

    vazhaipoo poriyal

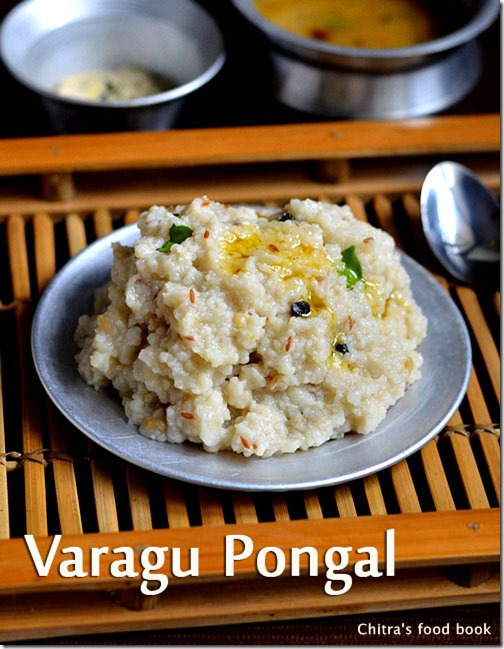
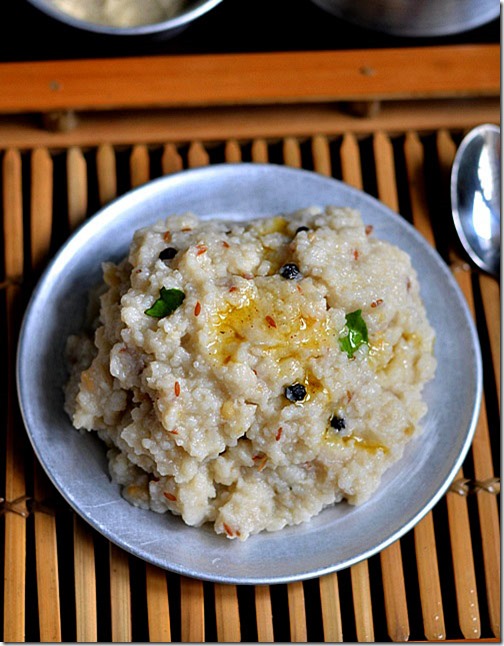
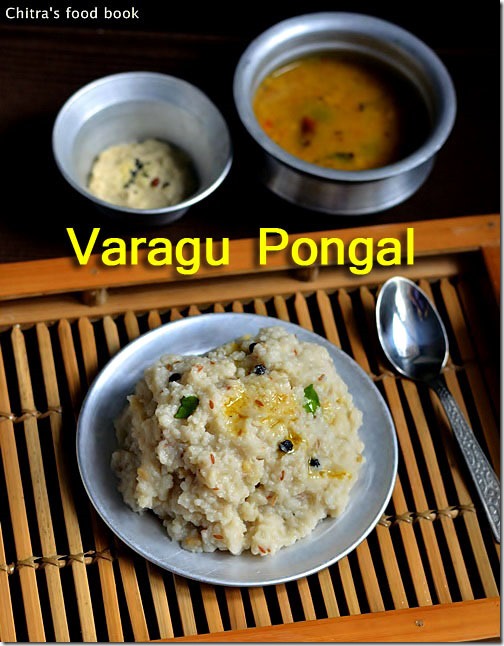
    VARAGU ARISI PONGAL RECIPE/KODO MILLET PONGAL-MILLET RECIPES

    $
    0
    0

    varagu arisi pongal recipe

    Very recently i started making upma & pongal varieties using millets.I tried Ven pongal using Varagu( Kodo millet in English,Koden/Kodra in Hindi,Harka in Kannada,Arikelu in Telugu,Koovaragu in Malayalam- Source-Wikipedia) for the first time.It came out very well.As u all know Varagu rice/Kodo millet has amazing health benefits.It is basically a digestion friendly millet.It is rich in phytochemicals,Phytate that helps in reduction of cancer risks.It helps to reduce the body weight which is most needed for obese people.It helps to overcome irregular period problems in women.It helps to reduce knee & joint pains.It is good for diabetic people.It reduces nervous disorders especially in eyes.And this pongal is a very easy and tummy filling breakfast recipe.Just 1/2 cup of varagu arisi is enough to serve 2-3 people because it doubles in quantity once its cooked.It tastes very similar to our regular rice pongal with full of flavors.My daughter Raksha loves pongal a lot.When i gave this for her breakfast today,she couldn’t identify its varagu rice pongal and not our usual oneWinking.We had with coconut chutney as side dish.It was yumLove Struck.Do try this easy and healthy pongal recipe for your breakfast or dinner.I am sure your entire family would love it.
    check out my other millet recipes here.

    varagu arisi pongal

    Varagu arisi pongal/Kodo millet pongal recipe


    Varagu arisi pongal/Kodo millet pongal recipeVaragu arisi pongal recipe - Healthy millet recipe for breakfast !
    Cuisine:Indian
    Category:Breakfast
    Serves:Serves 3
    Prep time:5 Minutes
    Cook time:20 Minutes
    Total time:25 Minutes


    INGREDIENTS

    • Varagu arisi/Kodo millet - 1/2 cup
    • Moong dal - 1 tbsp
    • Water - 2 cups
    • Salt - as needed
    To temper
    • Ghee - 1 tbsp
    • Pepper corns - 1/4 tsp
    • Cumin seeds/jeera - 1/2 tsp
    • Hing/Asafetida - a small pinch
    • Ginger - 1/2 inch piece ( finely chopped)
    • Green chillies - 1 no ( small sized)
    • Curry leaves - few
    METHOD

    • Wash the kodo millet ,drain and set aside.In a pressure cooker base,heat ghee and add the moong dal,pepper corns.Saute for a minute in low flame.Make sure the color of dal should not change.Then add the cumin seeds/jeera and saute till it turns light golden.Lastly add the curry leaves,green chillies & hing.Stir it.Add the measured water and required salt.
    varagu-pongal-1
    • Add the washed & drained millet and ginger pieces.Close the cooker and cook for one whistle in low flame.It will take nearly 10-12 minutes.
    varagu-pongal-2
    • Remove the lid and mix well.Add a tsp of ghee and serve hot !Tastes the best with coconut chutney !
    Enjoy !


    Note

    • Serve this pongal when its hot to enjoy its best taste.When it cools down,it will become slightly hard.You can reheat the pongal while serving by adding little water and mix well in flame for few seconds.
    • You can follow the same method and make pongal with thinai & samai too.
    • Replace ghee with cooking oil if u are calorie conscious.But ghee gives great flavor.
    • Add a tsp of ghee while serving for kids.

    Serve this healthy,easy varagu pongal with chutney andsambar.Tastes yummy !
    Kodo millet recipes


    EASY HOMEMADE GRANOLA(MUSELI)RECIPE-DIY

    $
    0
    0

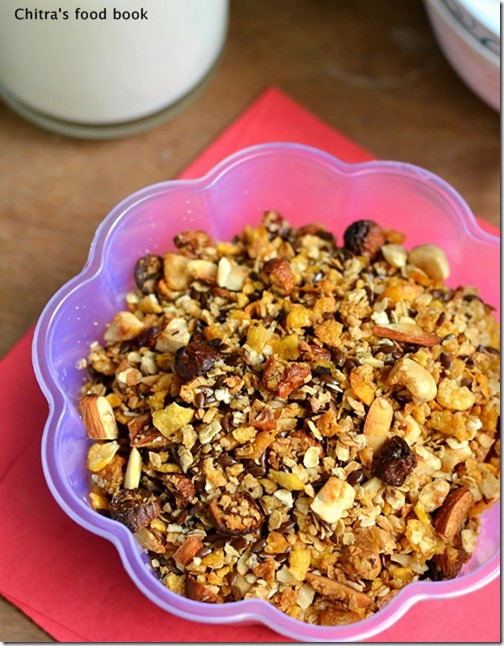
    Homemade museli

    Muesli/Granola is a popular breakfast dish based on raw rolled oats and other ingredients including grains,fresh or dried fruits,seeds and nuts,mixed with milk,soy milk, yogurt or fruit juice.It is available in a packaged dry form,ready made,or made fresh.There are slight differences between museli and granola.Please find them here.Recent days Sendhil is taking store bought museli & granola bars to his office to have it during break time.As u all know store bought brands are very costly.So i wanted to give it a try at home.When i browsed for the same, i found a very simple and easy recipe here.Its just a three step process.I did some changes in the original recipe and tried it.It came out very well and crunchy.Anyone can make it with easily available ingredientsCool .Sendhil loved it a lot.Even i liked it very much and i am having it for my breakfast once in a week.Its really a healthy,tummy filling breakfast recipe for weight watchers like me and a good replacement for my regular plain(kellogs)corn flakes.Lets see how to prepare granola/Museli at home easily.

    Homemade-museli-recipe

    Homemade museli recipe


    Homemade museli recipeHow to make museli/granola at home easily at home
    Cuisine:Indian
    Category:Breakfast
    Serves:2-3cups
    Prep time:10 Minutes
    Cook time:20 Minutes
    Total time:30 Minutes


    INGREDIENTS
    To mix
    • Quick oats - 1 cup ( i used quaker)
    • Kellogs corn flakes - 1/2 cup ( crushed coarsely)
    • Flax seeds - 1/4 cup
    • Hazelnuts - a handful ( roughly chopped)
    • Raisins or dry grapes - A handful ( roughly chopped)
    • Almond/Badam - 1/4 cup ( chop into thin slices)
    • Cranberries or dates - 2 tbsp (optional) , chop roughly
    • Cinnamon powder – 1/2 tsp ( crush 2 inch cinnamon piece into fine powder)
    • Vanilla extract – 1 tsp
    • Honey - 2.5 tbsp
    • Cooking oil or olive oil - 1 tbsp
    • Salt - a pinch
    METHOD

    • Chop the nuts and dry fruits finely and set aside.In a wide bowl,take the oats,flax seeds and coarsely crushed corn flakes.Mix everything well together.
    Homemade-granola-recipe
    • To this,add honey,cinnamon powder,vanilla essence,cooking oil and condensed milk.Mix well using your clean hands.Make sure there are no lumps in the mixture.
    Homemade-granola-recipe-1
    • Grease a baking tray with little cooking oil and spread the museli mixture all over the plate.Pre Heat oven in convection mode at 180 c for 10 minutes.Then keep this plate and bake at 180 c in convection mode for 20 –25 minutes.Remove it once in 10 minutes,mix well with a spatula and again bake it.The color of raisins and cranberries would turn golden brown with a nice baked smell.The oats will turn crunchy.Remove after 20 minutes and let it cool completely.After it cools down,it will become super crunchy.Store in an air tight bottle and use as needed.
    Homemade-granola-recipe-2

    Enjoy it for your breakfast or lunch adding a cup of hot milk or munch as it is !


    Yummy,crunchy homemade granola is ready to munch adding hot milk.Its a tummy filling breakfast recipe for weight watchers Smile.


    Museli-recipe


    Beetroot Kootu Recipe-Side dish For Rice

    $
    0
    0

    I am planning to share this recipe for long time but i was not able to do it.This is one kootu recipe i make very often next tokeerai kootu& mixed vegetable kootu.This is our family favourite recipe too.As Sendhil has fatty liver problem,i try to include beetroot in my cooking at least twice or thrice in a week.I make this kootu or one of these poriyals( my mom’s version& easy version).Even Raksha loves these recipes lot.Today she told me to prepare More kuzhambu& beetroot kootu for her lunch.So i made it along with Pirandai thogayal for our lunch.My MIL has the practice of mixing side dishes with rice adding a drop of ghee or gingely oil to make her Son & daughter eat vegetablesWinking.So i too mixed this kootu with plain rice adding a tsp of ghee & packed for Sendhil’s lunch box.But Raksha loves to have this kootu as a side dish for more kuzhambu sadam like meTongue.It tastes great in either ways ! Here i have used moong dal following my MIL.You can also replace it with chana dal like in hotels.Do try it.Its a very simple and delicious kootu recipe with a mild sweetness of beets !


    Beetroot kootu recipe


    Beetroot kootu recipeBeetroot kootu recipe with moong dal
    Cuisine:Indian
    Category:Side dishes
    Serves:Serves 4
    Prep time:10 Minutes
    Cook time:15 Minutes
    Total time:25 Minutes


    INGREDIENTS
    To pressure cook
    • Beetroot - 1 no ( very big) or 2 nos ( if medium sized)
    • Moong dal - 1.5 tbsp
    • Salt & water - as needed
    To grind
    • Grated coconut - 1/4 cup
    • Green chillies - 2-3 nos
    • Small onions - 3 nos
    • Cumin seeds/Jeera - 1/2 tsp
    • Rice flour - 1/2 tsp
    To temper
    • Coconut oil - 1 tbsp
    • Mustard seeds - 1/2 tsp
    • Urad dal - 1/2 tsp
    • Curry leaves - few
    METHOD

    • Wash and peel the skin of beetroot and chop into small cubes.In a pressure cooker base,take the moong dal,chopped beetroot,salt & water.Mix well and pressure cook for one whistle in low flame.( I cooked it along with rice in cooker by keeping beetroot in a small bowl to save time).
    • Grind all the ingredients given under” to grind” to a smooth paste adding enough water.
    Beetroot-kootu-recipe
    • Add this paste to the cooked beetroot and boil the mixture in a kadai till its raw smell goes off completely.Add some water if u find the kootu is very thick.
    Beetroot-kootu-recipe-1

    • Lastly heat a small kadai and temper all the ingredients given under “to temper”.Add to the kootu and mix well.

    Enjoy !

    Note

    • You can replace moong dal with chana dal but u should soak the chana dal for 30 minutes before cooking.
    • Add more chillies if u want the kootu to be spicy.We like mildly spiced kootu.So i add only 2 chillies.
    • Adding coconut oil gives a nice flavor to this kootu.So don’t skip it.


    Enjoy this healthy,colorful beetroot kootu with rice and any gravy !


    Eggless Tutti Frutti Cake Recipe-Basic Vanilla Sponge Cake Recipe

    $
    0
    0


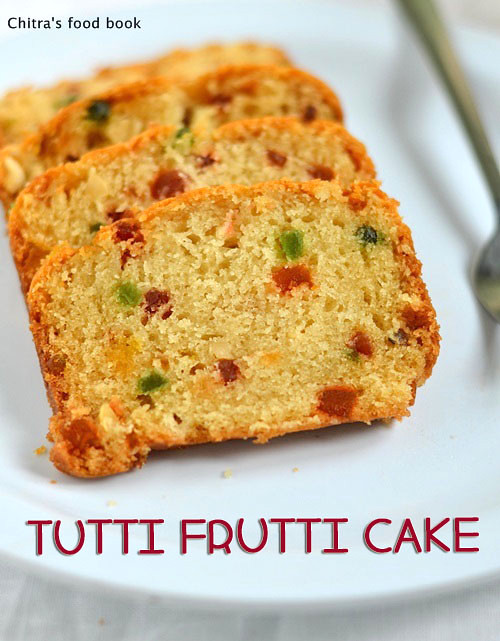
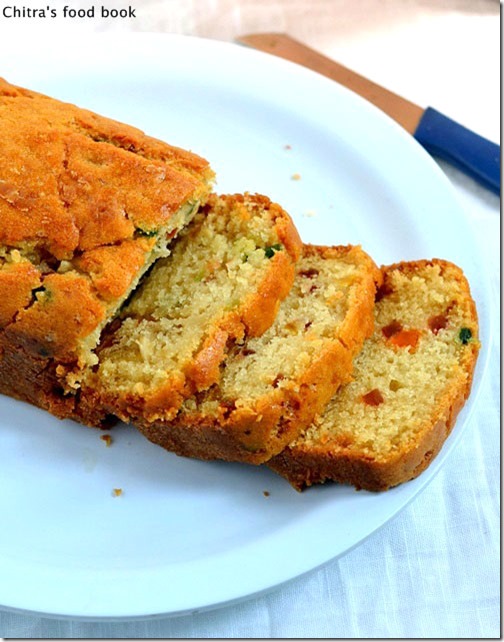
    Baking would be a fun & breeze if u have the perfect recipe in hand.Its so easy and most probably with just 2 steps.You don’t have to look for any consistencies like sweets.Even a beginner can make it without hassles.Though i know this very well,i bake once in a blue moon thinking about all the high calorie stuffs like maida,butter,sugar,condensed milk etc.If u are a controlled eater,u don’t have to worry about all these things.But in my family,no body knows what is controlled eating Tongue.Even If you give us a loaf of cake or bread,it would vanish within no time.We can’t resist our temptation to eat if it is a deep fried snack or cake.So to satisfy our cravings,i make one minute microwave cake recipes( Refer side bar) very often in which the quantity of consumption would be greatly reducedWinking.And When i plan to bake a conventional cake,i make sure to exclude at least one or the other ingredient from the above said ones.I always watch out for cake & cookies recipes that uses Oil and curd than butter and condensed milk.Being a vegetarian it should be eggless too.As Christmas is around the corner,i wanted to share some yummy eggless,butterless cake recipes in my blog.Last year this time,i posted eggless vanilla cake recipe using fresh cream.It took one year for me to post yet another delicious,eggless basic vanilla sponge cake recipeSilly .To make this cake interesting,i’ve used tutti frutti  & nuts here.Recently i bought a loaf pan to try whole wheat bread.I baked this cake in that pan.You can try this in a round, square or heart shaped pans too.Its one of the best eggless cake recipes i have ever baked & i adopted this recipe from here& here.This recipe was a super duper hit among my friends and family.Its one of the best tea time cake recipes and you can keep this cake as a base for making birthday and anniversary cakes too.It tastes even more rich and tasty if u decorate this cake with icing !!Try this yummy tutti frutti cake for this Christmas 2014 and share your feedback with me.I am…. waiting Big GrinWinking.Check out my eggless pressure cooker cake recipe too.You can refer this post,follow the same procedure and make this cake in cooker too.I hope it comes out well.Lets see how to make this eggless vanilla sponge cake recipe with tutti frutti.

    Tutti-frutti-cake-recipe

    Eggless tutti frutti cake


    Eggless tutti frutti cakeEggless tutti frutti cake using basic vanilla sponge cake recipe - The best sponge cake ever !
    Cuisine:Indian
    Category:Baking
    Serves:12-15 slices
    Prep time:10 Minutes
    Cook time:40 Minutes
    Total time:50 Minutes


    INGREDIENTS
    1 cup = 200 ml
    For sponge cake batter
    • All purpose flour - 1.5 cups
    • Curd - 1 cup
    • Baking powder - 1.25 tsp
    • Cooking soda/Baking soda - 1/2 tsp
    • Cooking oil - 1/2 cup ( i used saffola)
    • Vanilla essence - 1 tsp
    • Fine sugar or powdered sugar - 1 cup ( i used 3/4 cup + 2 tbsp)
    For tutti frutti mixture
    • Tutti frutti - 1/3 cup
    • Raisins - 1 tbsp ( optional)
    • Cashew nuts - 5 nos ( chopped finely)
    • Maida – 1tsp
    For greasing the pan
    • Cooking oil – 2tsp
    • Maida – 2 tsp OR Butter paper/Parchment paper
    METHOD

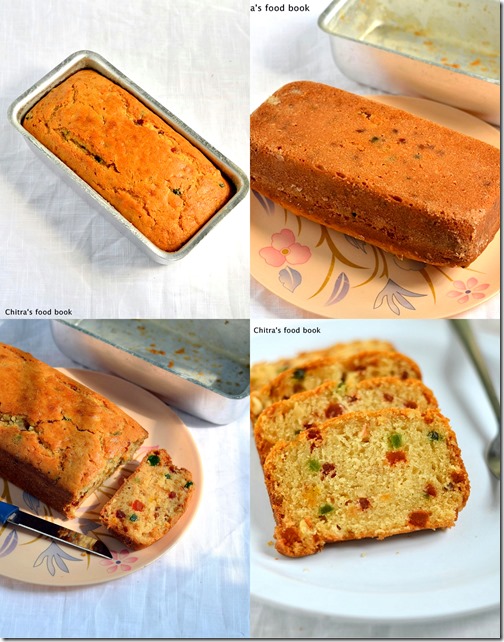
    • First take the baking pan and grease with oil all over the bottom and sides till the rim of pan completely.Then sprinkle maida and rotate the pan.Maida should coat the pan in all the sides.If u don’t want to do this step,just line the pan with butter paper or parchment sheet.Make sure u cut the butter paper in proper size before lining the pan.
    • In a bowl,take the tutti fruit,nuts and raisins.Add 1tsp of maida and mix it well.This step is to avoid sinking of tutti frutti in the bottom of pan.
    Tutti frutti cake recipe 1
    • In a big bowl,take the curd and beat it with a whisk.Do not beat it vigorously.Just mix till it becomes smooth.To this curd, add baking powder and baking soda.Mix it slowly & gently.As u mix,u will see bubbles rising from it.Stop mixing and keep the bowl aside for 5 minutes.In the mean time,sieve the maida once or twice in a bowl and keep it ready.
    Tutti frutti cake recipe 2
    • Now if u check the curd mixture,it would have risen well with foamy texture. Add the fine sugar or powdered sugar to it.Mix it with the whisk gently.Do not beat it.Just do it such that the bubbles should not subside.After mixing the sugar,add the vanilla essence and oil.Mix it slowly and nicely.The mixture should not lose its air particles.So be gentle.
    Tutti frutti cake recipe 3
    • Add half of the sieved maida and fold it gently.Again add the remaining half and mix well.Lastly add the tutti frutti mix and fold it.Batter should be of dropping consistency and not too thick.Transfer it to the cake pan and pat the pan well for uniform distribution.
    Tutti frutti cake recipe 4
    Tutti frutti cake recipe 5
    • Preheat the oven in convection mode for 10 minutes in 180c.Keep the cake pan and bake it for 35-40 minutes at 180c.Remove the cake just 5 minutes before completion brush it with milk.This gives a golden crust.Keep an eye after 30 minutes and check with a skewer.If it comes out clean with little crumbs,your cake is done.Else keep it for another 5 minutes.Mine took exactly 42 minutes.It may vary slightly.After the cake is done,remove and let it cool.Run a knife all through the sides of pan and invert the cake in a plate.It will come off easily.Slice it and serve with coffee/tea or enjoy as it is !
    Tutti frutti cake recipe 6


    Note


    • This cake doesn’t come out white in color.It would be slightly yellowish in color.
    • Do not over bake the cake than the mentioned time. Keep an eye after 25 minutes.Brushing with milk is very important to get golden colored crust on top.
    • Adding cashews and raisins is completely optional.Tutti frutti alone gives you great taste to this cake. 
    • You can also make this cake plain without adding nuts & dry fruits and enjoy.For variations u can add orange zest or lemon zest in the batter to make orange & lemon sponge cakes.
    • To make this as chocolate cake,add a tbsp of cocoa powder to the batter and mix well.
    • This cake stays good for 2 days without refrigeration.


    tutti-frutti-cake-recipe

    Try this yummy tutti frutti cake for this Christmas and enjoy !!


    Kuthiravali Puli Upma Recipe|Barnyard Millet Recipes

    $
    0
    0

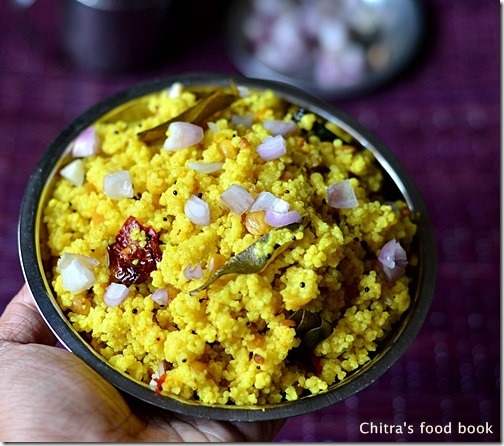
    Kuthiravali-upma
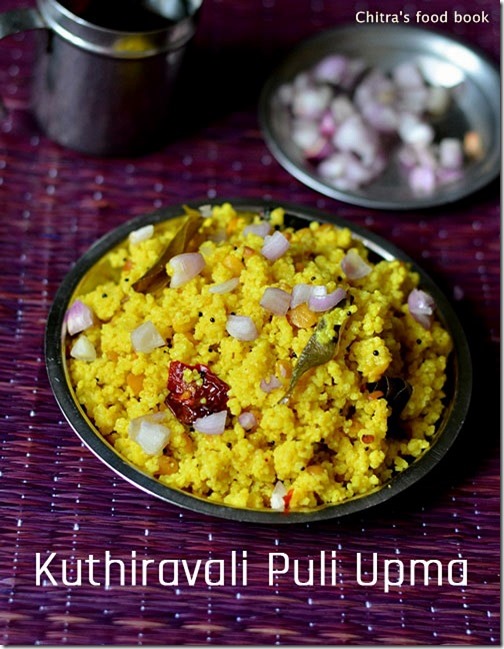
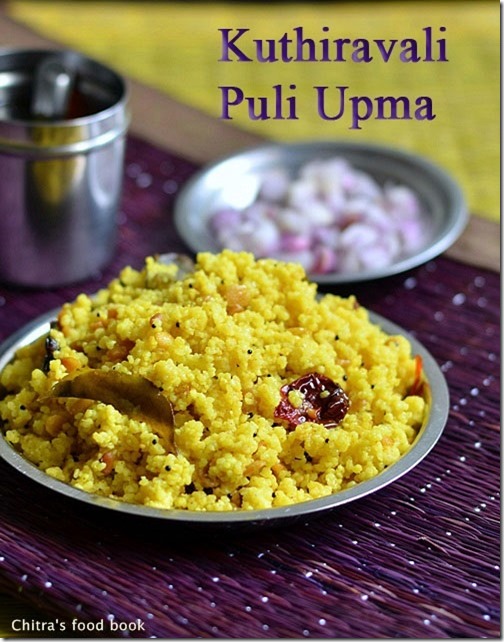
    Barnyard millet/Kuthiravali in Tamil,Oodalu in Kannada,odalu in Telugu,Jhangora in Hindi and Kavadapullu in Malayalam is a healthy millet which has 6 times high fiber content when compared with wheat.Its a gluten free millet with high calcium,phosporous & fiber.It is high in carbohydates & fat too.It helps to maintain the body temperature.It acts as a good anti oxidant too.This puli upma with kuthiravali is an easy and yummy breakfast cum dinner recipe which can be made under 20 minutes.Its a flavorful one pot meal.Its a great time saving recipe for people who look for quick breakfast/dinner options.We usually make this puli upma with rice orbroken rice/Noi arisi.Last week i just tried it with kuthiravali for a change following myPuli sundal recipe& it tasted yummy when drizzled with few tsp of gingely oil.The best side dish for this puli upma is finely chopped sambar onions/pearl onions.This is not only a tasty combo but also it helps to balance the heat of tamarind & keeps the body cool.Friends try this easy,tasty puli upma recipe with any millet.I am sure you are going to love it.You can also replace kuthiravali with varagu or samai.Cooking procedure & water quantity are the same.This upma can be done in electric rice cooker too.In that case,add 1/2 cup of water more than the mentioned quantity.Ok,Lets see how to make this tasty puli upma using healthy barnyard millet.It stays good for one day travel too.Check out my varieties of millet recipes here.
    barnyard millet recipes

    Kuthiravali puli upma recipe


    Kuthiravali puli upma recipeKuthiravali/Barnyard puli upma recipe
    Cuisine:Indian
    Category:Breakfast/Dinner
    Serves:Serves 3
    Prep time:10 Minutes
    Cook time:15 Minutes
    Total time:25 Minutes


    INGREDIENTS

    • Kuthiravali/Barnyard millet - 1 cup
    • Toor dal - 2 tbsp
    • Water - 3 cups
    • Tamarind - Big gooseberry size
    • Turmeric powder - 1/4 tsp
    • Hing/Asfetida - 1/8 tsp
    • Curry leaves - few
    • Salt - as needed
    To temper
    • Cooking oil or gingely oil - 2 tbsp
    • Mustard seeds - 1 tsp
    • Urad dal - 2 tsp
    • Red chillies - 4-6 nos
    • Curry leaves - few
    • Hing/Asafetida - 1/8 tsp
    METHOD

    • Soak tamarind in warm water for 10 minutes and take the extract using 3 cups of water as mentioned above.Its not necessary to use all the 3 cups for taking tamarind extract.U can use 2 cups of water for extract and add the remaining 1 cup of water directly to the cooker.To this tamarind juice,add curry leaves,turmeric powder,salt and hing.Set aside.
    • In a kadai,heat a tsp of oil & roast the toor dal.Remove in a plate.In the same kadai,roast the millet/kuthiravali till it changes to white & puffy.Remove it in toor dal plate.
    kuthiravali-puli-upma-recipe-1
    • Heat a pressure cooker base with oil and temper all the ingredients given above in the same order.Now add the tamarind extract taken using 3 cups of water.When the water comes to boil,simmer the flame and add the roasted dal & millet.Mix well without lumps.
    barnyard millet recipes
    • Pressure cook in low flame for one whistle or 3-4 whistles if high flame. It takes 10-12 minutes.After the steam is released,open the lid and fluff it with a fork.It will look mushy when it is hot but it becomes grainy & separate as it cools down.
    kuthiravali-puli-upma-recipe-2
    • Don’t forget to add a tsp of gingely oil while serving.Enjoy this upma with small onions as side dish.


    Note

    • Roast the dal & millet carefully in medium flame.Make sure nothing gets burnt.
    • Adjust the quantity of chillies based on ur spice level.
    • Add less water ( around 2.5 cups) if u want more fluffy upma.


    Enjoy this healthy kuthiravali upma with small onions as side dish.Tastes yumeee !!
    kuthiravali-puli-upma

    Karthigai Deepam Recipes-Thirukarthigai recipes(with video)

    $
    0
    0


    Maavilaku

    Thirukarthiagai/Karthigai Deepam is one of the most important festival of lights in South India especially in Tamil nadu.It usually falls on Tamil month Karthigai ( pournami day) when the moon is in line with the six star constellation called Karthigai.It is celebrated in a very grand manner in Tiruvannamalai where they lit Annamalai deepam on the hill and and it is believed that Lord Shiva's jothi will be visible on this day.Lord Muruga took the form of six babies in a lake called "Saravana Poigai". On this day, all his six forms were united by Parvathi(his mother) and this way, he had six faces. Special poojas are performed to Lord Muruga.Karthigai deepam 2014 ie this year it falls on 5th of December(on friday).The idea behind this festival is to keep away bad things from life and welcome the good and holy things of life.On this day,we clean the house and draw rangoli ( kolam ) in front of pooja room & house entrance.We light oil lamps all over the house in the evening and we make some sweets & snacks like nei appam,Pori urundai/Nel pori urundai, Maavilakku for neivedyam and my MIL also makes kara appam along with these stuffs to finish our dinner.My mom makes a special karthigai deepam kozhukattai and rice flour lamp for the well being of family members.Here i have shared the links for all neivedyam recipes of karthigai deepam with a video recipe.All are very easy to make and even beginners can give them a try.I have also planned to share few more recipes from tomorrow.Hope you will like these recipes and try it.
    I wish u all a very happy Karthigai Deepam Star.Lets see the collection below.

    Karthigai pori urundai video recipe

    How to make pori urundai - full video recipe


    Brinjal Masala Kuzhambu/Kathirikai Kuzhambu Recipe

    $
    0
    0

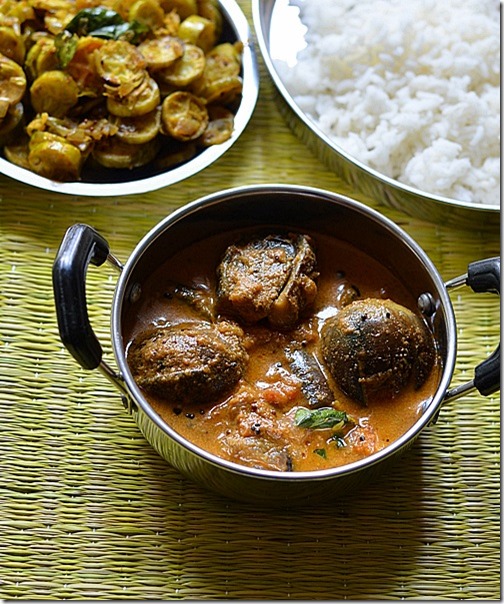
    Brinjal masala kuzhambu recipe
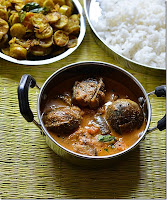
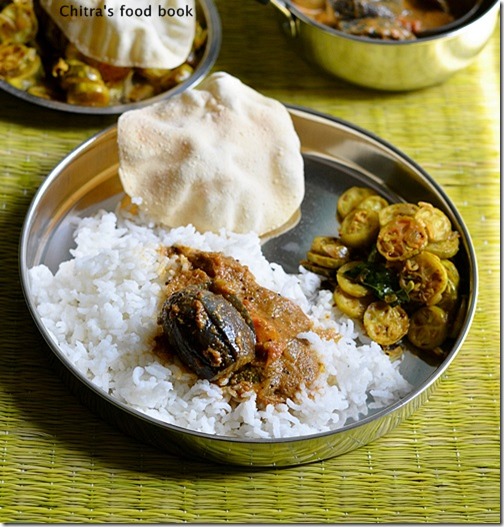
    I learnt this recipe from my friend Megha.Its a kurma kind of gravy that goes well with rice,idli,dosa and even chapathi too.Here in Bangalore,people make a brinjal gravy named as “Ennegaayi gojju” as a side dish for akki roti.This gravy tastes similar to that but not exactly.I will share authentic ennegaayi recipe soon.I tasted this gravy once in megha’s house and liked it a lot.I got the recipe from her immediately and wrote in my cook book.I have made this many times in my kitchen but somehow i couldn’t blog it.Today i made this brinjal gravy along with tindora curry(yet to post) for Sendhil’s lunch box and thought of sharing here.Basically i am a big fan of brinjal recipes.I keep trying one or the other new recipes using brinjal.When i made this gravy,i was super happy that i got yet another easy,interesting brinjal gravy recipe just like my Ennai kathirikai kuzhambu and brinjal kara kuzhambu recipes.Brinjal lovers,do try this gravy.Its very simple to make and yummy too !
    Brinjal masala kuzhambu

    Brinjal masala kuzhambu


    Brinjal masala kuzhambuBrinjal masala kuzhambu recipe - A kurma kind of gravy for rice,idli n dosa !
    Cuisine:Indian
    Category:Gravies
    Serves:Serves 2
    Prep time:10 Minutes
    Cook time:15 Minutes
    Total time:25 Minutes


    INGREDIENTS

    • Brinjal - 6 nos
    • Tomato - 1 no
    • Salt & water - as needed
    To grind
    • Grated coconut - 3 tbsp
    • Big onion - 1 no
    • Ginger & garlic paste – 1 tsp ( heaped) 
    • Cinnamon - 1 small piece
    • Cloves - 2 nos
    • Coriander leaves - a handful
    • Red chilli powder - 1 tsp ( add 1.5 tsp for spicy gravy)
    • Dhania powder - 3/4 tsp
    • Turmeric powder - 1/8 tsp
    To temper
    • Cooking oil - 1.5 tbsp
    • Mustard seeds - 1/2 tsp
    • Urad dal - 1/2 tsp
    • Big onion - 1 no ( finely chopped)
    • Curry leaves – few
    Coriander leaves – little ( to garnish)
    METHOD

    • Wash and slit the brinjals into 4.Keep it immersed in water till use.
    • Grind all the items given under “ to grind” to a smooth paste.
    Brinjal masala kuzhambu 1

    • In a pressure cooker base,heat oil and splutter mustard seeds,urad dal and cumin seeds.Saute finely chopped big onions till transparent.Add curry leaves and then add the slitted brinjals.Saute till the skin of brinjal shrinks lightly.Now add the ground masala paste and saute till raw smell vanishes.
    Brinjal masala kuzhambu 2
    • Then add a roughly chopped tomato and saute till slightly mushy.Lastly add 1.5 cups of water and pressure cook in low flame for one whistle.Remove the lid after the steam is released completely.Mix well.Garnish with finely chopped coriander leaves and serve with plain rice adding ghee.
    Brinjal masala kuzhambu 3

      Enjoy !


    Note

    • You can replace brinjal with avarekalu/mochakottai/hyacinth beans.
    • This gravy tastes the best when mixed with plain rice adding ghee.Ghee is a must here.
    • You can also have this as a side dish for idli,dosa
    • Here i have not used tamarind.If u want u can replace tomato with a small gooseberry size of tamarind.
    • Garnish with coriander leaves for more flavor.

    Enjoy this masala gravy mixing with plain rice n ghee Smile

    brinjal gravy

    Thinai Nei Appam Recipe/Foxtail millet Sweet Appam recipe-Karthigai Deepam Recipes

    $
    0
    0

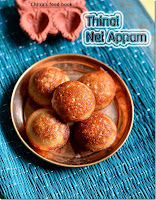
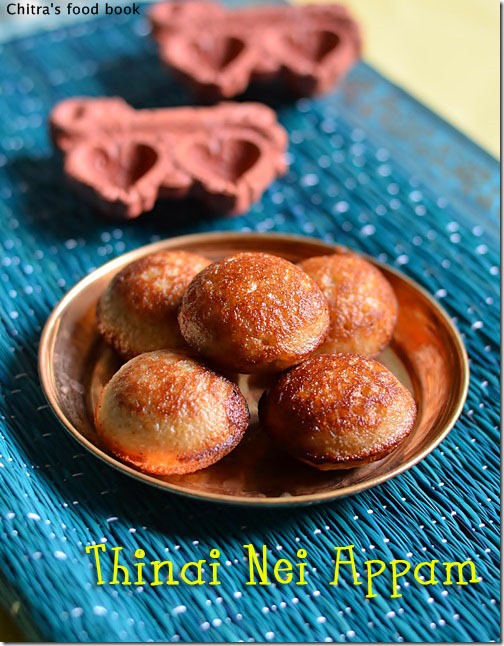
    nei appam recipe

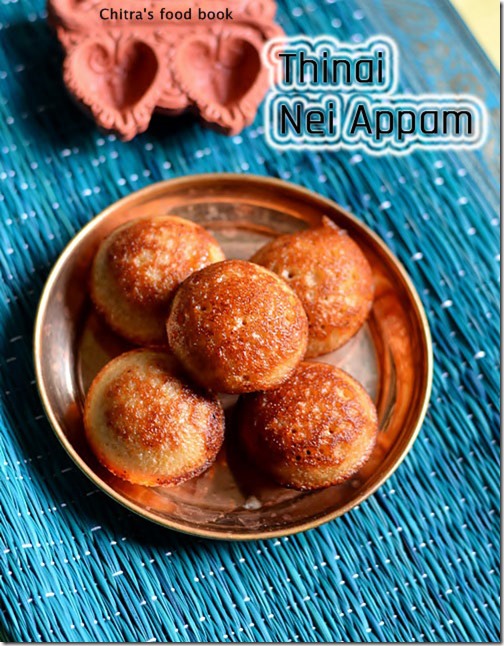
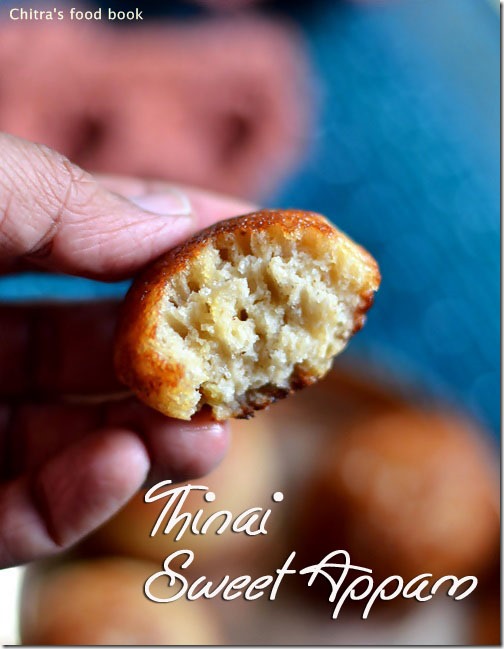
    People in Tamil nadu usually make pori urundai and nei appam for Karthigai deepam.As i had already shared varieties of appam recipes like appam recipe using wheat flour,instant nei appam and appam-deep fried version,i wanted to try an appam using millet as we are fond of eating millets nowadays.Actually i wanted to try with kuthiraivali,varagu or saamai but then i changed my mind to try with Thinai as Lord Muruga is fond of thinai,Right??. So i tried with thinai(Foxtail millet in English,Kangni/Rala in Hindi,Navane in Kannada,Korra inTelugu,Thina in Malayalam) & it came out very well.I made this appam using paniyaram pan.Actually i made one batch with ghee and remaining with oil.Both were tasting awesome.We liked it very much.I am glad i could make a healthy nei appam recipe using millets.Tomorrow i will try to share how to make nel pori urundai recipe.Please click this link to view full collection of Karthigai deepam recipes in my blog.Happy Karthigai Deepam Happy

    Nei-appam-recipe

    Thinai nei appam recipe


    Thinai nei appam recipeNei appam recipe using Thinai/Foxtail millet
    Cuisine:Indian
    Category:Sweet
    Serves:12-15 nos
    Prep time:2 Hours
    Cook time:10 Minutes
    Total time:2H 10Minutes


    INGREDIENTS
    To grind
    • Thinai/foxtail millet - 1/2 cup
    • Wheat flour - 2 tbsp
    • Banana - 1 no ( small-yelakki,poovan)
    • Grated jaggery - 1/2 cup( use 1/3 cup for normal sweet)
    • Cardamom - 2 nos
    • Grated coconut - 2 tbsp
    • Rice flour - 1/2 tbsp
    • Cooking soda - a big pinch
    To cook
    • Ghee/Nei - as needed
    METHOD

    • Wash and soak the thinai/Foxtail millet for 2 hours.After 2 hours,grind it to a slightly coarse paste adding cardamom & little water.To this,add wheat flour,rice flour,Chopped Banana,grated jaggery,grated coconut and grind to a smooth thick paste adding required water.Batter should be of pourable consistency.
    thinai nei appam 1
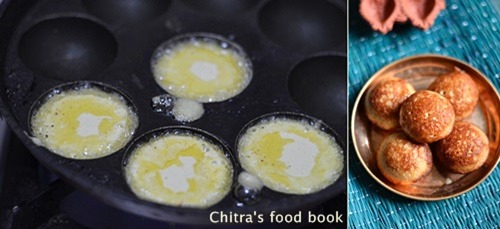
    • Leave the batter for 2-4 hours.Before making appam,add a big pinch of cooking soda and mix well.Heat paniyaram pan and add a tsp of ghee in each hole.Pour a small ladle of appam and cover cook it for few minutes in medium flame.Flip it and again cook for a minute.Remove and serve hot !
    thinai nei appam 2


    Enjoy !


    Note

    • Adding rice flour is optional.This appam itself comes out slightly crispy outside and soft inside.
    • U can also add rave in place of rice flour.
    • Adding cooking soda and banana is essential.It gives u the soft appam.Suppose if u ferment the batter for 8 hours,then cooking soda is not needed.
    • Serve & eat hot to enjoy its best taste.


    Make this healthy,Lord Muruga’s Favourite Thinai Nei appam for this Karthigai Deepam and get his blessings !Praying

    thinai nei appam recipe

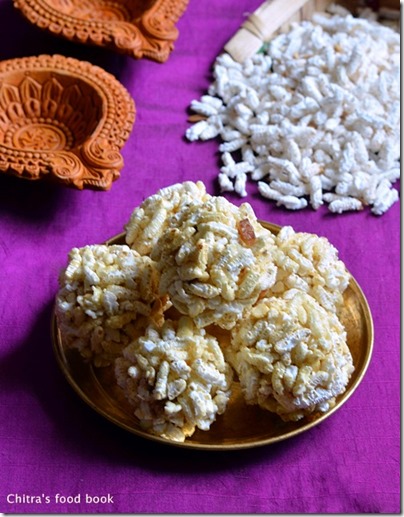
    Nel Pori Urundai Recipe-Karthigai Deepam Recipes

    $
    0
    0

    Nel pori urundai

    Nel pori urundai was in my try list for years.In my house,both mom & mil make aval pori urundai as aval pori is easily available in Tamil nadu.My MIL makes it as balls whereas my mom just mix the aval pori with jaggery syrup and keep it as it is.So its purely our choice.Here in Bangalore, we make Aval pori urundai by roasting aval/Poha as we don’t get readymade aval pori and make it as balls.But recently i saw Aval pori/Avalakki pori and Nel pori in Gandhi Bazaar.I became so happy and bought them immediately.I tried urundai with both at the same time as i wanted to update my old post as well.Both came out perfect.Please check out my updated aval pori urundai recipe if u are interested.In this post,i have shared nel pori urundai with tips & tricks to identify the correct consistency of jaggery syrup.So you can follow this recipe and make either aval pori or nel pori urundai with it.As i had tried pori urundai with aval,nel pori as well as puffed rice,I personally felt the taste of aval pori urundai is the best.Next comes pori urundai using puffed rice and i would give the least points for nel pori urundaiTongueDont tell anyone.So friends try any based on your liking.
    Nel pori urundai recipe

    Nel pori urundai recipe


    Nel pori urundai recipeNel pori urundai recipe for karthigai deepam
    Cuisine:Indian
    Category:Sweet
    Serves:12-15 nos
    Prep time:10 Minutes
    Cook time:15 Minutes
    Total time:25 Minutes


    INGREDIENTS

    • Nel pori - 3.5 cups
    • Grated jaggery - 1/2 cup ( heaped)
    • Cardamom - 3 seeds( powdered)
    • Black sesame seeds - 1.5 tsp
    • Finely chopped coconut pieces - 2 tbsp
    • Water - 1/2 cup
    METHOD

    • Dry roast black sesame seeds & fried gram dal.Set aside.In the same kadai,heat a tsp of ghee and roast the coconut pieces till golden brown.Keep it aside.
    Nel pori urundai step by step pictures-1
    • Clean the nel pori by removing the husk.Keep it aside.Melt grated jaggery by adding water and boil it.After it is completely melted,switch off the flame,remove and strain the syrup using a wire mesh.Wash the kadai and pour the strained syrup to it.
    Nel pori urundai step by step pictures-4
    Nel pori urundai step by step pictures

    • Now boil the syrup.It will thicken and reaches non-sticky,soft ball consistency( ie,Pour some thick syrup into a plate and try to gather it.U should be able to roll it a non-sticky and it should be soft too).Also when u pour the syrup using a ladle,the last drop will fall very slowly forming a single string. After that stage is reached,switch off the flame and add the roasted sesame seeds,fried gram dal,coconut pieces & cardamom powder.Mix well and add the nel pori immediately.Mix everything well together till all the nel pori is well coated with jaggery syrup.
    Nel pori urundai step by step pictures-2
    • Grease your hands with oil or rice flour and make tight balls from the mixture when it is warm. When the mixture is hot,u wont be able to make proper shapes.So make it tight when it is getting warm.Arrange all the balls and store in an air tight box.The shelf life of these balls would be around 2 weeks if properly done.
    Nel pori urundai step by step pictures-3
    Enjoy !


    Note

    • The consistency of jaggery syrup is important.It should be soft n non-sticky ball.
    • Cleaning nel pori is mandatory because that brown husk may cause loose motion trouble if u eat it.
    • The color & sweetness of pori urundai depends on the color& sweetness of jaggery.If ur jaggery is too sweet,use 4cups of rice & 1/2 cup of jaggery(levelled)
    Make this nel pori urundai on Karthigai deepam festival day and enjoy !
    Nel pori urundai-recipe

    Viewing all 969 articles
    Browse latest View live