Quantcast
Channel: Chitra's Food Book
Viewing all 967 articles
Browse latest View live

Tamil Brahmin Sambar Powder Recipe – Iyer Style Sambar Powder Recipe

$
0
0
Tamil brahmin sambar powder
I got this Tamil brahmin style sambar powder recipe from my neighbor friend Subha’s MIL. She is from Trichy. When I was telling Subha about my interest in Tamil brahmin recipes (Tambrahm style), she introduced her MIL who is an expert cook. I learnt few basic Tamil Iyer style recipes like sambar, rasam, more kuzhambu, vatha kuzhambu, puli sadam, pachadi and wrote down all of them in my notebook. At that time she shared her traditional, homemade sambar powder recipe and gave me a box full of it. I also prepared sambar using this sambar powder by adding mixed vegetables. It was so good and flavorful. Soon I will post the brahmin style sambar recipe here. Now I have given the ingredients for sambar powder in bulk quantity. You can sun dry them or dry roast in a kadai. Grind in a flour mill and store it for months. Soon I will try to ask her for smaller portion and update this post. Ok lets see how to make Tamil brahmin style sambar powder recipe.\

Check out my mom's Tirunelveli style and MIL's Thanjavur style sambar powder recipes too.

Rasam powder recipe

Idli sambar powder

Homemade garam masala powder

Other homemade powders

Iyer sambar powder recipe

Tamil brahmin sambar powder recipe


Tamil brahmin sambar powder recipe

Tamilnadu brahmin style sambar powder recipe for making lunch sambar.


Cuisine:Tamil brahmin
Category:Sambar powder
Serves:-
Prep time:4 Hours
Cook time:10 Minutes
Total time:4H10Minutes

1 cup = 250ml
  • Coriander seeds / Dhania - 3/4 kg
  • Red chilli - 1/4 kg(Use 1/2 kg for more spice)
  • Toor dal, Urad dal, Chana dal - 200 gms each
  • Pepper - 50 gms
  • Cumin seeds / Jeera - 50 gms
  • Methi / Fenugreek seeds – 1.5 tbsp
  • Turmeric sticks / Virali manjal - 100 gms
HOW TO MAKE TAMIL BRAHMIN STYLE SAMBAR POWDER
  1. Take all the ingredients mentioned for sambar powder.
  2. Spread in a wide plate and dry them under the sun for 3 to 4 hours.
  3. Instead you can dry roast all the ingredients one by one for few minutes without burning them.
  4. Let it cool. Grind in a rice flour mill to a smooth powder.
  5. After grinding spread the sambar powder in a clean sheet. Let it cool down.
  6. Then transfer to an air tight box.
  7. Take the quantity required for 15 days and store in a box separately.
  8. Use clean spoon to handle and store for months. Enjoy !
TAMIL BRAHMIN SAMBAR POWDER - METHOD 
  • Measure and take all the ingredients given above in a wide plate. Sun dry them for 3 to 4 hours. 

  • Instead of drying under the sun, you can dry roast all the ingredients one by one in a kadai just to heat them slightly. Do not burn any ingredient. It is done to remove the moisture content.

  • Transfer to a plate and let it cool down. Grind in a rice flour mill to a smooth powder.

  • Spread the sambar powder in a clean sheet and let it cool down. Then transfer to a big air tight container. Take the quantity required for 10 to 15 days and store in another small box.

  • Use a clean spoon to handle this powder. It stays good for months. Mami told they keep this powder up to 3 to 4 months.

  • For making sambar, you can use 1 to 2 tsp depending on the need. Soon I will post a detailed post about it.

  • Enjoy !

Note

                            
  • You should either sun dry the ingredients or dry roast in a kadai without burning the ingredients.
  • Its always better to store the sambar powder in two containers. Bulk quantity in one and smaller portion of it in another container. This helps to retain the flavor of sambar powder for long time.

Try this Tamil brahmin sambar powder recipe and use it for months !


Easy Tomato Garlic Chutney For Idli Dosa - Thakkali Poondu Chutney

$
0
0
Tomato garlic chutney
Usually I make tomato raw garlic chutney for roti and paratha. Recently my sister Radha was telling me about this tomato garlic chutney without onion (Thakkali poondu chutney in Tamil) for idli, dosa. I found it so easy and tried it for our breakfast yesterday. It came out really well and tasted great with dosa. I am sure it tastes the best with hot idli when drizzled with a tsp of gingely oil. Its a very simple chutney recipe with 3 basic ingredients tomato, garlic and red chilli powder. But one thing we should remember is to add the right quantity of tomato and garlic else chutney tastes bitter or smells pungent. So I always add a pinch of tamarind to balance it. Friends, do try this chutney and enjoy with idli, dosa. It stays good for a week when refrigerated. So you can make in bulk quantity. I hope it stays good for one day travel as this chutney is without onion. As summer vacation is started, you must be travelling to places with packed food. You can try this chutney, pack in an air tight box to avoid oil leakage, use a clean spoon and use it for a day or two. Ok lets see how to make this easy, yummy tomato garlic chutney for idli, dosa with step by step pictures.

Also check out my 20 tomato chutney varieties, 65 chutney recipes too.

Tomato garlic chutney recipe


Tomato garlic chutney recipe for idli, dosa


Tomato garlic chutney recipe for idli, dosa

Easy tomato garlic chutney for idli, dosa / Thakkali poondu chutney


Cuisine:Indian
Category:Chutney Recipes
Serves:Serves 2
Prep time:5 Minutes
Cook time:10 Minutes
Total time:15 Minutes

To grind
  • Ripe tomato / thakkali - 2
  • Garlic cloves / Vellai poondu - 8
  • Tamarind – a small piece
  • Salt & water - as needed
To saute in oil
  • Gingely oil / Nalla ennai - 2 tbsp
  • Mustard seeds - 1/2 tsp
  • Urad dal – 1/2 tsp
  • Curry leaves - Few
  • Red chilli powder – 1 to 1.5 tsp (Adjust as per taste)
HOW TO MAKE TOMATO GARLIC CHUTNEY
  1. In a mixie jar, take the washed and chopped tomato, peeled garlic cloves, tamarind and salt.
  2. Grind to a smooth paste adding enough water.
  3. In a kadai, heat oil. Temper mustard seeds, urad dal, curry leaves.
  4. Lower the flame and add red chilli powder. Mix quickly without burning it.
  5. Add the chutney immediately and mix well.
  6. Rinse the mixie jar with little water and add to chutney.
  7. Boil in low to medium flame till oil releases in sides.
  8. Switch off the flame. Cool down and enjoy !
TOMATO GARLIC CHUTNEY RECIPE - STEP BY STEP PICTURES

  • Wash and chop the tomato. Peel the garlic cloves. In a mixie jar, take the tomato, garlic cloves, salt and grind without water. Add some water and grind to a smooth paste if there are tomato chunks. Set aside.
  • Tomato garlic chutney recipe
  • In a wide kadai, heat gingely oil. Splutter mustard seeds, urad dal and curry leaves.

  • Lower the flame completely and add red chilli powder. Mix quickly without burning it.

  • Now add the ground tomato garlic paste. Rinse the mixie jar with 1/2 cup of water and add to chutney. Mix well.
  • Tomato garlic chutney recipe
  • Let it boil in medium flame till oil releases in its sides. Color of the chutney also becomes dark
  • Enjoy this yummy tomato garlic chutney with hot idli, dosa. It stays good for 3 to 4 days when refrigerated.

Note

  • Adjust the quantity of red chilli powder as per its spice level.
  • If you are using big sized garlic cloves, you can reduce its quantity.
  • Make sure you do not burn the red chilli powder while sauting in oil. So do it in low flame.

Easy, yummy tomato garlic chutney ready. You can enjoy with idli or dosa !
Thakkali poondu chutney

Tamil New Year Recipes / Tamil Puthandu Recipes

$
0
0
Tamil new year recipes

Here is a list of Tamil new year recipes/ Tamil puthandu special recipes for pooja and lunch menu. On varusha pirappu day we offer mango pachadi, arisi paruppu payasam, neer mor and panakam to God. Apart from this, we make no onion no garlic lunch menu by making sambar, thayir pachadi with gooseberry or carrot or lady's finger, kootu or poriyal, urad dal vada with pepper. This menu is more like amavasya food / no moon day lunch. Some people also make 5 rice varieties like lemon rice, tamarind rice, coconut rice, sweet pongal and curd rice instead of making full meals. But usually I make Lady’s finger sambar, Gooseberry or carrot thayir pachadi, raw mango pachadi, raw banana poriyal or broad beans poriyal, rice and moong dal payasam , urad dal vada. I have given the links for all these recipes below. I have also shared the links for other options. Do check it out and try the menu according to your convenience and family practice.

Also check out my post on How to celebrate Tamil New Year at home  !

Tamil new year lunch menu

Tamil New Year Recipes Links


FULL MEALS MENU

    OR

    Variety Rice Recipes + Vada + Payasam


    Check out my Full meals lunch menu post to view the order of arranging the dishes in banana leaf.

        OTHER OPTIONS FOR KUZHAMBU(Skip onions and make it for festival day to offer God)

      KOOTU VARIETIES


      PORIYAL VARIETIES


      PACHADI VARIETIES


      PAYASAM VARIETIES


      Check out my 18 Payasam Varieties for full collection.

      OTHER SWEETS

      KESARI RECIPES

      • Rava Kesari Recipe

      • Kesaribath - Karnataka style

      • Milk kesari/Paal kesari recipe

      • Semiya/Vermicelli kesari

      • Microwave rava kesari

      • 12 Kesari varieties

      • OTHER LUNCH MENU RECIPES

      • Tamil nadu lunch menu 1

      • Tamil nadu lunch menu 2

      • No Onion No Garlic Lunch Menu

      • All the above recipe links are for variations. You can try any based on the availability of ingredients. Its not a hard and fast rule to make a full meals and offer GOD. Some people celebrate Tamil new year just by offering a payasam & vada. If you are a bachelor and wish to do the pooja, you can simply soak Poha/Aval in milk adding sugar &amp cardamom and offer to God. GOD will accept everything and anything if done whole heartedly. The celebration procedure I have shared here is based on my family practice. It may vary as per your tradition and custom. So beginners, please consult the elders of your family and do the pooja.

        Wish you all a very happy and prosperous Tamil New Year !!
        அனைவருக்கும் இனிய தமிழ் புத்தாண்டு நல் வாழ்த்துக்கள் !!!

      15 Coconut Chutney Recipes – Coconut Chutney Varieties For Idli, Dosa

      $
      0
      0

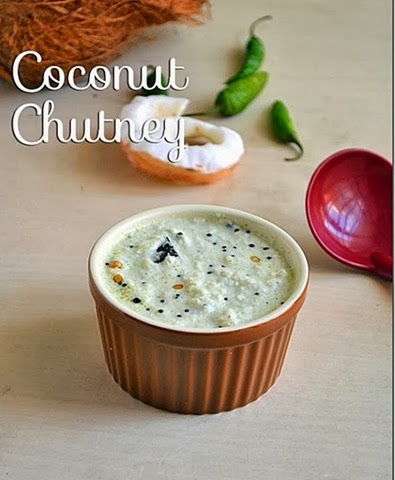
      Coconut chutney recipe is the most preferable south Indian side dish for idli, dosa. Most of the coconut chutney recipe requires no cooking. So it can be prepared without fire. I have blogged nearly 15 coconut chutney varieties for idli, dosa and rice. In South India, especially in Tamil nadu and Kerala, coconut is a vital ingredient in our regular cooking. We use coconut in chutney, kuzhambu, kootu, poriyal and even in kurma varieties to grind masala. Basically coconut chutney recipes are easy to make and simple to prepare under minutes. So I thought to have a collection of coconut chutney recipes under one page for easy reference. If you want to make a quick side dish for idli, dosa during busy morning hours, coconut chutney recipe is the best option. One can make N number of variations in a simple coconut chutney and come up with varieties. In this collection, you can find hotel style coconut chutney, green coconut chutney, red coconut chutney, coconut chutney without chana dal, coconut chutney for travel, few Kerala style coconut chutney recipes, Karnataka style coconut chutney and much more. Most of these chutney recipes are learnt from my mom, MIL and cook books. I have also shared 3 different types of coconut chutney recipes in a video. Ok, lets see the collection of 15 coconut chutney varieties below.

      Check out my65 chutney recipes for idli, dosa 


      15 chutney recipes/ thogayal for rice.

      15 idli varieties

       30 Idli sambar recipes


      20 side dish for poori

      20 Kurma varieties for roti, poori, idli, dosa

      70 Kuzhambu recipes for rice


      Coconut Chutney Varieties

      Black Rice Idli Dosa Recipe – Karuppu Arisi Idli Dosai

      $
      0
      0
      black rice idli

      Black rice idli, dosa and sweet paniyaram was my recent try using black rice/ Karuppu arisi (Kavuni arisi). Black rice / Karuppu arisi popularly known as kavuni arisi is a rice variety with amazing health benefits. Recently I shared Chettinad special Kavuni arisi sweet recipe. When I shared that recipe, some of my readers asked me to share more black rice recipes. So I made black rice sweet paniyaram and idli, dosa. Both came out well in the first attempt. I thought of starting with this soft and spongy black rice idli, dosa recipe. Next week I will post the paniyaram recipe. Here I have used idli rice and black rice in equal quantities. The quantity of rice and urad dal is important to get a soft and spongy idli. I have also used some poha / pressed rice for additional softness. Friends do try this healthy black rice idli / karuppu arisi idli and dosa. You will love it.


      Check out my 15+ idli varieties !


      karuppu arisi idli


      black rice dosa

      Black rice idli dosa recipe


      Black rice idli dosa recipe

      Black rice idli dosa recipe / Karuppu arisi idli dosa using black rice, idli rice, urad dal, pressed rice and fenugreek seeds.


      Cuisine:Tamil nadu
      Category:Idli varieties
      Serves:20 nos.
      Prep time:12 hours
      Cook time:10 Minutes
      Total time:10Hours 10Minutes

      1 cup = 250ml
      • Black rice / Karuppu arisi - 1 cup
      • Idli rice / salem rice - 1 cup
      • White, Round urad dal - 1/2 cup
      • Methi seeds / Fenugreek seeds - 1/2 tsp
      • Thick Poha / Pressed rice / aval - 2 tbsp
      HOW TO MAKE BLACK RICE IDLI
      1. Wash and soak idli rice, black rice, urad dal, methi seeds and poha for 6 hours.
      2. Black rice takes longer time to soak.
      3. Grind everything to a smooth paste adding required water and salt.
      4. Transfer the idli batter to a vessel. Mix the batter with hands.
      5. Cover and ferment over night. The next morning mix the batter well.
      6. Steam in idli pot till done. Remove and enjoy with chutney, sambar !
      BLACK RICE IDLI DOSA - STEP BY STEP PICTURES
      • Wash the black rice thrice in a wide bowl. Add idli rice, urad dal, methi seeds and poha. Wash everything together for once or twice. Soak it for 6 hours minimum because black rice takes longer time to soak.
      • black rice idli
      • Grind everything to a smooth paste in a mixie or grinder. Use ice cold water for grinding if you use mixie. While grinding you can add salt if you like OR add it the next day before making idli.

      • After grinding the batter, transfer to a big vessel. Mix it with hands to aid fermentation. Cover the vessel and leave the batter overnight or 8 hours minimum to ferment. Consistency of batter should be like regular idli batter.black rice idli
      • The next day, batter would have raised well. Mix it well and pour the batter in a greased idli plate.

      • Boil water in idli pot. Place the idli plate and steam it for 10 to 15 minutes in high flame till idli is cooked well. Cracks may form on top of idli. But it will be soft.
      • black rice idli
      • Remove the idli plate and rest it for 5 minutes before removing the idli. Take the idli and serve hot with chutney or sambar. I made dosa the next day. For making dosa, add little water to the batter if needed. Heat dosa pan, pour a ladleful of batter and spread it. You can make it thin or thick as you like. Flip and cook both the sides. Remove and serve hot ! 
      • black rice idli
        Enjoy !

      Note

      • For variations, you can soak  and grind black rice, idli rice, methi seeds together. Soak urad dal separately and grind it first. Mix both the batter and ferment it. In that case, skip poha.
      • Color of idli may vary based on the color of black rice. Some rice looks reddish. 
      • This batter stays good for 3 days in refrigerator but it turns sour the next day. You can make dosa with it. 

      Healthy black rice idli dosa is ready to enjoy with chutney and sambar !
      Kavuni arisi idli

      Arcot Makkan Peda Recipe - How To Make Makkan Peda

      $
      0
      0
      Makkan peda
      Makkan peda is a popular sweet in Arcot, a small town in Vellore district, Tamilnadu. Arcot makkan peda is similar to khoya gulab jamun but it looks and tastes slightly different. I haven’t tasted the makkan peda from Arcot sweet shops but I had bookmarked its original recipe from an old Tamil magazine. I also watched the making of makkan peda in a sweet shop in Lakshmi Nair’s “Flavors of India” YouTube channel. Usually I make gulab jamun for any special occasion in my family. For a change I tried this makkan peda for the first time for my wedding anniversary celebration last week. It came out so well, soft and doubled in size too. I found many makkan peda recipes uisng gulab jamun mix instead of khoya, milk, curd and vanaspati. But I din’t use all these ingredients.  As I wanted to make it from scratch, I used store bought sugarless khoya, maida/ all purpose flour, baking soda and ghee. Just mix everything to make the dough, deep fry and dip in sugar syrup just like gulab jamun. As it looks flat and melts in mouth like butter, this sweet is named as makkan peda. Do try it. You will love it for sure. Ok friends, lets see how to make Arcot makkan peda recipe with step by step pictures.

      Makkan peda recipe


      Makkan Peda Recipe - Arcot makkan peda


      Makkan Peda Recipe - Arcot makkan peda

      How to make Arcot makkan peda recipe with khoya, maida, ghee and baking soda.


      Cuisine:Tamil nadu
      Category:Sweet
      Serves:15 to 20
      Prep time:10 Minutes
      Cook time:20 Minutes
      Total time:30 Minutes

      1 cup = 250ml
      • Unsweetened Khoya - 200 gms packet (I used Milky Mist khoya)
      • All purpose flour / Maida - 1 cup
      • Baking soda - 1/4 tsp
      • Sugar – 1/2 tsp (optional, to get dark brown color)
      • Melted ghee- 2.5 tbsp (at room temperature)
      • Water - as needed ( 1 to 2 tbsp)
      • Cooking oil - to deep fry
      For Sugar Syrup
      • Sugar - 3 cups
      • Water - 3 cups
      • Cardamom powder - 1/2 tsp
      • Saffron strands - few
      HOW TO MAKE ARCOT MAKKAN PEDA
      1. Chop all the dry fruits and nuts finely. This is the stuffing for makkan peda.
      2. Take the khoya at room temperature and crumble it well.
      3. Measure and take it in a bowl. Sieve maida, baking soda and add to khoya.
      4. Add melted ghee and mix well to make a crumble mixture.
      5. Add required water and make a smooth non-sticky dough.
      6. Knead gently. Cover and rest for 10 minutes.
      7. In the mean time, make sugar syrup. Mix sugar and water.
      8. Boil for 10 minutes till it becomes sticky in consistency.
      9. Take the dough, make a small ball. Press it slightly and stuff with a tsp of nuts.
      10. Cover it and make a round shape. Press it to shape like peda.
      11. Heat oil to deep fry. Fry the peda in batches. Flip and cook both sides till dark golden brown.
      12. Remove and peda and dip in sugar syrup. Leave it overnight for best taste !
      MAKKAN PEDA RECIPE - STEP BY STEP PICTURES
      • Lets make the stuffing for makkan peda. Take all the dry fruits and nuts. Chop finely and set aside.
      • Makkan peda recipe
      • In a wide bowl, take the crumbled or grated khoya. It comes to less than 1 cup. To this sieve 1 cup of maida and baking soda. Add sugar and melted ghee.  Mix everything well without any lumps. It should resemble a crumbly mixture.
      • Makkan peda recipe  
          Makkan peda recipe
      • Add required water and make a smooth dough without cracks. Knead slightly and rest the dough for 10 minutes by covering the dough with a lid. Seal the cracks and roll the dough if any.
      • Makkan peda recipe
      • In the mean time, make the sugar syrup. In a deep bottomed wide kadai, take sugar and water. Heat and melt it. Boil in medium flame for 10 minutes till it becomes slightly sticky. It resembles like oil with as shine. Switch off the flame. Add few saffron and cardamom powder. Mix well and keep aside.
      • Makkan peda recipe
      • Now take the dough. Pinch into small balls. Take a ball and press it in the middle. Stuff a tsp of chopped nuts and dry fruits. Seal the corners and make a ball without cracks. Flatten it slightly to make peda shape. Arrange all the peda in a plate. Do not let it dry. Keep it covered. Peda should be crack free.
        • Makkan peda recipe  
        Makkan peda recipe
      • Heat oil to deep fry the peda. Drop a pinch of batter. If it rises to the top slowly, oil temperature is right. Now drop 4 to 5 peda per batch. Cook in medium flame till it becomes dark golden brown in both the sides. Peda will start to float in oil as it cooks. So flip it and cook the other side too. Stay nearby and deep fry it patiently.  Remove in a tissue paper. Makkan peda recipe
      • Add to sugar syrup immediately and press it well. Makkan peda absorbs the syrup in few hours and becomes soft, almost double in size. You can keep it for 2 hours till over night too. Remove the sugar syrup carefully and serve it ! Makkan peda recipe
      • Enjoy !

      Note

      • Make sure the khoya is smooth without lumps. So its better to grate it or crumble it really well before measuring it.
      • Make sure there are no cracks in the peda before dropping in oil. You can seal it with fingers and press it.
      • Deep fry in oil patiently till it changes to dark golden brown in color. Do not fry in high flame because color of peda changes quickly but it remains uncooked inside.

      Try this Arcot special makkan peda sweet at home ! Enjoy !!

      arcot makkan peda recipe


      Snake Gourd Poriyal With Chana Dal – Pudalangai Kadalai Paruppu Poriyal Recipe

      $
      0
      0
      snake gourd poriyal with chana dal
      Recently I tasted this snake gourd poriyal with chana dal in a hotel in Tamil nadu. Usually I make snake gourd poriyal (Pudalangai poriyal in Tamil) with moong dal, onion and green chilli. But when I tasted this type of poriyal in that hotel with snake gourd, onion, chana dal / kadalai paruppu and sambar powder as major ingredients, I was tempted to try at home. Last week I prepared it as side dish for sambar rice. As usual I made this dish directly in a pressure cooker to ease my job and to save time. It came out so well. Tasted great with sambar rice and curd rice. As we are using chana dal, it takes more time to cook than snake gourd. So you can add previously cooked chana dal and add to poriyal or soak it for 30 minutes in water and add it as I did here. Other than this step, this pudalangai poriyal is so easy to make under 15 minutes. Also remember to add less water in pressure cooker else snake gourd turns mushy. Ok, lets see how to make snake gourd poriyal adding chana dal with step by step pictures.

      snake gourd poriyal with chana dal

      Snake gourd poriyal with chana dal


      Snake gourd poriyal with chana dal

      How to make snake gourd poriyal with chana dal like Tamil nadu hotel style.


      Cuisine:Tamil nadu
      Category:Poriyal
      Serves:Serves 3
      Prep time:30 Minutes
      Cook time:20 Minutes
      Total time:50 Minutes

      1 cup - 250ml
      • Snake gourd - 1 (Chop into small pieces)
      • Chana dal / Kadalai paruppu - 2.5 tbsp
      • Big onion - 1 (finely chopped)
      • Sambar powder - 1 tsp
      • Turmeric powder - 1/4 tsp
      • Sugar - 1/2 tsp
      • Salt & water - as needed
      • Grated coconut – 1/4 cup
      To Temper
      • Cooking oil or coconut oil - 1 tbsp
      • Mustard seeds - 1/2 tsp
      • Urad dal - 1 tsp
      • Cumin seeds - 1/2 tsp
      • Curry leaves - Few
      HOW TO MAKE SNAKE GOURD PORIYAL
      1. Wash ad chop snake gourd into small pieces. Soak chana dal for 30 minutes.
      2. Heat oil in a pressure cooker base. Splutter mustard seeds, Urad dal, cumin seeds, curry leaves.
      3. Add onion and saute till transparent. Add the chopped snake gourd.
      4. Mix well. Add salt, turmeric powder, sugar and sambar powder. Mix it well.
      5. Lastly add soaked chana dal. Add 1/2 cup of water and pressure cook for one whistle in low flame.
      6. Open the cooker after the steam is released. Mix gently.
      7. Boil and drain the excess water if any. Lastly add grated coconut. Toss gently and switch off the flame.
      8. Serve with sambar rice, curd rice.
      METHOD - STEP BY STEP PICTURES

      • Wash and soak chana dal for 30 minutes. In the mean time, wash and chop snake gourd into small pieces. Chop the onion. Set aside.
      • snake gourd poriyal
      • In a pressure cooker base, heat oil. Splutter mustard seeds, urad dal and cumin seeds. Add chopped onion, curry leaves. Saute till onion becomes transparent.

      • Add chopped snake gourd, sambar powder, turmeric powder, salt and sugar. Mix for a minute. Lastly add soaked chana dal.
      • snake gourd poriyal
      • Add 1/2 cup of water. Mix well. Close the lid and keep the flame high. Once the steam starts to come off, put the weight valve. Keep the flame completely low.

      • Cook for one whistle. Open the cooker after steam is released. Mix gently without breaking the veggie. Boil and drain the excess water if any.
      • snake gourd poriyal
      • Lastly add the grated coconut and toss it gently. Switch off the flame. Serve with sambar rice and curd rice.
      • snake gourd poriyal
        Enjoy !

      Note

      • For variations you can add moong dal instead of chana dal.
      • You can add slit green chilli instead of sambar powder.

      Try this hotel style snake gourd poriyal with chana dal and enjoy !
      snake gourd poriyal

      Instant Kurma For Idli Dosa – 10 Minutes Kurma Recipe Without Coconut

      $
      0
      0
      Instant kurma for idli
      Recent days my readers are asking me to post instant , no grind kurma recipe for idli, dosa without coconut and vegetables. When I was searching for the same, I got this recipe from Sangee’s blog. This is an instant tomato kurma recipe without using coconut and mixed vegetables. Onion, tomato and besan flour forms the base of this gravy. As mentioned in the title, it can be done under 10 minutes. This kurma goes well for idli, dosa, appam, chapathi and poori. But It doesn’t suit for rice and idiyappam. I have already shared an Instant sambar for idli dosa using pottukadalai, onion and tomato. Its a super hit recipe in my blog. This kurma tastes similar to it but its an even more simplified version. I loved the ease of this recipe and the mild masala flavor which is ideal for my family. Everyone loved it. I have tried it thrice so far. I have also made in bulk for my guests. They too liked it. What else I need to blog this recipe😍. This recipe is ideal for bachelors and working women👍. For variations, you can add boiled potato too. Ok, Lets see how to make Instant kurma within 10 minutes for idli, dosa. After a long time, I have taken a video for this recipe. Its under editing. I will include it soon. Lets move on to the recipe below.


      Kurma for idli dosa

      Instant kurma for idli dosa


      Instant kurma for idli dosa

      Instant kurma recipe under 10 minutes using tomato, onion and besan flour.


      Cuisine:Tamil nadu
      Category:Kurma recipes
      Serves:Serves 2
      Prep time:10 Minutes
      Cook time:10 Minutes
      Total time:20 Minutes

      1 cup = 250ml
      • Ripe tomato - 2 nos
      • Big onion - 1 no
      • Garlic cloves - 3 nos (optional)
      • Curry leaves - Few
      • Turmeric powder - 1/4 tsp
      • Red chilli powder - 1/2 tsp
      • Coriander seeds powder / Dhania powder - 1/2 tsp
      • Garam masala powder OR curry masala powder - 1/2 tsp
      • Besan flour - 2 tsp
      • Water - 1/4 cup ( To dilute the besan flour)
      • Salt - as needed
      • Water - 1 cup (to cook onion, tomato)
      To Temper
      • Cooking oil - 2 tbsp
      • Cinnamon - 1 inch
      • Cloves - 2
      • Fennel seeds - 1/2 tsp
      HOW TO MAKE INSTANT KURMA FOR IDLI DOSA
      1. Wash and chop tomato, onion.
      2. In a kadai, heat oil. Temper cinnamon, cloves and fennel seeds.
      3. Saute onion, garlic and curry leaves. Add tomato and saute till mushy.
      4. Add salt and spice powders. Saute till raw smell vanish.
      5. Add 1 cup of water and cook onion, tomato. Dilute besan flour in little water.
      6. Add to gravy and roll boil for few minutes. Switch off the flame and garnish with coriander leaves.
      7. Serve hot with idli, dosa, chapathi or poori !
      INSTANT KURMA FOR IDLI DOSA - STEP BY STEP PICTURES
      • Wash and chop onion, tomato. Peel garlic and set aside. Heat oil in a kadai. Add cinnamon, cloves and fennel seeds.

      • Add the finely chopped onion, garlic cloves and curry leaves. Saute till onion becomes transparent.
      • Instant kurma for idli
      • Add tomato, required salt. Saute till tomato become mushy. Then add turmeric powder, red chilli powder, garam masala powder and saute till raw smell vanish.Instant kurma for idli
      • Add 1 cup of water and cook the onion, tomato till soft and mushy. In the mean time, take 2 tsp of besan flour. Add 1/4 cup of water and dilute it without lumps.
      • Instant kurma for idli

      • Add the besan water to the onion tomato mixture. Mix well and let it roll boil for 5 minutes till the gravy reaches desired consistency.
      • Instant kurma for idli

      • Garnish with coriander leaves, switch off the flame. You can make the gravy thin or thick as you wish by boiling it for extra time.
      • Instant kurma for idli
      Enjoy !

      Note

      • For variations, you can skip garam masala powder for mildly spiced gravy.
      • You can add more onions. Skip garlic.
      • You can make it thin if making for idli, dosa else make it thick for poori and chapathi.
      Try and enjoy this instant kurma with idli, dosa or chapathi !
      Kurma for dosa

      Easy Vanilla Popsicle Recipe – Milk Popsicle Without Condensed milk, Heavy Cream

      $
      0
      0
      vanilla popsicle recipe
      Yesterday Raksha and her friend wanted to make some easy popsicle recipe for holiday activity. She was looking for vanilla popsicle recipe with milk and sugar. I told her to make it without condensed milk or heavy cream as I didn’t have both in my hand. She googled and found this recipe in cookclickndevour. Its a very simple and easy recipe with just 3 major ingredients milk, sugar and corn flour. Raksha and her friend made it under my supervision. I was not sure of the output as this popsicle is without any creamy ingredient like condensed milk or fresh cream. But to our surprise, it came out very well. Kids became super happy to see the popsicle demolding beautifully. Only negative point is that this popsicle melts quickly and there may be few ice crystals while you eat. You should consume it immediately after taking out from the freezer. But this recipe wins your heart for sure. Friends do try this easy, yummy vanilla popsicle recipe along with your kids and enjoy ! Lets see how to make vanilla popsicle recipe with step by step pictures.

      Do check out my other ice cream recipes !

      Easy vanilla popsicle recipe

      Easy vanilla popsicle recipe


      Easy vanilla popsicle recipe

      Easy vanilla popsicle recipe for kids. Its a yummy milk popsicle recipe without using heavy cream and condensed milk.


      Cuisine:Indian
      Category:Popsicle recipes
      Serves:5
      Prep time:5 Minutes
      Cook time:10 Hours Minutes
      Total time:10H 5Minutes

      1 cup = 250ml
      • Boiled milk - 1 cup + 2 tbsp extra
      • Corn flour - 1 tsp
      • Sugar - 3 to 4 tbsp ( I used 3 tbsp)
      • Vanilla essence - 1/2 tsp
      • Popsicle mould - 5
      HOW TO MAKE VANILLA MILK POPSICLE
      1. To make vanilla popsicle, mix 2 tbsp milk with corn flour without any lumps.
      2. Add 1 cup of milk, sugar and vanilla essence. Mix to dissolve sugar.
      3. Boil in medium flame for 5 minutes by stirring constantly.
      4. Cool down the milk and pour in popsicle mould.
      5. Freeze it for 12 hours. Take the mould and dip in cold water for a minute.
      6. Demold the popsicle and consume immediately !
      VANILLA POPSICLE RECIPE - STEP BY STEP PICTURES
      • In a wide bowl, take 2 tbsp of milk (Boiled milk at room temperature). Mix corn flour without lumps.

      • Add this milk to 1 cup of boiled milk at room temperature. Add sugar and vanilla essence. Mix till sugar dissolves completely.

      • Now boil the milk in low to medium flame for 5 minutes. Keep mixing the milk to avoid burnt bottom. Switch off the flame and cool down the milk completely. 
      • Easy vanilla popsicle recipe

        Easy vanilla popsicle recipe
      • Pour in the mould. Cover it with the lid. Freeze it overnight or minimum 12 hours. The next day remove the popsicle mold. Dip in water or shown it under tap water for a minute. Remove the lid and demold it carefully. Consume it immediately because this popsicle melts quickly. Enjoy !  Easy vanilla popsicle recipe

      Note

      • For variations you can use 1/4 cup of condensed milk instead of sugar.
      • For more creamy popsicle, you can use heavy cream or fresh cream. But you should beat the cream until stiff peaks form and then mix the milk and sugar to it.

      Try this easy vanilla popsicle recipe and enjoy with your kids !
      Easy vanilla popsicle recipe

      Mango Mastani Recipe Pune Style – Mango Recipes

      $
      0
      0
      mango mastani
      Mango mastani is a popular dessert drink and a street food in Pune, Maharashtra. Mastani is basically a thick mango milkshake topped with vanilla ice cream or mango ice cream and nuts. Recently I watched an YouTube video from Sujata mastani shop, a popular outlet in Pune which sells mastani in different flavors. I got tempted to try at home and blog it as I didn’t post any mango recipes this year. Even though its my first attempt, it came out really tasty. You can use either vanilla ice cream or mango ice cream on top. In Sujata mastani recipe, they used mango ice cream. So I too followed the same. Its a must try recipe during this mango season. Friends, forget about the calories, try it and enjoy. Don’t forget to share your feedback with me. Ok, lets see how to make Pune style mango mastani recipe with step by step pictures.

      Do check out my other MANGO RECIPES too !

      mango mastani pune style

      Mango mastani recipe in Pune style


      Mango mastani recipe in Pune style

      Pune style mango mastani recipe


      Cuisine:North Indian
      Category:Drink
      Serves:Serves 1 to 2
      Prep time:10 Minutes
      Cook time:20 Minutes
      Total time:30 Minutes

      1 cup = 250ml
      • Ripe mango - 1
      • Sugar -  1 to 2 tbsp (adjust as per the taste of mango)
      • Boiled, chilled Milk - 1/2 cup
      • Mango ice cream - 2 scoops
      • Chopped Almond, Pista, Cashews, tutti frutti - a handful
      • Glazed cherries - 2 (to decorate)
      • Chopped mango – 2 to 3 tbsp
      HOW TO MAKE MANGO MASTANI RECIPE
      1. Wash and slice mango skin. Chop it.
      2. Grind to a thick, pourable milkshake adding milk and sugar.
      3. Pour the milkshake to a glass. Top it with a scoop of mango or vanilla ice cream.
      4. Garnish with nuts, tutti frutti chopped mango and a cherry !
      5. Serve immediately !
      MANGO MASTANI RECIPE - STEP BY STEP PICTURES
      • Wash and slice the mango skin. Chop into small cubes. Boil milk and cool down.

      • In a mixie jar, take the chopped mango, sugar, 1 scoop ice cream and milk. Blend to a smooth, thick puree.
      • mango mastani recipe
      • Pour into a medium length glass till 3/4th of it. Top it with a scoop of vanilla or mango ice cream. Garnish with chopped nuts, mango pieces and tutti frutti (If you like). Place a glazed cherry on top. Serve immediately ! Enjoy ! mango mastani recipe

      Note

      • For variations you can add some chopped mango pieces in the bottom of glass and then pour the milkshake.
      • Tutti frutti is optional.
      Try this easy, yummy mango mastani and enjoy !

      Ven Pongal Mix – Homemade Pongal Mix Recipe

      $
      0
      0
      After a long time I tried an Instant, ready to eat breakfast mix at home. Yes, its ven pongal mix recipe which was bookmarked long back from Radha mam’s space. Just like my rava upma and aval upma mix, it came out very well in my first attempt. In fact I loved this pongal made using pongal mix more than my regular pongal recipe. It was so soft and flavorful, reminded some restaurant taste to me. Actually I made it two weeks before but blogging this recipe now as I wanted to check its shelf life. It stays great till today even without refrigeration. This instant pongal mix recipe would be ideal for bachelors, working women and for people who travel abroad and for a tour. I made it using raw rice/ pacharisi. You can use boiled rice/ steamed rice/ Puzhungal arisi too. Friends, do try this yummy homemade instant ven pongal mix. Cook it under 15 minutes and enjoy with any chutney or sambar ! Soon I will try to share Karnataka style Khara pongal mix just like MTR pongal mix.


      Ven Pongal mix - Homemade Pongal mix recipe


      Ven Pongal mix - Homemade Pongal mix recipe

      Tamil nadu style ven pongal recipe mix with raw rice, moong dal, pepper and cumin seeds.


      Cuisine:Tamil nadu
      Category:Main course
      Serves:600gms
      Prep time:10 Minutes
      Cook time:20 Minutes
      Total time:30 Minutes

      1 cup = 250ml
      • Raw rice / Pacharisi - 2 cups
      • Yellow moong dal - 1/4 cup
      • Salt - as needed (I used 1.5 tbsp)
      • Pepper corns - 1.5 tsp
      • Cumin seeds - 1 tbsp
      • Asafetida / Hing - 1/2 tsp
      • Cashew nuts - 10 (Break into pieces)
      • Ginger - 1 inch (Chopped finely)
      • Curry leaves - Few
      • Ghee - 3 tbsp
      • Cooking oil - 1 tbsp
      To make ven pongal with mix
      • Ven pongal mix - 1 cup
      • Water - 4 to 4.5 cups (Depends on rice)
      • Ghee - 1 tbsp
      HOW TO MAKE INSTANT PONGAL MIX
      1. Heat oil + ghee in a kadai. Splutter pepper corns.
      2. Saute cumin seeds, ginger, cashew nuts, curry leaves and hing.
      3. Remove in a plate.
      4. Add some ghee. Roast moong dal and rice in low flame for 5 to 7 minutes.
      5. Add salt, mix well. Switch off the flame and let it cool down.
      6. Add the roasted cumin + pepper to the rice mixture.
      7. Store in a box after mixture cools down. Stays good for 2 to 3 weeks without refrigeration.
      PONGAL MIX RECIPE - STEP BY STEP PICTURES
      • Take the rice and dal, clean it by removing the dust. If you wish, you can wash the rice + dal, spread in a cloth and dry it.

      • Heat 1 tbsp cooking oil + 1 tbsp ghee in a kadai. Add pepper corns and roast in medium flame. When it starts to splutter, add cumin seeds, ginger bits, curry leaves and cashew nuts. Saute in low flame without burning any. Roast ginger pieces without any moisture. Remove everything in a plate.

      • Add the remaining 2 tbsp ghee in the kadai. Add moong dal and rice. Roast in medium flame for 5 to 7 minutes. Add required salt.  Switch off the flame.

      • Add the roasted cumin + pepper to rice, dal mixture. Mix well. Store in a box after the mix cools down completely.  

                              
      • It stays good for 2 to 3 weeks without refrigeration. You can also freeze it if you like.

      • To make ven pongal using pongal mix, take 1 cup of pongal mix in a pressure cooker base. Add 4 to 4.5 cups of water. Add 1 tbsp ghee. Mix well and pressure cook in very low flame for one whistle. Remove the lid after steam is released. Mix well and serve hot with coconut chutney or sambar. Enjoy ! 

      Note

      • For variations, you can use steamed rice / boiled rice instead of raw rice.
      • You can also powder pepper + cumin seeds instead of whole ones.

      Try this instant ven pongal mix at home. Make pongal under 15 minutes and enjoy !
      pongal mix recipe

      Onion Garlic Chutney For Idli Dosa – Poondu Vengaya Chutney Recipe

      $
      0
      0
      Onion garlic chutney
      Garlic chutney / poondu chutney for idli dosa with step by step pictures and video. My search for chutney varieties is endless. Whenever I come across an interesting and easy chutney recipe, I try it immediately. Recently I tried this easy onion garlic chutney without tomato, coconut (chinna vengayam poondu chutney in Tamil) from Madras samayal YouTube channel. It was so easy to make under 10 minutes. We all loved it with dosa. I am sure it tastes great with idli and chapathi as well. You can store this poondu chutney up to one week in refrigerator. I hope it stays good for travel too.  Friends, do try this easy, yummy, South Indian style garlic chutney for idli, dosa. You will love it. Lets see how to make onion garlic chutney with step by step pictures and video recipe.

      Check out my 70+ chutney recipes too !

      Easy tomato garlic chutney

      Garlic chutney

      Tomato raw garlic chutney for roti


      Garlic chutney recipe


      Onion garlic chutney recipe


      Onion garlic chutney recipe

      Small Onion, garlic chutney for idli, dosa - Chinna vengayam poondu chutney !


      Cuisine:Tamil nadu
      Category:Chutney recipe
      Serves:Serves 3
      Prep time:5 Minutes
      Cook time:10 Minutes
      Total time:15 Minutes


      • Garlic cloves - 15
      • Small onion /Shallots - 5 / Big onion - 1
      • Long red chilli - 8 + Kashmiri chilli - 3 (Use 15 chilli for spicy chutney)
      • Tamarind - Berry size
      • Salt - as needed
      • Gingely oil / Sesame oil - 1 tbsp
      To Temper
      • Gingely oil / Sesame oil - 1 tbsp
      • Mustard seeds - 1/2 tsp
      • Urad dal - 1/2 tsp
      • Curry leaves - Few
      • Asafetida / Hing - a pinch
      HOW TO MAKE ONION GARLIC CHUTNEY
      1. Wash and peel onion, garlic.
      2. Heat oil and saute onion, garlic, red chilli.
      3. Once transparent add salt, tamarind and switch off the flame.
      4. Grind to a smooth paste. Temper mustard, urad dal, hing and curry leaves.
      5. Switch off the flame and add the chutney. Mix well and serve with idli, dosa !
      ONION GARLIC CHUTNEY - STEP BY STEP PICTURES
      • Wash and peel small onion, garlic cloves and set aside. Heat 1 tbsp gingely oil in a kadai. Add chopped onion, garlic cloves, red chilli.
      • Vengayam poondu chutney
      • Saute in medium flame till onion, garlic becomes golden brown. Add required salt, tamarind. Mix well and switch off the flame. Let it cool down.
      • onion garlic chutney
      • Grind to a smooth paste adding required water. Set aside.
      • onion garlic chutney
      • Heat 1 tbsp gingely oil in the same kadai. Splutter mustard seeds, urad dal, hing and curry leaves. After the mustard splutters, switch off the flame. Add the ground chutney.
      • onion garlic chutney
      • Mix well and remove to a bowl. Serve with idli, dosa and chapathi. This poondu chutney stays good for a week if stored in refrigerator.

      Note

      • To make spicy chutney, use 15 red chillies. I used 5 chilli + 3 kashmiri chilli as I wanted less spicy taste.
      • You can skip Kashmiri chillies and use long red chilli or guntur chilli.
      • You can use 1 big sized onion instead of small onion.
      • Do not skip tamarind. It helps to balance the pungent taste of garlic.
      • Do not add more tamarind. Chutney tastes tangy.

      Try this easy, yummy garlic chutney for idli, dosa and enjoy !
      Onion garlic chutney


      Barbeque Nation Style Cajun Potatoes Recipe

      $
      0
      0
      cajun potato recipe
      Cajun potatoes was in my try list since I tasted in Barbeque nation hotel. Cajun fried potato with mayonnaise was served as starter. It was so tasty. We all loved it very much and had 2 servings extra. Raksha and Sendhil told me to try at home. When I was searching for Barbeque nation style Cajun potato recipe, I found one in my Instagram page feed. I tried it for a weekend lunch. It came out so well just like the ones in Barbeque nation. The recipe I followed was given from scratch with homemade Cajun spice mix recipe. So it was so easy and convenient . For variations, you can deep fry the potatoes. I shallow fried it. Also you can adjust the quantity of mayonnaise as per the taste. Lets see how to make Barbeque nation hotel style Cajun spice potato with step by step pictures.

      cajun potato

      Cajun potatoes recipe


      Cajun potatoes recipe

      Cajun spices potatoes recipe with mayonnaise


      Cuisine:Indian
      Category:Starter recipes
      Serves:Serves 4
      Prep time:10 Minutes
      Cook time:20 Minutes
      Total time:30 Minutes

      1 cup - 250ml
      • Baby potato - 12 no
      • Corn flour – 2 tbsp
      • All purpose flour / maida – 2 tbsp
      • Mayonnaise - 4 to 5 tbsp ( I used eggless mayo, Veeba brand)
      • Tomato ketchup- 1 to 2 tbsp
      • Cooking oil - to shallow fry potatoes.
      Cajun spice mix recipe
      • Garlic powder or garlic paste - 1 tsp
      • Dried oregano - 1/2 tsp
      • Dried thyme - 1/2 tspOR pizza seasoning – 1 tsp
      • Pepper powder - 1 tsp
      • Red chilli powder - 1 tsp
      • Big onion - 1 (finely grated or paste)
      • Salt - as needed
      HOW TO MAKE CAJUN POTATO
      1. Wash and pressure cook baby potato with skin adding salt and water in pressure cooker.
      2. Take the cooked potato and press with fork gently.
      3. Add corn flour, maida and coat well. Shallow fry them till golden brown on both the sides.
      4. Remove in a plate. To make Cajun spice mix, mix all the ingredients given under “Cajun spice mix recipe” in a bowl.
      5. Add mayonnaise, tomato ketchup. Mix well.
      6. Just before serving, add the mayo mix over the potato and serve !
      CAJUN POTATO RECIPE - STEP BY STEP PICTURES
      • Wash and pressure cook baby potato with skin adding required water and salt in a pressure cooker base. Cook in high flame for one whistle. Switch off the flame and . Potato should not be over cooked. It should be soft but retain its shape.
      • cajun potato recipe
      • Take the potato and press it with a spoon gently to flatten it. Coat it with maida and corn flour. Heat oil in a kadai. Shallow fry the potato both sides. Cook in medium flame to make the outer layer crispy. Flip it whenever needed and fry it.
      • cajun potato recipe  cajun potato recipe
      • In a bowl, mix all the ingredients given under “ Cajun spice mix recipe “. Add mayonnaise, tomato ketchup. Add little hot water to dilute the mix if needed.
      • cajun potato recipe  cajun potato recipe
      • Add the mayo, cajun mix to the potato and serve hot immediately.cajun potato recipe

      Note

      • You can use regular potato instead of baby potato. Just pressure cook whole potatoes.
      • For variations, you can deep fry the cooked potato instead of shallow frying it.
      • Adjust the quantity of mayonnaise and tomato ketchup based on your taste.

      Enjoy this yummy, kids friendly cajun potatoes at home ! Share your feedback with me.
      barbeque nation style cajun potato recipe

      Drumstick Leaves Poriyal / Murungai Keerai Poriyal Recipe

      $
      0
      0
      drumstick leaves poriyal
      Drumstick poriyal / Murungai keerai poriyal is an healthy, yummy stir fry recipe that goes well for sambar rice. Recently when I went to Salem, my in-laws got me a bunch of drumstick leaves (Murungai keerai in Tamil, Nugge soppu in Kannada). I always make sambar adding drumstick leaves. But this time for a change, I tried drumstick leaves poriyal with toor dal. I learnt this recipe from my friend Shalini. Usually this poriyal is prepared by tempering, sautéing and cooking drumstick leaves along with onion, red chilli and spices. But I pressure cooked toor dal, drumstick leaves and then did the above said procedure. So it helped to get a nice color of leaves. Friends, do try this yummy drumstick leaves poriyal with toor dal and share your feedback with me.

       Check out my drumstick leaves sambar recipe too !

      murungai keerai poriyal


      Drumstick leaves poriyal / Murungai keerai poriyal recipe


      Drumstick leaves poriyal / Murungai keerai poriyal recipe

      Drumstick leaves stir fry / Murungai keerai poriyal recipe with step by step pictures.


      Cuisine:Tamil nadu
      Category:Side dish
      Serves:Serves 3
      Prep time:10 Minutes
      Cook time:10 Minutes
      Total time:20 Minutes

      1 cup = 250ml
      • Drumstick leaves / Murungai keerai - 3 cups
      • Toor dal - 2 tbsp
      • Big onion - 1 ( finely chopped)
      • Red chilli - 1 to 2
      • Grated coconut - 1/4 cup
      • Salt & water - as needed
      • Sugar and turmeric powder - 2 pinch (to get bright green color)
      To Temper
      • Cooking oil or coconut oil - 1 tbsp
      • Mustard seeds - 1/2 tsp
      • Urad dal - 1 tsp
      • Cumin seeds - 1/2 tsp
      • Curry leaves - Few
      • Asafetida / Hing - a pinch
      HOW TO MAKE DRUMSTICK LEAVES PORIYAL
      1. Clean the drumstick leaves and wash it well to remove the sticks.
      2. In a pressure cooker, take the murungai keerai, toor dal, turmeric powder. sugar and required water.
      3. Pressure cook in low flame for one whistle. Drain the excess water and keep the keerai aside.
      4. In a kadai, heat oil temper mustard seeds, urad dal, cumin seeds and red chilli.
      5. Saute onion. Add cooked drumstick leaves with toor dal. Add required salt and toss well.
      6. Lastly add grated coconut, mix gently and switch off the flame. Serve with sambar rice !
      DRUMSTICK LEAVES PORIYAL - STEP BY STEP PICTURES
      • Clean the drumstick leaves by removing it from the stem. Discard all the stem and stalk part. Wash it thrice to remove the dirt and small sticks. It will settle down in the water. Remove the leaves and set aside.
      • drumstick leaves poriyal
      • In a pressure cooker base, take the washed toor dal,, drumstick leaves, sugar. Add required water and pressure cook for 2 whistles in very low flame. Drain the cooked water and consume as soup adding salt and pepper powder. (Don't worry toor dal won't turn mushy. It will stay firm  but cooked soft).
      • drumstick leaves poriyal
      • Heat oil in a kadai. Splutter mustard seeds, cumin seeds, urad dal, curry leaves, hing, red chilli and finely chopped onion. Add the cooked toor dal and drumstick leaves. Add required salt and toss well.
      drumstick leaves poriyal

    • Add grated coconut and switch off the flame. Mix well and serve with sambar rice.

    • Enjoy !
      drumstick leaves poriyal

      Note

      • You can skip toor dal and make this poriyal.
      • You can also use moong dal instead of toor dal.
      • For variations you can saute the drumstick leaves instead of pressure cooking it.

      Try this healthy drumstick leaves poriyal n enjoy with sambar rice !
      If you like, you can mix with plain rice adding few drops of ghee.
      drumstick leaves poriyal recipe

      Instant Rava Toast / Suji Toast Recipe Without Curd

      $
      0
      0
      suji toast without curd
      Instant rava toast also known as sooji / suji toast is one of the easy breakfast recipes I make regularly in my kitchen. Usually I prepare this rava toast without curd. This recipe may be new to some of you. So today I have shared my version of instant rava bread toast recipe without curd. I don’t say this rava toast comes out crispy and stays long. But it tastes really good when served hot. Kids would enjoy this toast with tomato ketchup. Its a very easy and quick, Indian style breakfast recipe with bread made with easily available ingredients at home. Semolina, onion, tomato and spice powders are the major ones. Bachelors and working women can make this recipe easily under minutes. You can even make it as kids snacks. Friends, do check out this easy, instant rava toast recipe. Try and share your feedback with me.

      rava toast


      Instant rava toast / sooji toast recipe


      Instant rava toast / sooji toast recipe

      Instant rava toast without curd in Indian style !


      Cuisine:Indian
      Category:Bread recipes
      Serves:6
      Prep time:10 Minutes
      Cook time:5 Minutes
      Total time:15 Minutes

      1 cup = 250ml
      • Bread - 6 to 8 slices
      • Semolina / Sooji / Bombay Rava - 1 cup (unroasted)
      • Big onion - 1 (finely chopped)
      • Tomato - 1 (finely chopped)
      • Capsicum - 1/4 (finely chopped)
      • Carrot - 1 (Grated)
      • Coriander leaves - 2 tbsp (finely chopped)
      • Hing / Asafetida - a pinch (optional)
      • Red chilli powder - 1 tsp
      • Garam masala powder - 1 tsp
      • Salt & water - as needed
      • Butter and cooking oil - to grease the pan and bread
      HOW TO MAKE SUJI TOAST WITHOUT CURD
      1. Wash and chop all the vegetables finely.
      2. In a wide bowl, take the semolina and mix all the ingredients.
      3. Add water to make a smooth batter without lumps.
      4. Batter should be slightly thick and pourable.
      5. Take a bread slice and spread the batter.
      6. Heat a dosa pan with butter. Toast the bread both sides.
      7. Remove once it turns golden brown.
      8. Serve rava toast with tomato ketchup !
      RAVA TOAST / SUJI TOAST RECIPE - STEP BY STEP PICTURES
      • Wash and chop onion, capsicum, tomato, coriander leaves. In a wide bowl, take the semolina (no need to roast it), chopped vegetables, salt and spice powders.

      • Mix everything well. Add water to make a smooth paste without lumps. Make sure batter is slightly thick but pourable. You should be able to spread a thin layer on the bread.
      • rava toast
      • Take a bread slice and spread the batter over the slice on one side. Heat a dosa pan and add a tbsp of butter. Let it melt.

      • Now keep the bread slice smeared with rava batter and roast in medium flame till it turns golden brown. Grease the other side of bread slice with butter or cooking oil.
        • rava toast
      • After the rava part turns golden brown, flip the other side. Cook till golden brown. Remove and enjoy hot with tomato sauce. Enjoy !
      rava toast

      Note

      • Adjust the quantity of chilli powder and garam masala powder as per your taste buds.
      • You can skip chilli powder and use finely chopped green chilli.
      • If you wish to add curd, you can add 1/2 cup curd to the above mixture and adjust water accordingly.

      Try this easy, instant rava toast / suji toast and enjoy !
      rava toast recipe

      Peerkangai Poriyal Recipe - Ridge Gourd Stir Fry Recipe

      $
      0
      0
      peerkangai poriyal
      Ridge gourd stir fry ( peerkangai poriyal in Tamil) recipe is my recent try with this vegetable. Ridge gourd is called as beerakaya in Telugu, peerkangai in Tamil, torai in hindi, hirekayi in Kannada and peechinga in Malayalam. It is also known as Chinese okra and sponge gourd. As we all know ridge gourd is a healthy vegetable with lots of health benefits. It is rich in dietary fiber , vitamin-C, zinc, iron, riboflavin, magnesium, thiamine and traces of another minerals. It is low in saturated fat, cholesterol and calories. So its good for weight loss as well. As ridge gourd gets cooked easily, this stir fry can be prepared under 10 minutes. Its a very simple recipe. It is sure is a good addition to my ridge gourd recipes. Friends, lets try to include this healthy vegetable in our regular diet and reap its benefits. Even we can use its skin/ peel and make an yummy thogayal with it. I will try to share the recipe in near future. Ok, lets see how to make this yummy, easy peerkangai poriyal with step by step pictures.

      Do check out my other ridge gourd recipes below

      Ridge gourd kuzhambu

      Ridge gourd poricha kootu

      Ridge gourd subzi for roti

      Ridge gourd dal
      Ridge gourd poriyal


      Ridge gourd stir fry

      Ridge gourd poriyal / peerkangai poriyal recipe


      Ridge gourd poriyal / peerkangai poriyal recipe

      South Indian style ridge gourd stir fry / peerkangai poriyal recipe for rice


      Cuisine:Tamil nadu
      Category:side dish
      Serves:Serves 2
      Prep time:5 Minutes
      Cook time:10 Minutes
      Total time:15 Minutes

      1 cup = 250ml
      • Ridge gourd - 1
      • Big onion - 1
      • Sambar powder or green chilli - 1 tsp / 2
      • Turmeric powder – 1/4 tsp
      • Sugar – a pinch
      • Salt & water - as needed
      • Grated coconut – 1/4 cup
      To Temper
      • Cooking oil - 2 tbsp
      • Mustard seeds - 1/2 tsp
      • Urad dal - 1 tsp
      • Chana dal - 2 tsp
      • Cumin seeds – 1/2 tsp
      • Curry leaves - few
      • Asafetida / hing - a pinch
      HOW TO MAKE RIDGE GOURD / PEERKANGAI PORIYAL
      1. Wash and peel the skin of ridge gourd. Cut into small cubes.
      2. Heat oil. Splutter mustard seeds, urad dal, cumin seeds, chana dal, curry leaves and hing.
      3. Saute onion, curry leaves. Add ridge gourd pieces, salt, turmeric powder, sambar powder and sugar.
      4. Mix well and saute in low flame. Cover and cook till ridge gourd becomes soft.
      5. If needed sprinkle little water and cook it.
      RIDGE GOURD STIR FRY - STEP BY STEP PICTURES
      • Wash and peel the skin of ridge gourd. Cut into small cubes. Chop onion.
      • Peerkangai poriyal
      • Heat oil. Splutter mustard seeds, urad dal, cumin seeds, chana dal, curry leaves, hing. Saute onion till transparent. 
      • Peerkangai poriyal
      • Add ridge gourd pieces, salt, turmeric powder, sambar powder and sugar. Mix well and saute in low flame. 
      • Peerkangai poriyal
      • Cover and cook in low to medium flame. Stir gently in regular intervals. Ridge gourd gets cooked by releasing water. So no need to add more water. If required you can sprinkle 1 to 2 tbsp of water. Ridge gourd shrinks in quantity once its cooked. Do not cook till mushy. Stay nearby and cook patiently.
      • Peerkangai poriyal
      • Switch off the flame once its cooked soft. Lastly add grated coconut and switch off the flame. Serve with sambar rice or you can mix this poriyal with rice adding few drops of ghee and enjoy !

      Note

                                
      • You can use slit green chilli instead of sambar powder.
      • You can also use roasted peanut powder instead of grated coconut.
      • Addition of sugar and turmeric powder helps to give bright green color to the poriyal.   

      Enjoy this yummy ridge gourd poriyal with sambar rice or vatha kuzhambu rice.
      Peerkangai poriyal

      Kalan Milagu Peratal / Mushroom Pepper Fry Recipe

      $
      0
      0
      I learnt this kalan milagu peratal also known as kalan milagu varuval in Tamil from my neighbor friend  who is from Chettinad. Mushroom pepper fry is served as a side dish for rice. Mushroom, onion and fennel seeds are the major ingredients in it. Recent days I have been trying varieties of mushroom recipes asking my friends, referring cookbooks. I am glad to learn this simple and yummy recipe. It came out well. Sendhil is not a fan of mushroom. But he liked this curry because of pepper flavor. Personally I liked it with sambar rice and rasam rice. Friends do try this easy mushroom pepper fry recipe / kalan milagu varuval and share your feedback with me.

      Do check out my other mushroom recipes too !


      Kalan milagu varuval / Mushroom pepper fry recipe


      Kalan milagu varuval / Mushroom pepper fry recipe

      South Indian, Chettinad style mushroom pepper fry called as kalan milagu varuval in Tamil. Its a good side dish for rice.


      Cuisine:Chettinad
      Category:Side dish
      Serves:Serves 2
      Prep time:10 Minutes
      Cook time:10 Minutes
      Total time:20 Minutes


      • Mushroom / Button mushroom - 15
      • Big onion - 1 (finely chopped)
      • Garlic cloves - 5 (-do-)
      • Pepper corns - 1 to 1.5 tsp
      • Fennel seeds - 1/2 tsp
      • Salt & water - as needed
      To Temper
      • Cooking oil - 2 tbsp
      • Mustard seeds - 1/2 tsp
      • Cumin seeds - 1/4 tsp
      • Curry leaves - Few
      HOW TO MAKE MUSHROOM PEPPER FRY
      1. Wash and clean mushroom. Slice it and set aside.
      2. Heat oil in a kadai. Splutter mustard seeds, cumin seeds and curry leaves.
      3. Saute onion, garlic till transparent. Add mushroom slices, salt and mix well.
      4. Cover cook in low flame by tossing it whenever needed.
      5. Coarsely crush the pepper + fennel seeds. Add to the cooked mushroom.
      6. Mix well and cook for a minute. Switch off the flame. Serve with rice !
      KALAN MILAGU PERATAL - STEP BY STEP PICTURES


    • Wash and clean the mushroom. Slice it and set aside. Slice onion thinly and keep aside.


      • Heat oil in a kadai. Splutter mustard seeds, urad dal, cumin seeds and curry leaves. Add onion, garlic and saute till transparent.

      • Add sliced mushroom, required salt and mix well. Cover the kadai with a lid. Cook in low flame till mushroom is cooked.

      • Coarsely powder the fennel seeds and pepper corns together. After the mushroom is cooked, add this powder and mix gently. Let it cook in low flame for a minute. 

      • Switch off the flame and serve this mushroom pepper fry with sambar rice or rasam rice.

      Note

      • Adjust the quantity of pepper corns as per your spice level.
      • For variations, you can skip fennel seeds.
      • You can also saute one green chilli along with onion and adjust the quantity of pepper accordingly.
      Try this easy mushroom pepper fry recipe and enjoy with rice ! I served it with thakkali kuzuhambu.


      Chettinad Vegetable Biryani Recipe

      $
      0
      0
      chettinad veg biryani
      Chettinad style vegetable biryani recipe was in my try list for long time. Even though I have posted Angannan hotel style biryani in vegetarian version, I wanted to try authentic home style veg biryani of Karaikudi, Chettinad. Recently I came across this chettinad veg biryani recipe in a YouTube channel. She mentioned it as arachu vacha biryani i.e biryani with freshly ground spices. This recipe doesn’t use any store bought spice powders like red chilli powder, garam masala or biryani masala powder. So this biryani has a nice aroma of freshly ground spices. Color of this biryani may vary based on the vegetables and masala. Mine was half white in color for the first time. So I added little turmeric powder in the second time and took pictures. So the color of biryani in step by step pictures and cover pictures may vary. But the taste and flavor was really good. Friends, do try this recipe and let me know how it turns out for you.

      Do check out my other Chettinad recipes too !

      chettinad vegetable biryani


      Chettinad vegetable biryani recipe


      Chettinad vegetable biryani recipe

      Chettinad vegetable biryani recipe


      Cuisine:Chettinad
      Category:Biryani recipes
      Serves:Serves 3
      Prep time:10 Minutes
      Cook time:20 Minutes
      Total time:30 Minutes

      1 cup = 250ml
      • Steamed rice / Puzhungal arisi - 1 cup
      • Cooking oil - 2 tbsp
      • Ghee - 1 tbsp
      • Cinnamon - 1 inch
      • Cloves - 2
      • Cardamom - 1
      • Bay leaf - 1
      • Black stone flower - 1
      • Fennel seeds – 1/2 tsp
      • Big onion - 1 (sliced or finely chopped)
      • Green chilli - 3 to 4
      • Ripe tomato - 1
      • Mixed vegetables - 1 cup (1 carrot, 10 beans, 1 potato, a handful green peas)
      • Turmeric powder – 1/2 tsp (optional, I used it)
      • Water - 2.25 cups
      • Salt - as needed
      To Grind - Paste 1
      • Mint leaves - a handful
      • Garlic cloves - 10
      To grind - Paste 2
      • Grated coconut - 2 tbsp
      • Cinnamon - 1 inch
      • Cloves - 2
      • Cardamom - 1
      HOW TO MAKE CHETTINAD VEG BIRYANI
      1. Wash the rice. Wash the vegetables and chop into small pieces.
      2. Grind paste 1 and paste 2 separately.
      3. Heat oil + ghee in a pressure cooker.
      4. Saute whole garam masala, fennel seeds. Add onion, green chilli and saute well.
      5. Add paste 1 and saute for a minute. Add vegetables, salt and mix well.
      6. Add paste 2 and saute for few minutes. Add water and washed rice.
      7. Mix gently and pressure cook in low flame for one whistle.
      8. Open the cooker and fluff the rice gently. Serve with raita !
      CHETTINAD VEG BIRYANI - STEP BY STEP PICTURES

      • Wash the rice and keep it aside. No need to soak it. Wash and chop the vegetables into small cubes.

      • Heat oil + ghee in a pressure cooker base. Saute the whole garam masala like cinnamon, cloves, cardamom and bay leaf.
      • chettinad vegetable biryani recipe
      • Saute onion, green chilli and few curry leaves till onion becomes transparent. Add tomato and saute till mushy. Add required salt for quick sautéing of tomato.

      • Then add mixed vegetables and saute well. In the mean time, grind paste 1 ingredients to a coarse paste. Add to vegetable and saute for a minute. chettinad vegetable biryani  
      • chettinad vegetable biryani


      • Grind the ingredients of paste 2 to a smooth paste adding required water. Add to the cooker. Add water, salt and turmeric powder (optional). Mix well and bring the water to a boil. chettinad vegetable biryani
      • chettinad vegetable biryani

        • Add washed rice and pressure cook for one whistle in low flame. For this, keep the flame high till steam comes out. As soon as steam comes out of the nozzle, put the weight valve and lower the flame completely. Cook till one whistle in low flame. Open the lid after the steam is released. Mix gently with a fork. Serve hot with onion raita ! chettinad vegetable biryani  chettinad vegetable biryani

        Note

        • Adjust the quantity of green chilli as per your taste. I made medium spiced biryani.
        • You have to grind the paste 1 and 2 separately.
        • For variations, you can grind green chilli along with garlic and mint leaves.
        • You can also use basmati rice or seeraga samba / jeera rice for more flavor.

        Try this flavorful Chettinad veg biryani and share your feedback with me. I served it with onion raita. I also prepared Barbeque nation hotel style cajun potato, curd rice. 
        chettinad vegetable biryani

        Carrot Kheer In Pressure Cooker - Carrot Payasam Recipe – Gajar Kheer

        $
        0
        0
        carrot payasam
        Carrot kheer is our family favorite Indian dessert recipe. We call it as carrot payasam in Tamil. Sendhil likes to eat carrots either raw or in the form of halwa, kheer more than kootu, poriyal. So I try to make this Indian style dessert at least once in a month for my Thursday Guru pooja or Friday Lakshmi pooja neivedyam. Usually I make carrot kheer by grating the carrot, saute in ghee and cook in milk. Mostly I make it in a kadai and its time consuming too. Recently I came across this carrot kheer recipe in a pressure cooker in a YouTube video and tried it for Thursday Guru pooja prasad. It came out very well and finger licking good. We loved it. Its easy and quick to prepare too. All you need is just to pressure cook sliced carrots, grind to a puree. Add sugar, milk and cardamom powder. Boil for few minutes and serve. The entire work gets over under 15 minutes. I made this kheer in a simple way without using condensed milk. For variations, you can use condensed milk in place of sugar. It tastes more rich and creamy. This carrot kheer is a crowd pleaser and party friendly recipe. It can be served both warm and cold. I am sure everyone will love it. Friends, do try this easy carrot kheer recipe in a pressure cooker and share your feedback with me.

        Check out my carrot kheer recipe in another method.

        carrot kheer


        Carrot kheer recipe - Gajar ka kheer recipe


        Carrot kheer recipe - Gajar ka kheer recipe

        Carrot kheer recipe in a pressure cooker


        Cuisine:Indian
        Category:Sweet
        Serves:Serves 4
        Prep time:5 Minutes
        Cook time:10 Minutes
        Total time:15 Minutes

        1 cup - 250ml
        • Carrot / Gajar - 3
        • Boiled milk - 1/2 liter
        • Sugar - 1/2 to 3/4 cup
        • Cardamom powder - 1/2 tsp
        • Cashew nuts - 5 + 5 for roasting
        • Badam/ almonds – 5
        • Ghee – 1 tbsp
        • Water - if required
        • Saffron threads - to garnish
        HOW TO MAKE CARROT KHEER
        1. Wash and peel the carrot. Cut into roundels.
        2. Pressure cook the carrot adding water, cashews and almonds in low flame for one whistle.
        3. Grind the carrot and nuts to smooth paste. Add to cooker.
        4. Add milk, sugar and cardamom powder. Boil for few minutes.
        5. Garnish with saffron threads. Roast chopped cashews in ghee and add to carrot kheer.
        6. Serve warm or hot. Enjoy !
        METHOD - STEP BY STEP PICTURES
        • Wash and peel the carrot. Trim the top and bottom part. Cut into roundels.
        • carrot  kheer in pressure cooker
        • Take the chopped carrot in a pressure cooker. Add 1 cup of water, 5 cashewnuts and 5 almonds. Pressure cook in very low flame for one whistle. Open the cooker after the steam is released.
        • carrot  kheer in pressure cooker
        • Grind to a smooth batter after carrot cools down. Take the pureed carrot in the pressure cooker or a kadai. Add 1.5 to 2 cups of milk, required sugar and cardamom powder. Mix well and boil till sugar dissolves completely.
        • carrot  kheer in pressure cooker
        • In the mean time, heat a small kadai. Roast chopped cashewnuts till golden brown. Add to the carrot kheer and switch off the flame. Garnish with saffron threads. You can serve it warm or chilled by refrigerating it for few hours.
        • carrot  kheer in pressure cooker
        • Enjoy this yummy carrot kheer. Its a crowd pleaser. You can make it for parties or get together. It stays good for 2 days in refrigerator. So you can make it in advance and serve chilled. Tastes creamy and delicious.

        Note

        • You can adjust the quantity of sugar as per your taste.
        • Quantity of milk can also be reduced or increased based on the thickness you need. I made it slightly watery.
        • This kheer thickens as it cools down. So you can add more water or boiled milk and bring to serving consistency.

        Try this easy, yummy carrot kheer and enjoy !
        carrot  kheer in pressure cooker


        Easy Chocolate Sandwich Recipe With Chocolate Syrup

        $
        0
        0
        chocolate sandwich recipe
        Here is an easy and quick chocolate sandwich recipe using Hershey’s chocolate syrup and butter. Usually chocolate sandwich is prepared by using cooking chocolate. But this is a quick and simple recipe I tried after tasting it in a popular Sandwich outlet named Hari super sandwich in Jayanagar, Bangalore. I watched him making this sandwich in a super quick method and took a video as well. Long back I shared the video in my Instagram page. After that I too started making chocolate sandwich very often in a slightly modified method for Raksha’s snack box and for our weekend breakfast. It has become our family favorite. It tastes so close to Hari's. Recently I noticed that I haven’t shared this simple recipe with you all. So I wanted to post this easy chocolate sandwich recipe today😊. You can use any chocolate syrup or chocolate spread in this recipe. You can use Nutella as well. I made this sandwich in a dosa tawa by toasting the bread greased with butter. You can also grill it and make grilled chocolate sandwich. It looks even more attractive. For variations, you can make this sandwich without fire, add grated cheese, garnish with chopped nuts, spirnklers etc. Make your own variations and enjoy. Friends, do try this super yummy chocolate sandwich recipe for your kids snacks or breakfast. It tastes great when served hot. Your kids would love it for sure and ask for more. Even your husband will love it😃. Do try it and share your feedback with me !

        Check out my otherSANDWICH RECIPES too !

        chocolate sandwich recipe using hersheys syrup


        Chocolate sandwich recipe with chocolate syrup


        Chocolate sandwich recipe with chocolate syrup

        Chocolate sandwich recipe with Hersheys chocolate syrup


        Cuisine:Indian
        Category:Kids recipes
        Serves:Serves 2
        Prep time:2 Minutes
        Cook time:2 Minutes
        Total time:4 Minutes


        • Milk bread - 8 slices
        • Butter - 2 to 3 tbsp (softened )
        • Hershey’s chocolate syrup - 3 tbp ( As needed)
        HOW TO MAKE CHOCOLATE SANDWICH RECIPE
        1. Take 2 bread slices. Apply bread on one side of the bread.
        2. Heat a dosa tawa. Lower the flame and toast the buttered side.
        3. While the bread gets toasted in low flame, apply chocolate syrup on one slice.
        4. Spread butter in the other slice. Do this job quickly. Cover it and remove in a plate.
        5. Drizzle some chocolate syrup over the sandwich and serve hot !
        CHOCOLATE SANDWICH RECIPE - STEP BY STEP PICTURES
        • Take 2 bread slices in a plate. Apply soft butter on one side of both bread.

        • Heat a dosa tawa. Lower the flame completely. Keep the buttered side on the tawa. Toast in low flame.

        • Immediately start to apply chocolate syrup on one of the bread slices. Apply butter in the other slice.
          • chocolate sandwich recipe using hersheys syrup
        • As soon as the bottom is toasted, cover the sandwich by placing buttered side over the chocolate side.  Do this process quickly else bread will burn at the bottom. Bread becomes soft as it toasts. Remove it and enjoy hot. I cut into 6 small pieces just like the way it was served in Hari Sandwich center. Its easy to eat and looks cute as well !
        • chocolate sandwich recipe using hersheys syrup
        • Drizzle more chocolate syrup if you like. Enjoy hot for best taste !

        Note

        • For variations, you can apply chocolate spread instead of syrup.
        • Remember you should keep the flame very low while spreading the chocolate and butter. Do it quickly else bread will burn at the bottom.
        • You can sprinkle some cheese gratings to make cheese chocolate sandwich recipe.
        • You can also grill the sandwich in a toaster instead of dosa tawa.
        • Use fresh milk bread for best taste.
        Try this yummy, kids friendly sandwich recipe and enjoy !
        chocolate sandwich recipe using hersheys syrup


        Viewing all 967 articles
        Browse latest View live