Quantcast
Channel: Chitra's Food Book
Viewing all 967 articles
Browse latest View live

Rava Adai Recipe – Sooji Adai Dosa Recipe

$
0
0

My husband loves South Indian Adai recipe with lentils / dal and rice. So I try to make varieties of adai recipes at home.  Recently I came across this rava adai recipe without rice in Chitra Murali’s kitchen YouTube channel. This is not an instant version. Its prepared by soaking dala. Rava, 4 different dals and curd are the major ingredients. It came out very well. It was soft in the corners and crispy in the middle.  Sendhil loved it. He couldn’t find any difference between our regular adai with rice and this rava adai. I am happy with this recipe and planning to make it often. Friends, If you are looking for some healthy breakfast and dinner recipes without rice, this is the one. Do give a try and let me know how you liked it. Lets see how to make this yummy rava adai recipe with step by step pictures.

Rava adai recipe


Rava adai recipe

Rava adai recipe - Sooji adai recipe with dal and semolina


Cuisine:South Indian
Category:Breakfast
Serves:8
Prep time:2 Minutes
Cook time:5 Minutes
Total time:7 Minutes

1 cup = 250ml
  • Bombay rava / Sooji / Semolina - 1/2 cup (unroasted)
  • Curd - 1/2 cup
  • Moong dal - 1/4 cup
  • Toor dal - 1/4 cup
  • Chana dal - 1/4 cup
  • Urad dal - 1/4 cup
  • Red chilli - 6 (I used 4)
  • Hing/ asafetida - 1/2 tsp
  • Big onion – 1 no (Chopped finely)
  • Curry leaves - Few
  • Ginger - 1 inch piece
  • Salt & water - as needed
  • Cooking oil - as needed
HOW TO MAKE RAVA ADAI
  1. Wash and soak the dals together for 2 to 4 hours.
  2. In a mixie jar, take red chilli, ginger, salt and hing. Grind coarsely.
  3. Add soaked dals and grind to a slightly coarse paste. Set aside.
  4. In a bowl take rava and curd. Add dal paste and mix well.
  5. Add required water to make it thick but pourable batter. Add onion, hing, curry leaves. Mix well.
  6. Heat dosa tawa. Spread a ladleful of batter. Drizzle oil and cook both the sides.
  7. Remove and serve hot with chutney, jaggery and butter !
RAVA ADAI RECIPE - STEP BY STEP PICTURES
  • Wash and soak dals together for 2 to 4 hours. In a mixie jar take red chilli, ginger, salt and hing.

  • Grind everything coarsely. Add soaked dals without water and grind to a slightly coarse paste. Set aside.

  • In a wide bowl, take the rava/ semolina and curd. Mix well. Add the dal paste and mix everything together. Add finely chopped onion, hing, curry leaves and coconut bits (optional). Add some water if needed and make a batter which is thick but pourable and spreadable.

      • Heat a dosa tawa. Pour a ladleful of batter and spread it slightly. Put a hole in the middle. Drizzle oil in the center and around the corners. Cover the dosa pan with a lid. Let it cook for a minute in medium flame. Open the lid and flip the adai. Cook the other side till golden brown.

      • Remove and serve hot with chutney or jaggery and butter ! Enjoy !.

      Note

      • For variations, you can reduce the quantity of curd to 1/4 cup.
      • Adjust the quantity of red chilli as per your taste.
      • You can also use rice rava instead of Bombay rava.

      Try this easy, yummy rava adai recipe and enjoy !


      Besan Toast Recipe – How To Make Bread Besan Toast

      $
      0
      0
      Besan toast recipe
      Last week I prepared few easy, instant breakfast and dinner recipes with bread. This Bread besan toast is one among them. Its a super quick recipe that can be prepared under 10 minutes. We can make this bread toast in a dosa tawa or oven. Usually I make this besan toast for Sunday breakfast if I wake up late in the morning. I used besan and rice flour to make the toast crispy. You can use rava / semolina too. Its a simple bread toast recipe with less calories. You can do many variations in this recipe by adding grated carrot, cheese etc. This recipe would be helpful for bachelors, working women to make a quick breakfast, dinner or evening snack. Kids would love it with tomato ketchup. It tastes the best when served hot. Friends, do try this easy, yummy bread besan toast and share your feedback with me. Check out the video below !


      Bread besan toast

      Besan toast recipe - Bread besan toast in a tawa


      Besan toast recipe - Bread besan toast in a tawa

      Besan bread toast recipe in a dosa tawa


      Cuisine:Indian
      Category:Breakfast
      Serves:Serves 2
      Prep time:10 Minutes
      Cook time:5 Minutes
      Total time:15 Minutes

      1 cup = 250ml
      • Bread slices - 5 ( I used Milk bread )
      • Besan flour - 1 cup
      • Rice flour or Semolina/ sooji - 2 tbsp
      • Red chilli powder - 1 tsp
      • Turmeric powder - 1/2 tsp
      • Garam masala powder - 1 tsp
      • Salt & water - as needed
      • Ajwain or cumin seeds - 1/2 tsp
      • Big onion - 1 (finely chopped)
      • Capsicum - 2 tbsp (-do-)
      • Coriander leaves - 2 tbsp (-do-)
      • Tomato - 1 (-do-)
      • Cooking oil or butter or ghee - to toast the bread
      HOW TO MAKE BESAN BREAD TOAST
      1. Wash and chop onion, tomato, capsicum.
      2. In a wide bowl, mix all the ingredients given above except cooking oil.
      3. Add required water and make a smooth, thick batter.
      4. Dip the bread slice in the besan batter. Heat dosa tawa adding oil or butter.
      5. Put the bread slice and toast both sides by drizzling oil, ghee or butter.
      6. Remove and enjoy hot with tomato ketchup.
      BESAN TOAST RECIPE - STEP BY STEP PICTURES
      • Wash and chop the vegetables finely. In a wide bowl, mix besan flour, rice flour, cumin or ajwain, chopped vegetables, coriander leaves, salt, chilli powder, turmeric and garam masala powder.

      • Add required water and mix well without any lumps. Batter should be slightly thick and spreadable.
      • Besan toast
      • Take a bread slice ( you can cut the bread slice into 2 triangles and use it too) and dip in the batter. Apply batter on both sides of the bread.

      • Heat a dosa tawa with butter or ghee. Keep the bread slice dipped in besan batter. Cook in low to medium flame on one side. Flip and cook the other side. Drizzle some cooking oil / butter or ghee all over the bread slice.
      • Besan toast
      • Remove after cooking both the sides to golden brown. Serve hot with tomato ketchup. Tastes yummy !    
              

      Enjoy !

      Note

      • For variations you can add 1 tsp of ginger garlic paste to the batter.
      • You can also add grated carrot, boiled corn kernels to the batter.
      • For kids, you can add some grated cheese while toasting the bread or garnish with grated cheese and serve it.

      Try this easy, yummy, kids friendly besan toast recipe and enjoy !
      Besan toast recipe

      How To Make Sprouts At Home – Moong Bean Sprouts – Green Gram Sprouts

      $
      0
      0
      Sprouts are nothing but germinated seeds that are high in nutrition. Some of the edible sprouts are alfalfa, broccoli, mung bean, green peas, chana and radish sprouts. Making sprouts at home is so easy. I make moong bean sprouts also known as green gram sprouts regularly for making sprouts salad for his lunch box, sprouted green gram kurma for roti and sometimes sprouts chaat in weekends. But I never thought of making a separate post for this until few of my readers asked me to make a detailed post on how to make sprouts at home. As we all know, sprouting a legume increases its nutritional value. Sprouts are rich in protein, vitamins and minerals. Sprouts are more helpful for weight loss by keeping the tummy full for long time. It is always better to consume homemade sprouts than the store bought ones as its more healthy, fresh and hygienic. Tomorrow I will share a simple moong sprouts salad that aids in weight loss. Before that we will see how to make sprouts at home easily in simple steps. Lets see how to make green gram sprouts with step by step pics.


      How to make sprouts at home


      How to make sprouts at home

      How to make green gram sprouts at home easily


      Cuisine:Indian
      Category:Health food
      Serves:2 cups
      Prep time:20 Minutes
      Cook time:20 Minutes
      Total time:40 Minutes

      1 cup = 250ml
      • Green gram / Moong bean - 1 cup
      • Water - to soak
      • Cotton cloth / kerchief - 1
      HOW TO MAKE SPROUTS
      1. Wash the green gram and soak overnight in enough water.
      2. The next morning drain the soaked water completely.
      3. Take the soaked green gram in a clean cotton cloth.
      4. Tie it and set aside for a day to two.
      5. Green gram would germinate and gets sprouted. Store this in a box inside refrigerator.
      6. Consume it within 2 to 3 days. You can make salad, gravy, rice and chaat with sprouts.
      HOW TO MAKE SPROUTS AT HOME - STEP BY STEP PICTURES
      • Wash the green gram (moong bean) twice or thrice. Add enough water and soak it for 8 hours or over night.

      • The next day morning drain all the soaked water from green gram. Keep the green gram in a clean cotton cloth. Tie the cloth and keep aside for one to two days.

      • After one day, open the cloth and check whether the moong bean is germinated. If not keep it for one or two days more. You can even refrigerate and sprout it.

      • Once its sprouted, transfer them to a clean container. Use whenever needed. It stays good for 2 to 3 days in refrigerator. Its always better to consume small sized sprouts. Do not consume if its over grown.

      Note

      • You can use green peas, brown chana / kala chana, ragi/ finger millet and sprout it. But sprouting time may vary based on the legume. 
      • Time duration for sprouts may differ based on the weather in your place.
      Try this easy method of making sprouts and share your feedback with me.

      7 Taste Uthappam / 5 Taste Uthappam Recipe

      $
      0
      0
      7 taste uthappam
      7 Taste Uthappam / 5 Taste Uthappam Recipe – Many of you would have tasted this dosa variety in restaurants like Saravana bhavan and many restaurants in Tamil nadu. Basically uthappam is a soft, spongy dosa that looks round and small in size. You can make it with freshly ground fermented idli, dosa batter or with leftover idli batter. Both tastes great. Onion uthappam is the most common oothappam variety. But this 5 taste / 7 taste uthappam with 7 different toppings makes this simple dish much more interesting. Though I haven’t tasted this recipe in Chennai Saravana bhavan, I have tasted it in Salem Saravana bhavan – asai dosai and Sree Saravana bhavan restaurant in Krishnagiri. But both the restaurants served 5 taste uthappam with masala toppings like mushroom masala, paneer masala, Gobi masala, grated carrot and small onion. It was so filling that I wasn’t able to eat 3 uthappam.  But the recipe I have shared here is very simple with light toppings. It won’t make you feel full at the same time its so appealing to eyes. Kids would love it for sure. Even we adults would be craving to eat it by seeing their colors. I have made this uthappam with the mini uthappam pan which I bought recently. I purchased it mainly for this recipe and to make pancakes for Raksha. If you don’t have this pan, you can make in dosa tawa itself. You can make 3 to 4 per batch based on the size of your dosa tawa. I have used onion, carrot, capsicum, coriander leaves, tomato + crushed pepper, Idli podi / Gun powder, dry fruits and nuts toppings. You can skip any two and make 5 taste uthappam. For variations, you can use paneer bhurji, grated cheese, chocolate chips even finely cut apple for different and interesting toppings. Friends, do try this easy and colorful 7 taste uthappam recipe and share your feedback with me ! Tomorrow I will upload the video too.

      7 taste uthappam recipe

      7 taste uthappam / 5 taste uthappam recipe


      7 taste uthappam / 5 taste uthappam recipe

      How to make easy and colorful 7 taste uthappam with idli dosa batter.


      Cuisine:Indian
      Category:Breakfast
      Serves:Serves 1
      Prep time:10 Minutes
      Cook time:10 Minutes
      Total time:20 Minutes

      1 cup - 250ml
      • Idli dosa batter - 1 cup
      • Big onion - 1/2 no ( finely chopped)
      • Colored Capsicum - 2 tbsp (finely chopped, I used green)
      • Tomato - 1/2 no (-do-)
      • Pepper powder - 1/4 tsp
      • Coriander leaves - 2 tbsp (finely chopped)
      • Carrot - 1 ( grated)
      • Dry fruits and nuts - 2 tbsp ( I used cashews and dry grapes)
      • Idli podi / Gun powder - as needed
      • Cooking oil / Sesame oil /Ghee - to drizzle over dosa
      HOW TO MAKE 7 TASTE UTHAPPAM RECIPE
      1. Wash and chop all the vegetables finely. Grate carrot.
      2. Take idli dosa batter and add little water if batter is too thick.
      3. Heat a dosa pan or uthappam pan. Pour small ladleful of batter. Do not spread it.
      4. Sprinkle the topping over each dosa. Drizzle oil around the dosa.
      5. Cook in medium flame. Flip and cook the other side till toppings become golden in color.
      6. Remove and serve hot with chutney or sambar !
      7 TASTE UTHAPPAM - STEP BY STEP PICTURES
      • To make 7 taste or 5 taste uthappam, prepare the toppings by finely chopping onion, capsicum, cashew nuts, tomato, coriander leaves. Grate carrot and keep aside.

      • Take 1 to 2 cups of idli dosa batter. You can use leftover idli dosa batter or with fresh fermented idli batter. If the batter is too thick add little water and bring to pouring consistency. Remember batter should not be too thin and watery.
      • 7 taste uthappam recipe
      • Heat a dosa tawa or mini uthappam pan (If you have it). Pour small ladles of batter in each hole. In dosa tawa, make 3 to 4 small sized thick dosa. Do not spread the batter.

      • Place the toppings over each dosa. Put chopped small onion in one, tomato and sprinkle some pepper powder in the second, capsicum in third, grated carrot, chopped coriander leaves, dry fruits and nuts in the remaining uthappam. Lastly sprinkle idli podi over the 7th uthappam. Drizzle oil or ghee (for kids) around each dosa. Cook in medium flame and flip the dosa.

      • Cook the toppings side patiently till each of them is cooked well and turns slight golden brown in color. You can remove carrot and coriander uthappam earlier than onion uthappam.
      • 7 taste uthappam recipe
      • Remove in a plate and serve hot with chutney and sambar ! Enjoy !

      Note

      • For variations you can use grated cheese, grated paneer, chocolate chips and favorite fruits.
      • To make 5 taste uthappam, skip any two toppings and make the remaining.
      • Adding ghee gives the best taste. But you can use cooking oil or sesame oil for low calorie version.
      • Coconut chutney or sambar is the best side dish for these uthappam.
      Colorful, tasty 7 taste uthappam is ready ! Enjoy !
      7 taste uthappam recipe

      Muscoth Halwa Recipe – Halwa Without Ghee

      $
      0
      0
      Muscoth halwa

      Muscoth halwa / Muscat halwa is a popular halwa recipe in Mudalur near Tuticorin (Thoothukudi), Tamilnadu. It is also known as Mudalur halwa. AJJ bakery/ sweet shop is very famous for this halwa preparation. I got this recipe from a Tamil magazine where the sweet shop owner has given the recipe with measurements. I reduced the sugar quantity and tried it. I also watched Sutralaam suvaikalaam Youtube channel video for more details. This halwa is prepared using Maida milk / All purpose flour milk and coconut milk. It can be called as coconut milk halwa too. Highlight of this halwa is its made without adding a drop of ghee or oil. The oil releases from the coconut milk makes the halwa glossy and flavorful. If you are a big fan of coconut based recipes, you must try this halwa. It looks and tastes similar to Tirunelveli halwa. Patience is the only thing you need to make this halwa successfully. It needs a day for pre- preparation and an hour to cook.  But it tastes great with the nice flavor of coconut. You will love it ! For variations, you can use wheat flour instead of maida. But authentic, sweet shop recipe uses all purpose flour/ maida. But this halwa stays good for 2 to 3 days as we are using coconut milk. Use a good non-stick kadai for best results. If you have an iron kadai, you can use that as well.

      Recently Kent appliances sent me a non-stick kadai (Kent Red plus with SS lid) for my review about the product. I have shared a picture of it in my Instagram feed as well. Kent by Kent Appliances is a kitchen appliance brand. It caters to the various needs of homemakers in the country. It has a varied product portfolio ranging from pressure cookers, non-stick cookware, hard anodized cookware, thermoware, mixer grinders to varied other electrical appliances and kitchen tools. The company has been at the forefront of innovation and has been the fastest growing company in the kitchen appliance space. When they sent me a kadai for reviewI wanted to try some sweets with it because its easy to identify the final consistency. As this Muscoth halwa is without ghee, I felt it would be ideal for making in the new kadai. As expected, kadai was so good. I cooked this halwa for more than one hour still the kadai and its handle was heat resistant. Spatula is good and sturdy. Halwa came out beautifully without sticking to the pan. I loved the red outer coating which is my favorite color too. Above all this product has one year warranty. I started using this kadai in my regular cooking. So far so good ! Friends, if you are planning to buy this kadai, use CHITRAS5 coupon code for 5% discount (for purchasing through website only).
      Check out their website, Facebook and Instagram page links below to see all their products.

      Website : https://kentappliances.com/

      Facebook:  https://www.facebook.com/KENT-Appliances-486182058591104/

      Instagram:  https://www.instagram.com/kent_appliances/

      Note : This is not a paid post. 

      Lets see how to make this yummy Muscoth halwa recipe with step by step pictures. I am happy to include this halwa in my halwa recipes collection.

      Muscoth halwa recipe

      Muscoth halwa recipe


      Muscoth halwa recipe

      Muscoth halwa / muscat halwa recipe - An yummy halwa recipe without using ghee


      Cuisine:South Indian
      Category:Sweet
      Serves:8 pieces
      Prep time:10 Minutes
      Cook time:20 Minutes
      Total time:30 Minutes

      1 cup = 250ml
      • Maida / all purpose flour - 1 cup
      • Coconut milk - 4 cups using 1 big coconut
      • Sugar - 2 cups ( 1.25 cups + 3/4 cup for caramel)
      • Cashew nuts – 5 ( break into small pieces)
      • Ghee - Few drops to grease the halwa plate
      HOW TO MAKE MUSCOTH HALWA
      1. To make Muscoth halwa, take maida in a wide bowl and make a smooth dough adding water.
      2. Add 3 cups of water to the maida dough. Mix it well with your hands. Dough dissolves in water and you will get white colored milk.
      3. Discard the gluten part and set the maida milk aside. Keep it covered and leave overnight.
      4. The next morning, discard the water carefully and use the sedimented maida milk for making halwa.
      5. In a kadai, add maida milk, coconut milk, 1.25 cups sugar and start cooking in medium flame.
      6. In another small kadai, take 3/4 cup sugar and a tsp of ghee. Mix well and caramelize it in low flame.
      7. Add to maida mixture , add cashew nuts and keep cooking for an hour. Remove when halwa starts to release oil in the sides of kadai.
      8. Transfer the halwa to a ghee greased plate. Cut into pieces when warm. Serve and enjoy !
      9. Tastes best the next day !
      MUSCOTH HALWA RECIPE - STEP BY STEP PICTURES
      • In a wide bowl, take 1 cup of maida/ all purpose flour. Add water gradually and make a smooth dough. No problem even if the dough is sticky. Add 3 cups of water to the dough and start mixing with your hands. Dough dissolves in water and you will get white colored maida milk.
      • Muscoth halwa recipe
      • Keep mixing till you get the fiber like gluten part separately. Squeeze well and discard it. Now maida milk with water is ready. Cover the milk bowl with a plate and rest it overnight or 6 hours. Maida milk will be settled down and you will find the water on top. Drain the water carefully. No problem if little water is present with maida milk. Measure the sedimented maida milk. You will get around 1 cup. Keep it aside. Muscoth halwa recipe
      •  Muscoth halwa recipe
      • Take one big coconut. Grate it or make pieces. Grind to a smooth paste adding 1 cup of warm water. Strain and collect the coconut milk in a bowl. Add more warm water and take the second milk too. Total quantity of coconut milk should be 4 cups. So you can add water based on this. In a kadai take 1 cup of maida milk, 4 cups of coconut milk, 1.25 cups of sugar. Mix well. Muscoth halwa recipe
      • Muscoth halwa recipe
      • Keep the kadai in medium flame and keep stirring till sugar dissolves. After 5 to 10 minutes, halwa starts to thicken. Keep cooking by changing the flame from low to medium high.
      • Muscoth halwa recipe
      • In the mean time, keep a small kadai in another gas burner. Add 3/4 cup sugar and a tsp of ghee. Keep the flame very low. Mix well till sugar dissolves and changes the color to golden brown. Do not burn the sugar. Halwa tastes bitter. This process is called sugar caramelization. Switch off the flame and add the caramelized sugar to the halwa. Do it quickly. Mix well. Muscoth halwa recipe
      • Muscoth halwa recipe
      • Color of halwa changes to golden brown. Add cashew nut pieces. Keep mixing the halwa for another 30 minutes. Halwa thickens completely and leave the sides of kadai. It rolls with the ladle and becomes a lump. It will be non-sticky to touch. If you want, you can remove the halwa to a ghee greased plate at this stage. Set it till warm, cut into pieces and enjoy. It tastes good. But If you want really glossy halwa like in sweet shops , you need to proceed to the next step. Muscoth halwa recipe
      • Keep the flame medium and mix until halwa starts to leave traces of oil in the sides of kadai. Total cooking time would be more than one hour. Once you see the oil releasing in the sides, remove and transfer to a ghee greased plate. Level it with ghee greased spatula. Rest the halwa till warm, invert to a plate. Make pieces and consume within 2 to 3 days. Enjoy ! Muscoth halwa recipe Muscoth halwa recipe

      Note

      • For healthy options, you can use wheat flour / atta instead of maida.
      • You can skip cashew nuts.
      • You can also reduce the quantity of coconut milk to two cups and make this halwa. But halwa won’t release oil. You can remove once it becomes non-sticky.
      • Actual recipe called for fermenting maida milk overnight. But I saw many recipes that make the maida milk instantly. You can try that way too.
      • Cardamom powder is not needed. If you wish, you can add it.


      Friends, try this easy yummy Muscoth halwa and enjoy with family and friends.

      It stays good only for 2 to 3 days because of coconut milk.


      Heerekayi Palya Recipe – Karnataka Style Ridge Gourd Gravy For Roti, Rice

      $
      0
      0
       heerekai palya
       Recently my neighbor from North Karnataka gave me some Jolada roti / Jowar roti , ridge gourd / Heerekai palya  (Kannada name )and brinjal / badanekayi chutney as side dish. I have tasted jolada roti oota in Kamat restaurant but this gravy and chutney recipes were new to me. It was so tasty and made me eat 3 rotis 😋. When I shared this picture in my Instagram feed, many of my friends and readers asked me to share the recipe of heerekayi palya. This afternoon I got the recipe from my neighbor and prepared it for our lunch. It came out so well. Its a very simple recipe with peanut and till seeds/ black sesame seeds masala as base for this gravy. Its very similar to Ennegai recipe prepared using brinjal which is the most popular side dish for Jolada roti. Some people call this heerekayi palya as stuffed ridge gourd palya / heerekayi ennagai palya in Kannada. But there is a small variation in this gravy. Friends, I bet no one could find that this gravy is prepared with ridge gourd. Its so flavorful and tastes great with jowar roti, rice and chapati. Do try it once. You will love it and start to make it often. Its so easy to prepare too ! Ok, lets see how to make North Karnataka style (Uttara Karnataka) heerekai palya recipe with step by step pictures.

      Check out my other interesting Karnataka recipes.

      heerekayi palya

      Heerekai palya - North Karnataka style ridge gourd gravy


      Heerekai palya - North Karnataka style ridge gourd gravy

      Heerekai palya - North Karnataka style ridge gourd gravy for jolada roti, rice and chapati.


      Cuisine:Karnataka recipes
      Category:side dish for jolada roti
      Serves:Serves 4
      Prep time:10 Minutes
      Cook time:20 Minutes
      Total time:30 Minutes

      1 cup = 250ml
      • Ridge gourd - 1 (Long and big)
      • Big onion - 1 (Big)
      • Tomato - 1 (big)
      • Salt & water - as needed
      To grind
      • Roasted peanuts without skin - 1/4 cup
      • Black till seeds powder - 1 tbsp
      • Green chilli - 3(Use 2 for less spice)
      • Coriander leaves - 2 tbsp
      • Curry leaves - 10
      • Cumin seeds - 1/2 tsp
      • Sambar powder - 1 tsp ( I used MTR sambar powder, refer notes)
      • Turmeric powder = 1/4 tsp
      • Coconut - 1 tbsp (optional)
      To Temper
      • Cooking oil - 3 tbsp
      • Mustard seeds - 1 tsp
      • Cumin seeds - 1/2 tsp
      • Curry leaves - Few
      HOW TO MAKE RIDGE GOURD GRAVY / HEEREKAI PALYA
      1. Wash and peel the ridges of ridge gourd & skin.
      2. Chop into 2 inch size lengthy pieces. Set aside.
      3. Grind all the ingredients given under “To grind” to a smooth paste adding water.
      4. Heat oil in a kadai. Splutter mustard seeds, cumin seeds and curry leaves.
      5. Saute onion, tomato and ridge gourd pieces till soft. Add the ground masala paste.
      6. Saute till raw smell goes off. Add required water, cover and cook till ridge gourd is done.
      7. Remove and serve hot with Jolada roti / Jowar roti, rice or chapathi !
      HEEREKAI PALYA - STEP BY STEP PICTURES
      • Wash and peel the ridges and skin of ridge gourd. Do not remove the skin completely. But ridges should be removed and discarded. Chop the ridge gourd into 2 inch pieces in length. Wash and set aside.

      • In a mixie jar take roasted peanuts (without skin), black sesame seeds powder(uchellu podi, dry roast and powder it), green chilli, cumin seeds, coriander leaves, curry leaves, dry coconut, turmeric powder and sambar powder ( If you are not using Karnataka sambar powder, add 1 piece cinnamon and 1 clove along with usual sambar powder). Grind everything to a smooth paste adding required water. Set aside.
      • heerekayi palya
      • Heat oil in a kadai and splutter mustard seeds, urad dal and curry leaves. Add onion and saute till transparent. Add tomato, required salt and saute till mushy.
      • heerekayi palya
      • Add ridge gourd pieces and saute till it becomes soft. Add ground masala paste. Saute till its raw smell goes off. Now add the required water, check for taste.
      • heerekayi palya
      • Cover and cook for sometime. Open the lid and mix once or twice in the middle. Cook till ridge gourd is cooked completely but not mushy. It should retain its shape. 
      • heerekayi palya
      • Adjust the consistency of gravy by adding water. Switch off the flame and serve hot with jolada roti, rice and chapathi. Enjoy !

      Note

      • Adjust the quantity of green chilli based on your taste.
      • Sesame seeds powder and peanut forms the base for this gravy. So do not skip it.
      • You can use snake gourd, lady’s finger instead of ridge gourd.

      Yummy, Karnataka style ridge gourd gravy is ready to relish with jowar roti, rice !
      ridge gourd gravy

      Varalakshmi Vratham Recipes – Varamahalakshmi Festival Recipes

      $
      0
      0
      varalakshmi vratham recipes
       In this post, you can find the list of naivedyam / prasadam recipes of Tamil nadu, Andhra pradesh and Karnataka for Varalakshmi pooja. Varalakshmi Vratham/Varamahalakshmi festival is the most auspicious festival celebrated by married woman (Hindu) to commemorate Goddess Mahalakshmi. "Vara" means "boon" and Goddess Lakshmi grants all boons to those who performs pooja with utmost devotion on this day. People of South Indian states like Tamil nadu, Andhra and Karnataka and North Indian states like Maharashtra and Orissa celebrate this festival in a grand manner. This festival falls on the second Friday of August/ Sravana masam (Avani in Tamil). In 2019, its on August 9th, Friday. Goddess Lakshmi loves special dishes prepared with milk, jaggery, rice, coconut, dal and ghee. So people offer 3, 5, 7 or 9 dishes for Varalakshmi pooja naivedyam / prasadam with these ingredients as major ones. Sweet pongal, Payasam, tamarind rice, lemon rice, curd rice, kesari, vada, panakam, sundal, kozhukattai are the major neivedyam recipes prepared in Tamil nadu. Apart from this, people also offer white rice (cooked raw rice), cooked dal (paruppu) and little ghee for Mahanaivedyam. Some people also make raw rice idli. In Andhra, people offer boorelu, bellam paramannam, pulihora, garelu, chakkara pongali, panakam, pappu unta, daddojanam, perugu vada and sundal. In Karnataka Chitranna, bele holige, vada, kosambari, shavige payasa, panaka, sihi pongal, chakli, kodubele are offered to Goddess. In all these states people make similar naivedyam recipes but the preparation method and ingredients are slightly different. I have listed all the possible Varalakshmi festival special dishes for each state. Hope you will find this list useful to choose and prepare naivedyam.

      Wish you all a very happy Varalakshmi pooja. May the Goddess bless us with all the goodness of life !

      Before going to the recipes list, check out my detailed post on Varalakshmi vratham pooja procedure / puja vidhanam with slokhas. 


      VARALAKSHMI VIRATHAM RECIPES – TAMIL NADU

      varalakshmi pooja recipes

      • Cooked rice / Raw rice ( rice & water ratio is 1:2.5)

      VARAMAHALAKSHMI FESTIVAL RECIPES – KARNATAKA

      varamahalakshmi recipes

      VARALAKSHMI VRATHAM RECIPES – ANDHRA PRADESH

      varalakshmi vratham recipes


      Check out other recipes below


      Baby Corn Masala Gravy For Chapathi / Roti

      $
      0
      0
      baby corn masala for chapati
      This is my first try on baby corn masala gravy for chapathi and roti. I watched few YouTube videos and came up with this north Indian style gravy recipe with onion, tomato base. This recipe is without coconut. It tastes so good. We all loved it with soft chapati. It tastes similar to restaurant style paneer butter masala. Its not so spicy too. I made this gravy directly in a pressure cooker for easy and quick cooking. If you make it a thick gravy, you can keep in a dosa and make baby corn masala dosa as well. Friends, do try this yummy North Indian style baby corn masala gravy and enjoy with chapathi, roti or naan. Lets see how to make baby corn masala with step by step pictures and video.


      baby corn masala gravy recipe

      Baby corn masala gravy for chapathi, roti


      Baby corn masala gravy for chapathi, roti

      Easy baby corn masala gravy in a pressure cooker. Its a good side dish for chapati, roti and naan.


      Cuisine:North Indian
      Category:Main course
      Serves:Serves 4
      Prep time:10 Minutes
      Cook time:20 Minutes
      Total time:30 Minutes

      1 cup =250ml
      • Baby corn - 4 to 5
      • Big onion - 1
      • Ginger garlic paste / gg paste – 1 tsp
      • Ripe tomato - 2 big (Grind to puree)
      • Cashewnuts - 8 to 10(Grind to a paste adding milk/water)
      • Turmeric powder - 1/4 tsp
      • Red chilli powder - 3/4 tsp
      • Coriander powder / dhania powder - 1 tsp
      • Garam masala powder - 1/2 tsp
      • Crushed kasoori methi - 1 tsp
      • Cinnamon, cloves, cardamom and bay leaf – 1 each
      • Cumin seeds or shahjeera – 1/2 tsp ( I used black cumin seeds)
      • Salt & water - as needed
      • Cooking oil - 2 tbsp (Any Flavorless oil)
      • Butter - 2 tsp (optional)
      • Coriander leaves - to garnish
      HOW TO MAKE BABY CORN MASALA GRAVY
      1. Wash and chop baby corn into small roundels.
      2. Grind tomato to a smooth paste and set aside.
      3. Grind cashew nuts to a smooth paste adding little milk or water.
      4. In a pressure cooker, heat oil + butter. Saute whole spices and cumin seeds.
      5. Add onion, gg paste and saute for a minute. Add spice powders and saute in low flame.
      6. Then add tomato puree, salt and sugar. Mix well.
      7. Add baby corn pieces and cashew paste. Add garam masala powder. Mix well and add water.
      8. Pressure cook in low flame for 2 whistles. Open the cooker and add kasoori methi.
      9. Give a boil. Garnish with coriander leaves. Serve hot with chapati, roti and naan.
      BABY CORN GRAVY RECIPE - STEP BY STEP PICTURES
      • Wash and clean the baby corn by removing the fiber part. Cut into small, thick roundels. Set aside. Chop onion finely. Grind tomato to a smooth puree adding required water.

      • Grind cashew nuts to a smooth paste adding required water or milk. Set aside. 

      • In a pressure cooker base, heat oil + butter. Saute cinnamon, cloves, cardamom, bay leaf and cumin seeds / black cumin seeds. Saute for a minute in medium flame without burning it.
      • baby corn masala gravy recipe
      • Add the chopped onion and saute till transparent. Then add ginger garlic paste. Saute till its raw smell goes off. Reduce the flame to low. Add turmeric powder, red chilli powder and coriander powder. Saute for a minute without burning the powders.
      • baby corn masala gravy recipe
      • Now add the tomato puree, salt and sugar. Stir it well. Let it boil in medium flame till the puree thickens and leaves oil in the sides. 
      • baby corn masala gravy recipe
      • Now add 1 cup of water, chopped baby corn, cashew nuts paste and garam masala powder. Mix well and check for taste. Add more salt and chilli powder if needed. Close the lid and pressure cook for two whistles in low flame. Open the cooker after steam is released. Check for the consistency of gravy. If its too thin, boil for sometime till  slightly thick. Lastly add crushed kasoori methi and coriander leaves. Mix well and boil for a minute. Switch off the flame and serve hot with roti/ chapati / naan. Enjoy ! 
      baby corn masala gravy recipe  baby corn masala gravy recipe  

      Note

      • Adjust the quantity of chilli powder as per your spice level.
      • Do not skip cashew paste as it adds thickness and richness to the gravy.
      • For more richness, you can add a tbsp of fresh cream at the end before serving.

      Try this yummy baby corn masala gravy and enjoy with roti/ chapati.
      baby corn masala recipe


      Betel Leaves Rasam – Vetrilai Rasam Recipe - Vethalai Rasam

      $
      0
      0

      Betel leaves / vetrilai rasam also known as paan leaves was in my try list for long time. After Varalakshmi pooja, I had so many betel leaves in hand. Usually I make homemade paan /  sweet beedaor have it with gulkand as it helps for better digestion. As you all know, betel leaves has innumerable health benefits and uses. So this time, I wanted to make vethilai rasam. I followed my tomato rasam recipe, made slight changes and came up with this recipe. With the dominating flavor of betel leaves, it tasted yummy. Sendhil & myself loved it. Use vellai vethalai for best taste. Karuppu vetrilai may taste bitter and gives a pungent taste. Friends, do try this easy betel leaves rasam for a change. You will love it like us. Ok, lets see how to make vetrilai rasam with step by step pictures.

      betel leaves rasam recipe

      Betel leaves rasam / vetrilai rasam / vethalai rasam recipe


      Betel leaves rasam / vetrilai rasam / vethalai rasam recipe

      Betel leaves rasam / vetrilai rasam / vethalai rasam recipe for rice


      Cuisine:South Indian
      Category:Rasam recipes
      Serves:Serves 4
      Prep time:10 Minutes
      Cook time:20 Minutes
      Total time:30 Minutes

      1 cup = 250ml
      • Betel leaves - 2 or 3 ( I used 3 small leaves)
      • Ripe tomato - 1
      • Green chilli - 1
      • Pepper - 1/2 tsp
      • Cumin seeds - 1 tsp
      • Dhania / coriander seeds - 1 tsp
      • Garlic cloves - 5
      • Tamarind – Berry size
      • Sugar - 1/4 tsp
      • Turmeric powder – 1/4 tsp
      • Salt & water - as needed
      • Coriander leaves - to garnish
      To temper
      • Ghee - 2 tsp
      • Mustard seeds - 1/2 tsp
      • Cumin seeds - 1/4 tsp
      • Hing / asafetida - a pinch
      • Red chilli - 1
      HOW TO MAKE BETEL LEAVES / VETRILAI RASAM
      1. Wash and remove the stalk of betel leaves.  Tear the leaves and take in a mixie jar.
      2. Add chopped tomato, green chilli, tamarind, pepper, cumin, dhania, garlic cloves and grind to a smooth paste.
      3. Take the paste in a kadai. Add salt, turmeric powder, sugar and 1 cup of water.
      4. Boil for few minutes till frothy and nice smell arises.
      5. Temper mustard seeds, cumin and red chilli. Add to rasam. Garnish with coriander leaves.
      6. Serve hot with plain rice adding few drops of ghee.
      BETEL LEAVES RASAM RECIPE / VETRILAI RASAM - STEP BY STEP PICTURES
      • Wash the betel leaves. Remove the stalk part (kaambu). Tear the leaves roughly. Take in a mixie jar.
      • Add chopped tomatoes, pepper, cumin seeds, dhania, green chilli, garlic to the mixie jar.betel leaves rasam recipe
      • Grind to a smooth paste adding required water.
      • Heat a kadai and add the rasam paste. Add 1 cup of water, turmeric powder, salt and sugar. betel leaves rasam recipe
      • Let it boil for few minutes till frothy with a nice smell. Switch off the flame. 
      • Heat ghee in a small kadai. Temper mustard seeds, cumin seeds, red chilli and hing.betel leaves rasam recipe
      • Add to the rasam. Garnish with coriander leaves. Serve with plain rice adding ghee. Enjoy !

      Note

      • Adjust the quantity of betel leaves based on the size. I used 3 small ones, if big use 2. Do not use more. 
      • You can use red chilli in place of green chilli while grinding.
      • Do not skip dhania and garlic as it lends a special flavor to the rasam.
      • Tamarind adds a milk tanginess to the rasam and helps to balance the bitter taste of betel leaves. But do not use more.
      • Tempering in ghee at the end makes the rasam more flavorful.

      Yummy, interesting betel leaves rasam is ready to relish with plain rice adding few drops of ghee.
      Vetrilai rasam

      Kara Seedai Recipe – Spicy Seedai Recipe With Rice Flour

      $
      0
      0

      Kara seedai / Spicy seedai recipe is one of the easy and interesting seedai varieties. Recently we bought this seedai in a shop and loved its spicy taste. For every Gokulashtami /Krishna jayanthi, we get varieties of seedai in Salem Lakshmi sweets. I have seen masala seedai, mint seedai, kara seedai, vennai seedai in the menu. I wish to try all of them and share in my blog.  To begin with, I started with this kara seedai recipe. Traditionally seedai recipe is prepared using processed rice flour/ homemade rice flour by soaking and grinding raw rice/ maavu arisi. But its a time consuming process to make a small batch. So I started using store bought idiyappam flour or kozhukattai flour to make sweet seedai and spicy seedai. I have tried Double horse, Nirapara, Anil brands so far. All are good. Even if we use store bought dry flour, we must roast it to make crunchy seedai. If you make seedai without roasting the rice flour, seedai may stick to the tongue while eating. It won’t be light and crunchy as well.Also this seedai takes more time to cook. So you have to fry it patiently. Please keep this point and try this recipe. I am sure you won’t be disappointed with the results. I have also used pottukadalai maavu instead of roasted urad dal flour/ uluthamaavu. Color of the seedai may vary based on the quantity of chilli powder. Mine was not so dark in color but it tasted spicy and flavorful just like store bought ones. Friends. do try this kara seedai recipe for this Krishna jayanthi festival and share your feedback with me. 

      Check out my other Gokulashtami recipes. and video below


      Kara seedai recipe / spicy seedai recipe


      Kara seedai recipe / spicy seedai recipe

      Kara seedai recipe / spicy seedai recipe with store bought rice flour


      Cuisine:Tamil nadu
      Category:Snacks
      Serves:100
      Prep time:10 Minutes
      Cook time:20 Minutes
      Total time:30 Minutes

      1 cup = 250ml
      • Store bought idiyappam flour / kozhukattai flour - 1/2 cup
      • Roasted gram flour / Pottukadalai maavu - 1 tbsp
      • Soft butter - 2 tsp (at room temperature)
      • Red chilli powder - 1/2 tsp
      • Hing/ asafetida - 1/4 tsp
      • Powdered coconut - 1/2 tsp (optional)
      • Cumin seeds or black sesame seeds - 1/2 tsp
      • Salt - as needed
      • Cooking oil - to deep fry
      HOW TO MAKE KARA SEEDAI RECIPE
      1. Heat a kadai and dry roast the rice flour in medium flame for few minutes.
      2. Remove the flour as soon as it starts to fume slightly.
      3. Cool down the flour, Sieve and take rice flour, roasted gram flour. Add other ingredients except cooking oil and water.
      4. Mix well to spread the butter evenly. Add water gradually and make a soft, smooth, non-sticky dough.
      5. Roll seedai and spread in a cotton cloth, rest for 5 minutes and deep fry in oil.
      6. Fry in batches by tossing them till bubbles cease. Remove and drain in a tissue.
      7. Cool down and store in a box. Enjoy for a week !
      KARA SEEDAI RECIPE - STEP BY STEP PICTURES
      • Heat a kadai and dry roast the idiyappam / kozhukattai flour for few minutes in medium flame without burning. Remove as soon as the flour starts to fume. Switch off the flame and draw a line to check it. Cool down. 

      • Sieve the rice flour and roasted gram flour to a avoid bursting( most important step).  Add chilli powder, salt, hing and powdered coconut. Add soft butter at room temperature. Mix it well to spread the butter evenly.

      • Add water gradually and make a smooth, non-sticky , soft dough. Roll seedai and spread in a cotton cloth. I got around 100 seedai. Make 2 rod shapes for baby Krishna. Let it dry for 5 minutes.
      •  
      • Heat oil to deep fry. Drop a pinch of dough. If it rises to the top immediately, oil temperature is right. Fry a batch of seedai in medium flame. Do not disturb or stir the seedai as soon as you drop them. Leave for a minute and then toss the seedai gently.

      • This seedai takes more time to cook. So cook it patiently in medium flame by tossing it in between. Remove the seedai after the bubbles cease. Do not burn them.

      • Remove in a tissue paper and drain the oil. Seedai becomes slightly darker in color as it cools down. It becomes more crunchy the next day. Store in an air tight box once the seedai cools down completely. It stays good for a week. Enjoy !

      Note

      • Adjust the quantity of red chilli powder as per your taste.
      • Do not forget to sieve the flour to avoid bursting.
      • Dry roast the rice flour for best seedai. Do not skip it.
      Try this easy, yummy, Kara seedai recipe and share your feedback with me.

      Kovakkai Masala Kuzhambu Recipe –Tindora Gravy For Rice, Roti

      $
      0
      0
      kovakkai masala kuzhambu
      Today’s Kovakkai masala kuzhambu / Tindora gravy for rice and roti is my long time pending recipe bookmarked from Nees kitchen. At last I tried it yesterday for our lunch. I made slight changes in the ingredients and prepared this gravy directly in my pressure cooker as I had less time to cook. So the job was done under 15 minutes. It was so easy to make and tasted great with nice peanut flavor. We all loved it with plain rice and ghee. You can enjoy with roti if you make the gravy slightly thick. The taste of this gravy reminds you Andhra style dondakaya masala. Ok friends, lets see how to make this easy and yummy kovakkai masala with step by step pictures.

      kovakkai kulambu


      Kovakkai masala recipe


      Kovakkai masala recipe

      Kovakkai masala recipe / Tindora gravy for rice, roti


      Cuisine:South Indian
      Category:Side dish
      Serves:Serves 4
      Prep time:10 Minutes
      Cook time:10 Minutes
      Total time:20 Minutes

      1 cup - 250ml
      • Tindora / Kovakkai - 25 nos
      • Ripe tomato - 2
      • Red chilli powder - 1/2 tsp
      • Turmeric powder - 1/4 tsp
      • Salt - as needed
      To roast and grind
      • Coriander seeds - 1 tsp
      • Sesame seeds - 2 tsp
      • Cinnamon - 1 inch
      • Cloves - 2
      • Cardamom - 1
      • Roasted peanuts - 1/3 cup ( I used with skin)
      • Grated coconut - 1 tbsp (optional)
      To temper
      • Gingely oil – 3 tbsp
      • Mustard seeds – 1/2 tsp
      • Urad dal – 1 tsp
      • Chana dal – 1 tsp
      • Cumin seeds – 1/2 tsp
      • Curry leaves – Few
      • Green chilli – 2
      • Big onion – 2
      • Ginger garlic paste – 1/2 tsp
      HOW TO MAKE KOVAKKAI MASALA
      1. Wash and slit kovakkai into . Set aside.
      2. Heat oil in a kadai and roast all the ingredients given under “to roast and grind”.
      3. Lastly add roasted peanuts and coconut. Mix well and switch off the flame.
      4. Grind the masala to a smooth paste. In a pressure cooker heat oil.
      5. Splutter mustard seeds, urad, chana dal and cumin seeds. Add green chilli.
      6. Add the onion and saute well. Add the slit kovakkai and toss for a minute.
      7. Add gg paste and saute well. Add turmeric powder and chilli powder.
      8. Saute quickly without burning the masala. Add tomato , peanut masala and cook for a minute.
      9. Lastly add 1 cup of water and pressure cook in low flame for one whistle.
      10. Open the cooker after steam is released. Garnish with coriander leaves.
      11. Serve hot with rice or roti.
      KOVAKKAI MASALA RECIPE - STEP BY STEP PICTURES
      • Wash and slit the kovakkai / Ivy gourd into 4 parts till half the way. 

      • Heat a kadai and dry roast the sesame seeds, dhania seeds, cloves, cinnamon and cardamom. Switch off the flame and add roasted peanuts, grated coconut. Grind to a smooth paste adding required water. Set aside.

      • Heat oil in a cooker base and splutter mustard seeds, urad dal , chana dal and cumin seeds. Add onion and green chilli. Saute till onion become transparent.

      • Add chopped kovakkai, saute for a minute. Add ginger garlic paste and saute for one minute. Add turmeric powder, chilli powder, salt & mix well. Do not burn any spices.

      • Now add chopped tomato. Cook till mushy. Then add the ground peanut masala. Mix and cook for a minute. Now add required water. I used 1 cup of water. Mix well and check for taste. Pressure cook in low flame for one whistle (It takes 8 to 10 minutes). Switch off the flame and let the pressure subside.

      • Open the cooker. You will see a layer of oil floating on top with a nice masala smell. Check the thickness of gravy. If its too watery, boil for a minute. If its too thick, add little water and mix well. Give one boil if needed. Garnish with coriander leaves.

      • Enjoy mixing with plain rice adding few drops of ghee ! You can also try with roti / chapathi if you like.

      Note

      • Use small size kovakkai for better looks. I used bigger ones. So my gravy was not so appealing.
      • Cinnamon and coconut are optional. Its not mentioned in the original recipe. But I used it.
      • Adjust the quantity of green chilli and chilli powder as per your taste.

      Try this easy, yummy kovakkai masala kuzhambu recipe and enjoy !
      kovakkai kuzhambu

      Orange Rasam Recipe – Orange Juice Rasam Recipe

      $
      0
      0
      orange rasam recipe
      Orange rasam recipe is one of the interesting and tasty rasam varieties. I buy Kamala orange or mosambi for Raksha as she loves both. But we all consume it as a fruit more than just drinking its juice. So I never had a chance to try recipes using orange juice. But this time, I reserved an orange to try out this rasam recipe and share in my space. I made it in a simple way just like my usual Tamilnadu style rasam. It tasted so good. I couldn’t spot any difference in taste but I could smell a nice orange flavor. We all loved it. Friend do try this easy, yummy orange juice rasam. You will love it too !
      Check out my other Rasam varieties.

      orange rasam

      Orange rasam recipe / orange juice rasam


      Orange rasam recipe / orange juice rasam

      Orange juice rasam recipe


      Cuisine:South Indian
      Category:Rasamvarieties
      Serves:Serves 3
      Prep time:10 Minutes
      Cook time:10 Minutes
      Total time:20 Minutes

      1 cup = 250ml
      • Orange - 1 OR Orange juice - 1/4 cup
      • Tamarind - Small gooseberry size
      • Ripe tomato - 1
      • Turmeric powder - 1/4 tsp
      • Sugar - 1/2 tsp
      • Salt & water - as needed
      To grind
      • Pepper - 1/2 tsp
      • Cumin seeds - 1/2 tsp
      • Coriander seeds - 1 tsp
      • Red chilli - 1
      • Methi seeds - 1/8 tsp
      • Toor dal - 1/2 tsp
      To Temper
      • Ghee - 2 tsp
      • Mustard seeds - 1/2 tsp
      • Cumin seeds - 1/2 tsp
      • Red chilli - 1(optional)
      • Coriander leaves - to garnish
      HOW TO MAKE ORANGE RASAM
      1. Take the extract from orange juice and set aside.
      2. Wash and chop tomato. Powder all the ingredients given under “To powder”.
      3. In a bowl, take 1 cup of water, chopped tomato, tamarind juice, turmeric and salt.
      4. Let it boil for few minutes.
      5. In a kadai, temper mustard, cumin, chilli. 
      6. Add the ground rasam powder in the ghee. Saute well for a minute and add to boiling rasam.
      7. Add 1/4 cup of water and boil the rasam in low flame till its frothy. Switch off the flame.
      8. Add orange juice after the rasam turns warm. Garnish with coriander leaves.
      9. Serve with plain rice adding few drops of ghee.

        ORANGE RASAM RECIPE - STEP BY STEP PICTURES

        • Grind all the ingredients given under “ to grind” to a coarse powder. Set aside. Alternately you can dry roast the ingredients and then powder it.

        • Slice orange into two and extract the juice from it. Keep it aside.
        • orange rasam recipe
        • In a bowl, take the chopped tomato, 1/4 cup tamarind extract, 1 cup water, salt, sugar and turmeric powder. Boil for few minutes. 
          • orange rasam recipe
        • In a small kadai, heat ghee. Temper mustard seeds, cumin seeds. Once it splutter, add rasam powder. Saute quickly in medium flame & add to boiling rasam.

        • Add 1/4 cup more water , lower the flame & boil till frothy. Switch off the flame.  Let the rasam turns warm. Filter the orange juice & add to the rasam. Garnish with coriander leaves.
        • orange rasam recipe
        • Close with a lid & rest for sometime for the orange flavor to infuse. Serve with plain rice adding few drops of ghee. Enjoy !

        Note

        • You can add lemon juice instead of tamarind extract but you should add at the end. Do not boil after adding it.
        • You can dry roast all the ingredients and then powder it instead of grinding it raw.
        • You can add orange zest ( orange skin gratings) if you like. But I din't add it.
        • Adjust the quantity of red chilli based on the tanginess of orange juice. 

        Yummy orange rasam is ready to serve with rice!
        kamala orange rasam

        How To Cook Kerala Matta Rice In Pressure Cooker

        $
        0
        0
        how to cook kerala matta rice
        Kerala matta rice also known as rosematta rice, vadi matta rice, palakadan matta rice, red rice, Kerala red rice, Kerala parboiled rice (Malayalam: കേരള മട്ട)is a healthy grain that is grown in Kerala and Karnataka regions. It is mainly consumed by people all over Kerala, Srilanka and coastal areas of Karnataka like Mangalore. As we all know, Kerala matta rice is a magnesium rich grain with immense health benefits. This rice can be cooked in a pressure cooker, microwave, electric rice cooker and in an open pot without cooker. One cup of Matta rice contains 84 grams of magnesium, one gram of calcium, one gram of fiber with 160 calories. It also contains vitamins. Though this red rice is different from brown rice, it has equal health benefits. Just like the usual polished white rice, this red rice can be used to make idli, dosa, appam, murukku and snacks. It can be consumed mixing with kuzhambu, sambar, rasam and non-veg curries. More than all these recipes, matta rice porridge is a most popular and healthy baby food. Apart from this, Kerala matta rice is good for people having Type 2 diabetes, heart diseases and osteoporosis. It makes you feel full for long time. Rice gruel is given to babies. Every year during Onam festival, I used to make Sadya at home for our lunch. I cook Kerala Matta rice easily in a pressure cooker. Washing the rice & soaking for minimum one hour is essential for cooking this rice perfectly. Ok friends, lets see how to cook Kerala red rice with step by step pictures.

        Check out all my Kerala Recipes

        how to cook kerala matta rice in cooker

        How to cook Kerala Matta Rice in a pressure cooker


        How to cook Kerala Matta Rice in a pressure cooker

        How to cook Kerala Matta Rice in a pressure cooker / How to cook red rice in a cooker


        Cuisine:Kerala
        Category:How to
        Serves:Serves 4
        Prep time:120 Minutes
        Cook time:30 Minutes
        Total time:150 Minutes

        1 cup - 250ml
        • Kerala matta rice / Kerala red rice - 1/2 cup
        • Water - 2.5 cups
        HOW TO COOK KERALA MATTA RICE
        1. Wash the matta rice thrice in water.
        2. Soak in enough water for 2 to 4 hours or overnight.
        3. Color of the rice turns pale white after soaking.
        4. Drain the water and take the rice in a pressure cooker.
        5. Add 2.5 to 3 cups of water. Keep the flame high till vapor comes off through nozzle.
        6. Put the weight valve and lower the flame completely.
        7. Cook for 5 whistles in low flame. Switch off the flame.
        8. Open the cooker after the steam is released.
        9. Strain the excess water through a colander.
        10. Fluff the rice and serve. You can drink the rice cooked water (gruel).
        11. Serve the hot rice with sambar, theeyal or any non-veg curry.
        KERALA MATTA RICE - STEP BY STEP PICTURES
        • Wash the Kerala matta rice/ red rice twice or thrice till the water color changes from red to pale white. Soak in enough water for minimum one hour to maximum over night.
        • how to cook kerala matta rice in cooker
        • Color of the rice changes to pale white after soaking. Drain the excess soaked water and take the rice in a pressure cooker.

        • Add 2.5 cups of water (Rice : water = 1: 5). Mix well and close the cooker. Keep the flame high till vapor starts to come off through the nozzle.
          • how to cook kerala matta rice in cooker
        • Put the weight valve and lower the flame completely. Cook in low flame for 5 whistles. It takes 15 to 20 minutes.

        • Switch off the flame. Open the cooker after steam is released. Take a vessel and place a colander / sieve over it. Strain the cooked water. Its known as rice gruel.
        • how to cook kerala matta rice in cooker
        • You can drink it adding a pinch of salt. Its very healthy. Take the cooked rice and press it with your fingers. If it becomes mushy, rice is cooked well. Remove the rice from colander and transfer to a bowl. Serve hot with sambar, theeyal, rasam etc. Enjoy ! how to cook kerala matta rice in cooker

        Note

        • Wash the rice thrice to remove the starch.
        • Color of rice changes to pale white after soaking for few hours
        • Soaking is mandatory. Minimum one hour is necessary.
        Enjoy this flavorful, healthy Kerala matta rice for your lunch & stay fit !
        how to cook kerala rice


        Pink Palada Payasam Recipe In Pressure Cooker

        $
        0
        0
        pink palada payasam
         Palada Payasam is one of the traditional payasam recipes of Kerala. It is prepared for Onam and Vishu festivals. Authentic palada payasam is prepared by boiling and simmering the milk, sugar, ada for hours together. Sugar caramelizes and milk turns pale pink (rose) in color naturally. But nowadays people follow this short cut and easy method to achieve this pink color in palada payasam. Every year during Onam, I try to make a new recipe as Onam special. This year I tried pink colored palada payasam for a change. I used small sized store bought ada (Double horse brand). It helped to cook quickly. As usual I did in a cooker. In a pressure cooker, we need to boil milk, sugar and ada.  In the mean time, a portion of sugar is caramelized in another pan and added to the cooker. Cook everything for 20 minutes in low flame. Ada will be well cooked and color of the milk turns to pale rose in color. It tastes great with a mild caramel flavor. You will love it for sure. Do try it friends. Lets see how to make pink colored palada payasam recipe with step by step pictures.
        pink palada payasam recipe

        Pink Palada Payasam Recipe


        Pink Palada Payasam Recipe

        Pink colored Palada Payasam Recipe with store bought ada in a pressure cooker


        Cuisine:Kerala
        Category:Sweet
        Serves:Serves 3
        Prep time:30 Minutes
        Cook time:20 Minutes
        Total time:50 Minutes

        1 cup = 250ml
        • Store bought ada - 1/4 cup
        • Milk - 1/2 liter
        • Sugar - 1/3 cup
        • Sugar - 2 tbsp (to caramelize)
        • Water - 1 tbsp (to caramelize sugar)
        • Roasted cashew nuts - 5 (optional, roast in 2 tsp ghee)
        HOW TO MAKE PINK PALADA PAYASAM
        1. Wash the ada and soak in hot water for 30 minutes.
        2. Wash the soaked ada in cold water and set aside.
        3. In a pressure cooker, take milk and sugar. Let it start to roll boil.
        4. Keep boiling the milk in low to medium flame.
        5. In the mean time, add sugar and water to caramelize it. Mix well till sugar turns golden brown in color. Do not burn it.
        6. Add to the boiling milk in pressure cooker. Add soaked ada. Put a small plate or spoon.
        7. Mix well and cover cook in low flame for 4 whistles.
        8. Open the cooker after steam is released. You will see a pale pink colored , flavorful palada payasam. You can add cardamom powder & ghee roasted cashew nuts if you like.
        PINK PALADA PAYASAM RECIPE - STEP BY STEP PICTURES
        • Wash the ada and soak in hot water for 30 minutes. Wash the ada in cold water and strain it completely.
        • pink palada payasam recipe
        • In a pressure cooker base add 1/2 liter milk, 1/3 cup sugar and mix well. Boil in medium flame.
        • pink palada payasam recipe
        • Take 2 tbsp sugar and 2 tsp water in a kadai. Mix well in low to medium flame till sugar dissolves. Keep mixing till sugar turns golden brown in color. Do not burn it. Keep the flame low to medium and do it patiently.
        • pink palada payasam recipe
        • Add the caramelized sugar to the boiling milk. Mix well and add soaked ada. Add a small plate or a teaspoon to the cooker. This helps to avoid spilling of milk from the cooker nozzle.
        • pink palada payasam recipe
        • Pressure cook in low flame for 4 whistles. It takes nearly 20 minutes. Switch off the flame. Open the cooker after the steam is released. You will see a nice, rose / pale pink colored payasam. Remove the spoon. Mix well and check the consistency. If its too thin, boil for some more time to become thick. If the payasam is thick, add some boiled milk.  Adding roasted cashew nuts is optional. I don’t add usually. Cardamom powder is not needed.
        • pink palada payasam recipe
        • Mix well & serve hot. Enjoy !

        Note

        • Adjust the quantity of sugar based on your taste.
        • Adding roasted cashew nuts is optional.
        Enjoy this yummy, pink colored palada payasam at home for this Onam festival !
        rose palada payasam in pressure cooker

        Pori Upma – Puffed Rice Upma Recipe

        $
        0
        0
        pori upma recipe
        Pori upma/ puffed rice upma was in my try list for long time. I usually make kara pori and bhel puri at home. Recently my friend was telling me about this easy pori upma for breakfast. Last time when I went to Salem, I got a bag of puffed rice. As I wanted to empty the pack soon, I tried this pori upma for our breakfast yesterday. The best thing about this upma is it can be made in jiffy because the cooking time is very less. It tastes super soft like aval upma and flavorful too. For 2 persons, you need to use 5 cups of puffed rice. It shrinks as soon as we wash and add to upma. So this upma is the best way to finish off the leftover, excess puffed rice. If you have leftover puffed rice at home after the festivals like Ayudha poojai / Saraswathi pooja, you can try this upma. This recipe is ideal for bachelors and working women to whip up a quick breakfast or dinner. Ok, Lets see how to make this easy, yummy and quick pori upma recipe for instant breakfast.

        Check out my other Bachelors recipes.

        puffed rice upma

        Pori upma recipe / puffed rice upma


        Pori upma recipe  / puffed rice upma

        Pori upma recipe / puffed rice upma for instant breakfast, snack and dinner


        Cuisine:South Indian
        Category:Breakfast
        Serves:Serves 2
        Prep time:10 Minutes
        Cook time:20 Minutes
        Total time:30 Minutes

        1 cup = 250ml
        • Puffed rice / Arisi Pori / Mandakki - 5 cups
        • Big onion - 1 (finely chopped)
        • Turmeric powder - 1/4 tsp
        • Green chilli - 1 (slit into two)
        • Sambar powder or red chilli powder – 1 /2 tsp
        • Coriander leaves - to garnish
        • Lemon juice - few drops
        • Salt - as needed
        • Water - to wash the puffed rice
        To Temper
        • Coconut oil or cooking oil - 1 tbsp
        • Mustard seeds - 1/2 tsp
        • Urad dal - 1 tsp
        • Chana dal - 1 tsp
        • Asafetida/ hing - 1/8 tsp
        • Red chilli – 1(cut into two)
        • Roasted peanuts – 2 tbsp
        HOW TO MAKE PORI UPMA
        1. Heat oil in a kadai. Temper mustard, urad, chana dal , roasted peanuts and curry leaves.
        2. Saute onion, green chilli till transparent.
        3. Add turmeric powder, sambar powder and salt.
        4. Saute for a minute in low flame.
        5. Wash the puffed rice and squeeze gently.
        6. Now add the squeezed puffed rice.
        7. Mix gently and cook till its heated. Switch off the flame.
        8. Add lemon juice and mix gently. Serve hot !
        PORI UPMA RECIPE - STEP BY STEP PICTURES
        • Heat oil in a kadai. Splutter mustard seeds, urad dal, chana dal, roasted peanuts and curry leaves.

        • Add finely chopped onion, green chilli , red chilli. Saute till onion becomes transparent.
          • puffed rice upma
        • Add turmeric powder, red chilli powder or sambar powder, salt. Saute for a minute in low flame without burning. Take puffed rice. Add water to cover it. Squeeze gently and add to the kadai.
        • puffed rice upma
        • Toss gently to coat the masala. Cook till puffed rice is heated and reduced in quantity. Switch off the flame. Add lemon juice and garnish with coriander leaves.
        • puffed rice upma
        • Enjoy hot for best taste.

        Note

        • Puffed rice reduces in quantity after cooking. So you need to use minimum 2 cups for 1 person.
        • For variations, you can skip sambar powder / red chilli powder and use slit green chillies.
        • Do not add the pori without washing and squeezing the water. Puffed rice become chewy.
        • For healthy options, you can saute finely chopped carrot, beans, potato and frozen peas till cooked and then add puffed rice.

        Try this interesting pori upma with excess puffed rice at home. You will love it.
        puffed rice upma


        Karnataka Idli Recipe – Soft Idli With Idli Rava

        $
        0
        0
        Karnataka idli recipe
        Karnataka style idli rava idli (also known as rice rava idli) became my favorite when I tasted this idli with sambar in my School moms group friends Megha’s house. As a big fan of idli recipes, I love to eat only pillow soft, spongy idli. But Idli rava idli has a grainy texture. It will crumble if you dip in sambar which I didn’t like it in early days. So I used to make idli rava idli by grinding idli rava / rice rava along with urad dal to a smooth batter. I made a detailed blog post too. Please check this link. We can make super soft idli and crispy dosa with that batter. But the authentic and traditional Karnataka style idli recipe that is prepared in home and hotels is very easy to make and tastes different. This batter can be prepared using a mixie. Here people use Idli rava and urad dal in the ratio of 3:1. All we have to do is to soak idli rava and urad dal separately for 1 to 3 hours. Grind urad dal to a smooth batter and mix the soaked idli rava. Make the batter and ferment it. Batter doubles beautifully the next day. Just mix well, add salt, baking soda (optional) and make idli. Idli comes out super soft and white in color. The only disadvantage in this recipe is you can only make idli with this batter. Dosa cannot be prepared with idli rava as the batter is very coarse. It will come out hard. Friends, do try this easy and yummy Karnataka hotel style idli recipe with step by step pictures and video. Soon I will post Karnataka hotel idli sambar.

        Check out my Bangalore style watery coconut chutney recipe too !


        Idli with idli rava


        Idli using idli rava


        Karnataka idli recipe - Idli rava idli recipe


        Karnataka idli recipe - Idli rava idli recipe

        How to make soft idli rava idli recipe in Karnataka hotel style


        Cuisine:Karnataka
        Category:Breakfast
        Serves:40
        Prep time:10 Minutes
        Cook time:20 Minutes
        Total time:30 Minutes

        1 cup = 250ml
        • Idli rava / Idli sooji - 3 cups
        • Urad dal - 1 cup(I used white, round urad dal)
        • Water - to soak & grind
        • Salt - as needed
        • Cooking soda / baking soda - a pinch
        HOW TO MAKE KARNATAKA IDLI RECIPE
        1. Wash and soak idli rava in enough water for 1 to 3 hours.
        2. Wash & soak urad dal in 3 cups of water for 1 to 3 hours.
        3. In a mixie jar, grind urad dal to a smooth batter adding the soaked water.
        4. Take the batter in a big vessel. Drain the excess water in soaked idli rava.
        5. Squeeze it gently and add the idli rava to urad dal batter.
        6. Mix both well. Ferment overnight. Batter will double in quantity.
        7. Add salt, baking soda and mix well.
        8. Steam water in idli pot. Pour idli batter in greased idli plate.
        9. Steam it for 10 minutes till its cooked.
        10. Remove the idli plate and rest for 2 minutes.
        11. Scoop the idli and enjoy with sambar or chutney.
        HOW TO MAKE IDLI WITH IDLI RAVA - STEP BY STEP PICTURES
        • In a bowl, wash and soak idli rava / rice rava in enough water for 1 to 3 hours. In another bowl, wash and soak urad dal in 3 cups of drinking water for 1 to 3 hours.
        • Karnataka idli with idli rava
        • Take the urad dal in a big mixie jar. Add the soaked water and grind to a smooth paste. Batter should be thick, smooth, not too thin and watery. So adjust the quantity of soaked water accordingly.

        • Transfer the batter to a bigger sized vessel. Now take the soaked idli rava. Drain the excess water carefully by sliding the vessel. Squeeze the idli rava gently and add to urad dal batter. Do not squeeze hard to remove all the water content. There should be some water while mixing with urad dal batter.
        • Karnataka idli with idli rava
        • Squeeze and mix all the idli rava to the urad dal batter. Mix well with your hands to aid fermentation. Consistency of batter should be like regular idli dosa batter.

        • Do not add salt now. Salt curbs fermentation process. So we are going to add the next morning after fermentation. Close the batter container and set aside for fermentation. Keep it overnight or minimum 12 hours based on the weather.
        • Karnataka idli with idli rava
        • The next morning batter would have doubled in quantity, sometimes overflowing too. Add required salt and a pinch of baking soda (optional). Mix well with a ladle.
        • Heat water in an idli pot. Take an idli plate and grease with sesame oil. Pour the batter in each mould. Steam it for 10 to 12 minutes till idli is cooked well. Dip your finger in water and make a hole in the idli. If your finger comes out non-sticky, idli is cooked else cook for more time. Karnataka idli with idli rava
        • Switch off the flame. Remove the idli plate. Rest for 2 minutes. Then remove the idli using a flat, big spoon. Enjoy with hot sambar or watery chutney !

        Note

        • Urad dal should be soaked a minimum of 1 hour. Its ok if you soak for 3 to 4 hours too.
        • This idli crumbles if you try to dip in sambar. So its better to serve as shown in the picture below. You should use a spoon to eat this idli.
        • You cannot make dosa with this batter.
        • Make sure idli batter consistency is not thick. It should be pourable like usual batter.
        • You can refrigerate this batter and use up to one week.
        Enjoy this easy Karnataka style idli rava idli with sambar or watery chutney !
        Karnataka idli with idli rava

        Eggless Wheat Flour Pancake Mix Recipe – Homemade Pancake Mix Without Eggs

        $
        0
        0
        Eggless pancake mix
        Eggless wheat flour pancake is one of our favorite weekend breakfast recipes. We love to have it with chocolate syrup and honey. I have heard my sister and friends in abroad telling me about store bought pancake mix. I got tempted to try eggless homemade pancake mix and prepared it. It came out so well, soft and fluffy. Raksha and Sendhil loved it. Usually all purpose flour / Maida is used in store bought pancake mix. But I am happy that I tried it with some healthy alternative, whole wheat flour instead of Maida. I used Choco chips in my pancake batter. You can add blueberries, mashed banana for healthy variations. Friends, do try this easy pancake mix at home and make the pancakes instantly.

        Eggless pancake mix with wheat flour


        Eggless, homemade pancake mix recipe


        Eggless, homemade pancake mix recipe

        Eggless, homemade pancake mix recipe with whole wheat flour / atta.


        Cuisine:International
        Category:Breakfast
        Serves:3 cups
        Prep time:10 Minutes
        Cook time:5 Minutes
        Total time:15 Minutes

        For homemade pancake mix ( 1 cup = 250ml)
        • Wheat flour/Atta - 3 cups ( I used Aashirvaad brand)
        • Baking powder - 3 tsp / 1 tbsp ( use fresh powders for best result)
        • Cinnamon powder - 1.5 tsp
        • Salt - a big pinch
        • Sugar – 3 tsp/ 1 tbsp
        To make pancake
        • Pancake mix - 1 cup
        • Water - 2 tbsp.
        • Milk - 1 cup ( boiled, at room temp)
        • Cooking oil - 1 tbsp ( use odorless oil, I used refined oil)
        • Melted Butter - 2 tbsp
        • Vanilla essence - 1 tsp
        • Choco chips – 1 tbsp
        • Wheat flour – 1/2 tsp ( mix with Choco chips to avoid sinking)
        HOW TO MAKE EGGLESS PANCAKE MIX
        1. In a wide bowl mix the flour, baking powder, cinnamon, salt and sugar.
        2. Store in a box. Homemade pancake mix is ready.
        3. To make eggless pancakes, take 1 cup of pancake mix in a bowl.
        4. Add milk, water, butter,vanilla essence and cooking oil.
        5. Mix without lumps. To this batter, add 1 tbsp of choco chips mixed with wheat flour. Heat a tawa and grease with butter.
        6. Pour a small ladleful of pancake batter. It should be thick and round.
        7. Cook in medium flame. Flip and cook the other side too.
        8. Remove and serve with honey / maple syrup.
        HOW TO MAKE PANCAKE MIX AND EGGLESS PANCAKE AT HOME - STEP BY STEP PICTURES
        • To make homemade pancake mix, take wheat flour, baking powder, cinnamon powder, salt and sugar. Mix well. Store in an air tight box. Homemade pancake mix is ready.
        • Eggless pancake mix
        • To make eggless pancakes with the mix, take 1 cup of pancake mix in a bowl. Add the mentioned quantity of melted butter, vegetable oil, vanilla essence, boiled milk at room temperature and water. 
        • Eggless pancake mix
        • Mix well to make lumps free batter. In a small bowl, take choco chips and add 1/2 tsp wheat flour. Mix well and add to pancake batter. This step helps to avoid choco chips sinking in the batter.  Batter should be thick but flowing.
        • Eggless pancake mix Eggless pancake mix
        • Heat a pan / tawa. Grease with butter. Pour a small ladleful of batter. Do not spread it. Make it thick and small.

        • Cook in medium flame till it bubbles on top. Flip the other side and cook till golden.
        • Eggless pancake mix
        • Remove in a plate. Make the other pancakes and stack them.  Drizzle chocolate syrup or honey or maple syrup. Enjoy ! Enjoy !

        Note

        • This pancake mix stays good for a month.
        • Consistency of the batter should be thick, smooth but flowing.
        • Cook the pancake in low to medium flame patiently.

        Try this homemade, eggless pancake mix and enjoy !
        Eggless pancake mix recipe

        Sundal Varieties For Navratri – Navarathri Sundal Recipes

        $
        0
        0
        sundal varieties for navratri

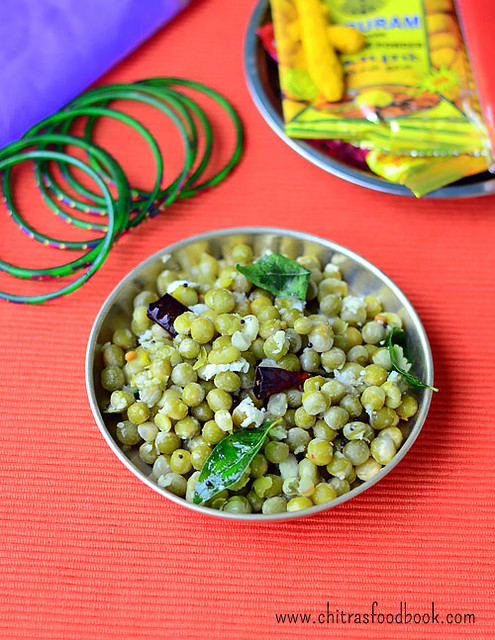
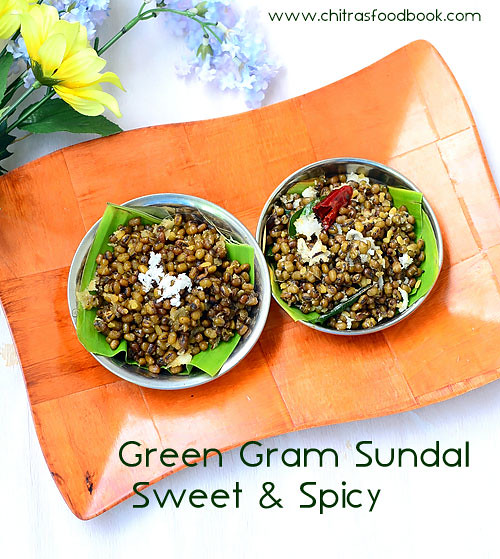
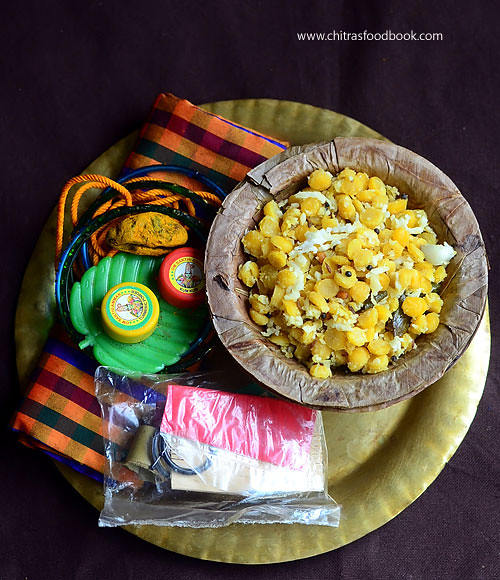
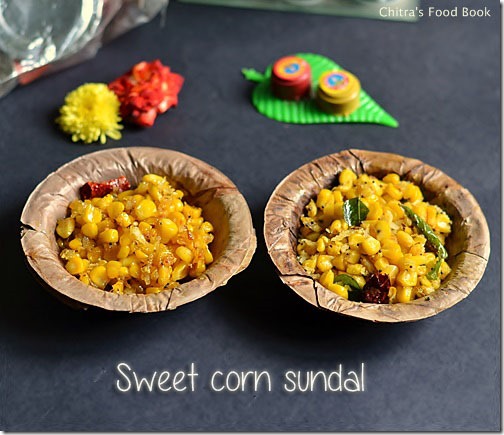
        In South India, Sundal is the most important and must prepare prasadam recipes during Navaratri. 9 varieties of sundal is prepared during this nine days (Nava means 9 , ratri is night) festival in Tamil nadu. Apart from tradition, there are some scientific reasons to consume legumes / navadhaniyam during Navratri days. Though we can make varieties of sweets and snacks, sundal recipes are mainly prepared and distributed as prasad to friends and relatives who visit our house Golu. The most common sundal varieties are chana /chickpeas/  kondakadalai sundal using white and brown ones, peas/ pattani sundal, green gram dal / pachai payaru sundal, Cowpeas / karamani sundal, Field beans/ mochai sundal, Kidney beans / rajma sundal, moong dal/ paasi paruppu sundal, and 9 mixed legumes / navadhaniyam sundal.  The basic preparation of sundal recipes is very simple. For this, legumes are soaked overnight, pressure cooked, tempered with spices and finally garnished with grated coconut. Some sundal recipes like chana dal sundal, sweet corn, green gram, cowpeas, moong dal sundal recipes can be prepared instantly without soaking. But all sundal recipes should be prepared without onion and garlic as we are offering to God. But nowadays people make variations by adding garam masala, sundal powder etc. So far I have shared more than 15 different types of sundal recipes in my blog. Lets see all under one page in this post.


        CLICK FOR NAVARATRI RECIPES COLLECTION

        CLICK THIS LINKON HOW TO KEEP GOLU AT HOME.


        Kondakadalai Masala Sundal Recipe – Black Chana Sundal Recipe

        $
        0
        0
        I learnt this kondakadalai masala sundal recipe from my neighbor. Last year during Ganesh Chaturthi I got this black chana sundal from her as prasadam. It was so flavorful and tasted yummy. Raksha loved it a lot. I asked the recipe from her and started making it regularly at home for Raksha’s sake. Generally, for offering God we need to make no onion no garlic sundal during Navaratri. For every occasion, I make a portion of sundal without onion garlic, reserve it for pooja and make the remaining sundal by adding masala. For making this masala sundal, we are using onion and kurma powder / garam masala powder which enhances the taste and flavor. We can make this sundal using white kabuli chana / chickpeas or black ones based on our wish. Both tastes great. Friends, do try this masala sundal by reserving some soaked legumes. You will love it. Lets see how to make karuppu kondakadalai sundal / black chana sundal adding masala with step by step pictures.

        Check out my other Sundal recipes too.


        Black chana sundal recipe / Kondakadalai Masala sundal


        Black chana sundal recipe / Kondakadalai sundal

        Black chana sundal / Karuppu kondakadalai sundal with masala flavor


        Cuisine:South Indian
        Category:Sundal recipes
        Serves:Serves 4
        Prep time:10 Minutes
        Cook time:20 Minutes
        Total time:30 Minutes

        1 cup = 250ml
        • Brown chana/ chickpeas - 1 cup
        • Big onion - 1 (finely chopped)
        • Garam masala powder / Kurma powder - 1/2 to 1 tsp
        • Green chilli – 1(slit into 2)
        • Salt - as needed
        • Grated coconut - 1/4 cup
        • Coriander leaves - to garnish
        To Temper
        • Cooking oil - 1 tbsp
        • Mustard seeds - 1/2 tsp
        • Urad dal - 1 tsp
        • Cumin seeds - 1/4 tsp
        • Asafetida / Hing - 1/8 tsp
        • Curry leaves - Few
        HOW TO MAKE BLACK CHANA SUNDAL
        1. Wash and soak brown/ black chana in required water over night or 8 hours.
        2. Drain the soaked water and pressure cook in low flame for one whistle.
        3. In a kadai, heat oil. Splutter mustard seeds, urad dal, cumin seeds , hing and curry leaves.
        4. When it splutters, add onion and green chilli. Saute till transparent.
        5. Add garam masala powder, salt Mix well. for a minute in low flame.
        6. Add cooked chana, mix well. Cook for minute.
        7. Lastly add grated coconut. Switch off the flame.
        8. Garnish with coriander leaves.
        CHANA SUNDAL RECIPE - STEP BY STEP PICTURES
        • Wash and soak chana / chickpeas in a bowl adding enough water. Soak it for 12 hours or overnight for best result. The next day, drain the water and add the soaked chana in a pressure cooker.

        • Add enough water to cover the chana. Pressure cook it for 2 to 3 whistles in low flame. Remove after the steam is released completely. Press to check it soft and well cooked. Drain the excess water if any and set aside.

        • Heat oil in a kadai. Splutter mustard seeds, urad dal, cumin seeds. Add hing, curry leaves. Saute finely chopped onion and a  slit green chilli.

        • Lower the flame completely and add the garam masala powder in oil. Saute quickly. Add the cooked chana, required salt and mix well. If necessary, add little water too.
        • Let it boil in low flame for few minutes. Lastly add grated coconut, mix well and switch off the flame. Garnish with coriander leaves. If you wish, you can add some lemon juice too. Serve warm or hot ! Enjoy.  

        Note

        • You can use white or brown chana.
        • White tastes the best but we use brown chana for festivals.
        • To make the chana soft, you can add a pinch of baking soda while soaking in the water. Drain the soaked water completely, wash it twice and then pressure cook.
        • For variations, you can add chilli powder in oil instead of green chilli.

        Friends, do try this masala chana sundal for a variation and enjoy !


        Pavakkai Chips / Crispy Bitter gourd Chips – Karela Chips Recipe

        $
        0
        0
        Bitter gourd chips

         I learnt this crispy bitter gourd chips recipe from my MIL. During my recent visit to Salem, my MIL gave me some fresh , home grown bitter gourd (Pavakkai in Tamil, Karela in Hindi, Kākarakāya in Telugu, Hagalakayi in Kannada, Pāvaykka in Malayalam). She also suggested me to try this crispy pavakkai chips for Sendhil and Raksha. Usually pavakkai chips is made using besan flour, rice flour or Maida and corn flour. But I used wheat flour and rice flour as suggested by my MIL. It came out super crispy and tasty. We all loved it. It tastes less bitter as we are slicing the bitter gourd thinly and deep frying it. Also it stayed crispy for more than an hour. It is prepared without curd, maida or besan flour. If you want to avoid deep frying, you can bake them in an oven but taste varies. Friends, do try this crispy pavakkai chips and enjoy with sambar rice or as teatime snack !

        Check out my white colored potato chips recipe, Raw banana chips and French friestoo !
        pavakkai chips

        Pavakkai chips / Bitter gourd chips recipe


        Pavakkai chips / Bittergourd chips recipe

        Pavakkai chips recipe / Crispy bittergourd chips recipe


        Cuisine:Indian
        Category:Snacks recipes
        Serves:Serves 3
        Prep time:10 Minutes
        Cook time:20 Minutes
        Total time:30 Minutes


        • Bitter gourd - 2
        • Wheat flour / Atta - 3 to 4 tbsp
        • Rice flour - 3 tbsp
        • Ginger garlic paste - 1 tsp
        • Red chilli powder - 1 tsp
        • Coriander seeds powder / Dhania powder - 1 tsp
        • Garam masala powder - 1/2 tsp
        • Fennel seeds powder - 1/2 tsp
        • Salt - as needed
        • Water - to sprinkle
        • Cooking oil - to deep fry
        HOW TO MAKE BITTERGOURD CHIPS
        1. Wash and slice bitter gourd thinly and take in a bowl.
        2. In that bowl mix wheat flour, half of rice flour, gg paste, spice powders, salt along with bitter gourd.
        3. Mix without water. Then sprinkle water slightly, coat the flour and bitter gourd.
        4. Rest for 10 minutes. Then add remaining rice flour, give a good mix. Set aside.
        5. Heat oil to deep fry. Drop each pieces separately and fry in medium flame till golden in color.
        6. Flip and cook the other side till crispy. Remove and drain in a tissue paper.
        7. Serve hot with sambar rice or as teatime snack.
        BITTER GOURD CHIPS RECIPE - STEP BY STEP PICTURES
        • Wash and chop bitter gourd very thinly. Slicing thinly helps to remove bitter taste.
        • bitter gourd chips
        • In a bowl, take the sliced bitter gourd. Add wheat flour and half of the rice flour, salt, red chilli powder, dhania powder, garam masala powder, fennel powder, ginger garlic paste. Mix well.
        • bitter gourd chips
        • Sprinkle little water to coat the bitter gourd and powders. Rest for 10 minutes. Lastly add the remaining half of rice flour. Mix well and its ready to deep fry.
        • bitter gourd chips
        • Heat oil to deep fry. Drop a pinch of bitter gourd and check if it rises to the top immediately. Now sprinkle the bitter gourd pieces one by one in oil. Do not clutter them. Cook in batches of 10 to 15 nos. based on the quantity of oil in the kadai.  
        • bitter gourd chips
        • Cook in medium to high flame till it becomes golden in color on one side. Keep tossing in oil. Flip and cook the other side till there are few bubbles in oil. Cook till crispy and golden in color. It takes more time to cook. Do not wait for all the bubbles to cease completely. Chips may burn. Rmove at the right stage. Check for crispy taste. Add more wheat flour or rice flour if necessary. Mix and make chips. 

        • Remove the chips in a tissue paper and serve hot for crispy taste. You can serve with sambar / rasam rice or as tea time snack. This bitter gourd chips stays crispy for an hour if fried properly.

        • Enjoy !

        Note

        • You can use besan flour instead of wheat flour but taste varies.
        • Deep fry the bitter gourd pieces by tossing it whenever needed and by adjusting the flame. It takes slightly more time to cook than other chips recipes.
        • You can fry in high flame too but keep tossing and stay nearby else  it will burn.
        • Color of this chips will be on the dark golden brown shade as we are using wheat flour.
        • Adjust the quantity of wheat flour and rice flour as per the size of bitter gourd.

        Try this crispy pavakkai chips and enjoy !

        Viewing all 967 articles
        Browse latest View live